fogartyjohn
commanospace
Yeah that's coming up fast hope it comes in for ya. I'm so tired of waiting for mine. It's going straight in my car tomorrow night when it gets here

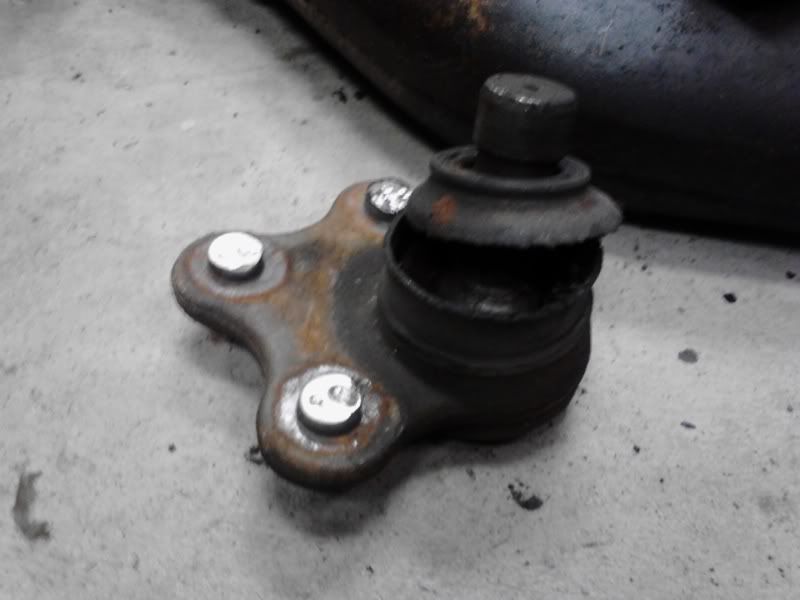
-$110 for 2 ball joints
I have a stage 2 clutchnet disc with a LUK pressure plate. Have about 25xxx miles or so. Not even LUK TOB either. Something from Carquest. You can't slip it too much otherwise it'll heat up too quickly and won't grab hard if you're getting on it. Unless it's just in my head? lol
Your call, but Advance Auto has whole Dorman lower A-arms w/ball joints at $59 each + tax. I've used these and they're perfectly fine.
Your call, but Advance Auto has whole Dorman lower A-arms w/ball joints at $59 each + tax. I've used these and they're perfectly fine.
I think you'll be fine with the Clutchnet disc and LUK/OEM cover and pressure plate. You might want to mic up the new lining thickness on both discs, they should be close, I'd be worried about more than 0.030" difference, especially of the Clutchnet disc is thicker, as it may not release.
I used to build my own Taurus SHO clutches, and built them for several years for the SHO community as they went through much the same thing we're seeing now with CSVT clutches: Poor quality and short lifetimes, spline hubs ripping out, poorly built stuff from China, etc.
I'd love to know what Clutchnet does to make their yellow, red, and green pressure plate assemblies different from each other. Moving pressure plate pivots around to increase clamp load looks easy, but the trade-off is less tolerance for lining wear - the clutch starts life at high clamp load with a full thickness lining, but the load decreases rapidly as the lining wears and thins.
I realize that Advance Auto (we don't have one around here) has the complete control arm/bj for cheap. Those are the EXACT same arms I have in my car now that only have 26,000 miles on them. The ball joints are junk already. Matter of fact, only after about 10,000 miles the BJ boots were destroyed/dry rotted/cracked apart - that's why I have to replace the BJs now and I don't want to do it again or pay for it again. The MOOG BJs are lifetime replacement warranty and the store is local.
The control arm bushings are still ok though. Nice and tight, no fore/aft or l/r movement or cracking in the rubber inserts.
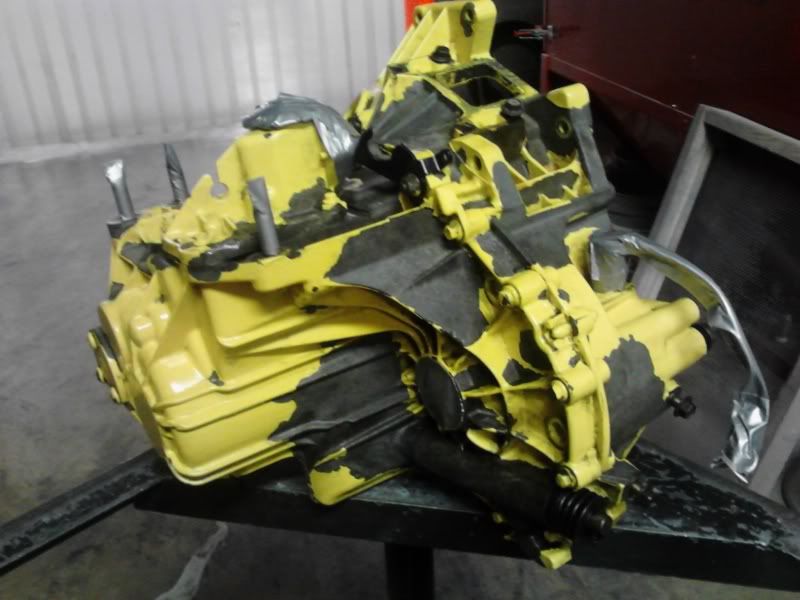
Some more progress today. Got the transmission into work to chip away all the loose yellow paint on the case. Wiped the grease/oil off it and got everything masked off to start blasting it back to bare metal. The yellow was fun, but didn't last at all. The self-etching primer just let go and the rest was history.

")
Hahahahah, could be paying $500/month car payment for a new car. So $500 per year is not so bad buddy!
Good luck with everything bud.
^ good to know.
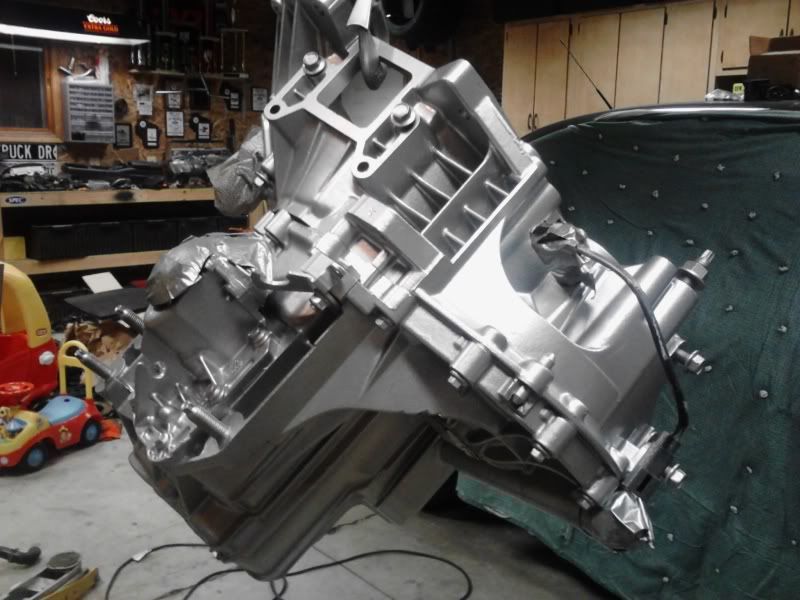
I'm going to leave it raw now that I will have plenty of hours into blasting it..... :nonono:
Clutchnet said they are shipping it tomorrow and I should have it in 3-4 days. Damn, won't get here for the weekend.
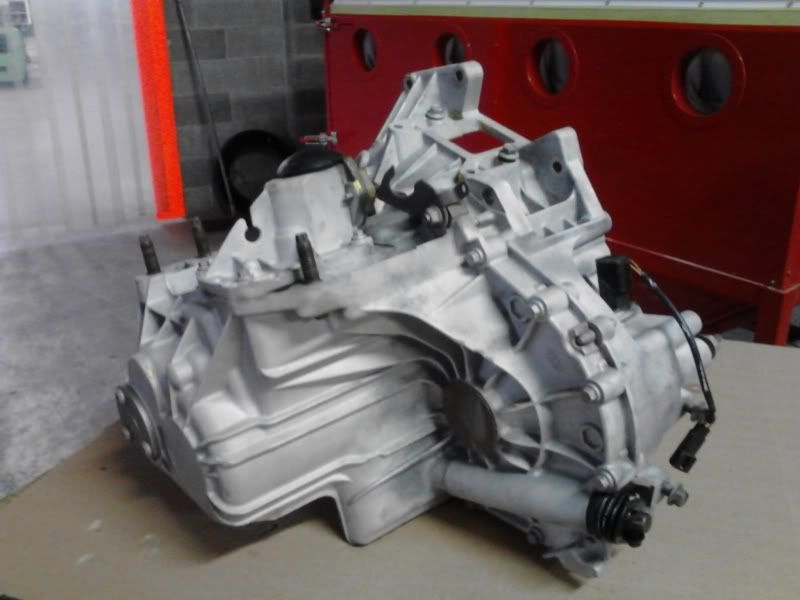


Silver looks much better than the yellow.