
-
Welcome to the Contour Enthusiasts Group, the best resource for the Ford Contour and Mercury Mystique.
You can register to join the community.
You are using an out of date browser. It may not display this or other websites correctly.
You should upgrade or use an alternative browser.
You should upgrade or use an alternative browser.
#49's new powerplant has arrived, let the build begin
- Thread starter CSVT#49
- Start date

CSVT#49
Addicted CEG'er
You're probably going to have problems with that drain. Almost certainly. If thats what it is
You realize this is not for the drain right...
It's for the Accusump when crap hits the fan and there is no oil pressure. The Accusump will inject pressurized oil to the main bearings, which is why I chose that port, which goes directly to the main bearing oil galley.
EDIT: This is the post where I discussed my drain... Link
Last edited:
Pole120
Addicted CEG'er
You're probably going to have problems with that drain. Almost certainly. If thats what it is
It's not drain. It's for the accusump system. Needs to be plumed to the pressurized portion of the oil system. If he put a drain line where that fitting is right now he would blow oil out of it.
You realize this is not for the drain right...
It's for the Accusump when crap hits the fan and there is no oil pressure.
Nope, and I do remember you're running an accusump now but its been so long I forgot. Hose seemd too small which is why I said something. I see that one all the time figured I would check.
CSVT#49
Addicted CEG'er
Nope, and I do remember you're running an accusump now but its been so long I forgot. Hose seemd too small which is why I said something. I see that one all the time figured I would check.
Well the hose is definitely not too small
") I'm running -10AN for both the turbo return line and the Accusump inlet/outlet line, which is what is recommended for both. Thanks for checking though! I always like to double/triple check things as I'd hate to mess something up with this much time and effort invested.
I'm running -10AN for both the turbo return line and the Accusump inlet/outlet line, which is what is recommended for both. Thanks for checking though! I always like to double/triple check things as I'd hate to mess something up with this much time and effort invested.KAOS_3.0
Hard-core CEG'er
Well the hose is definitely not too small
This is why your an awesome guy Mike, because you're not a dick when people question you and/or try to give suggestions...
CSVT#49
Addicted CEG'er
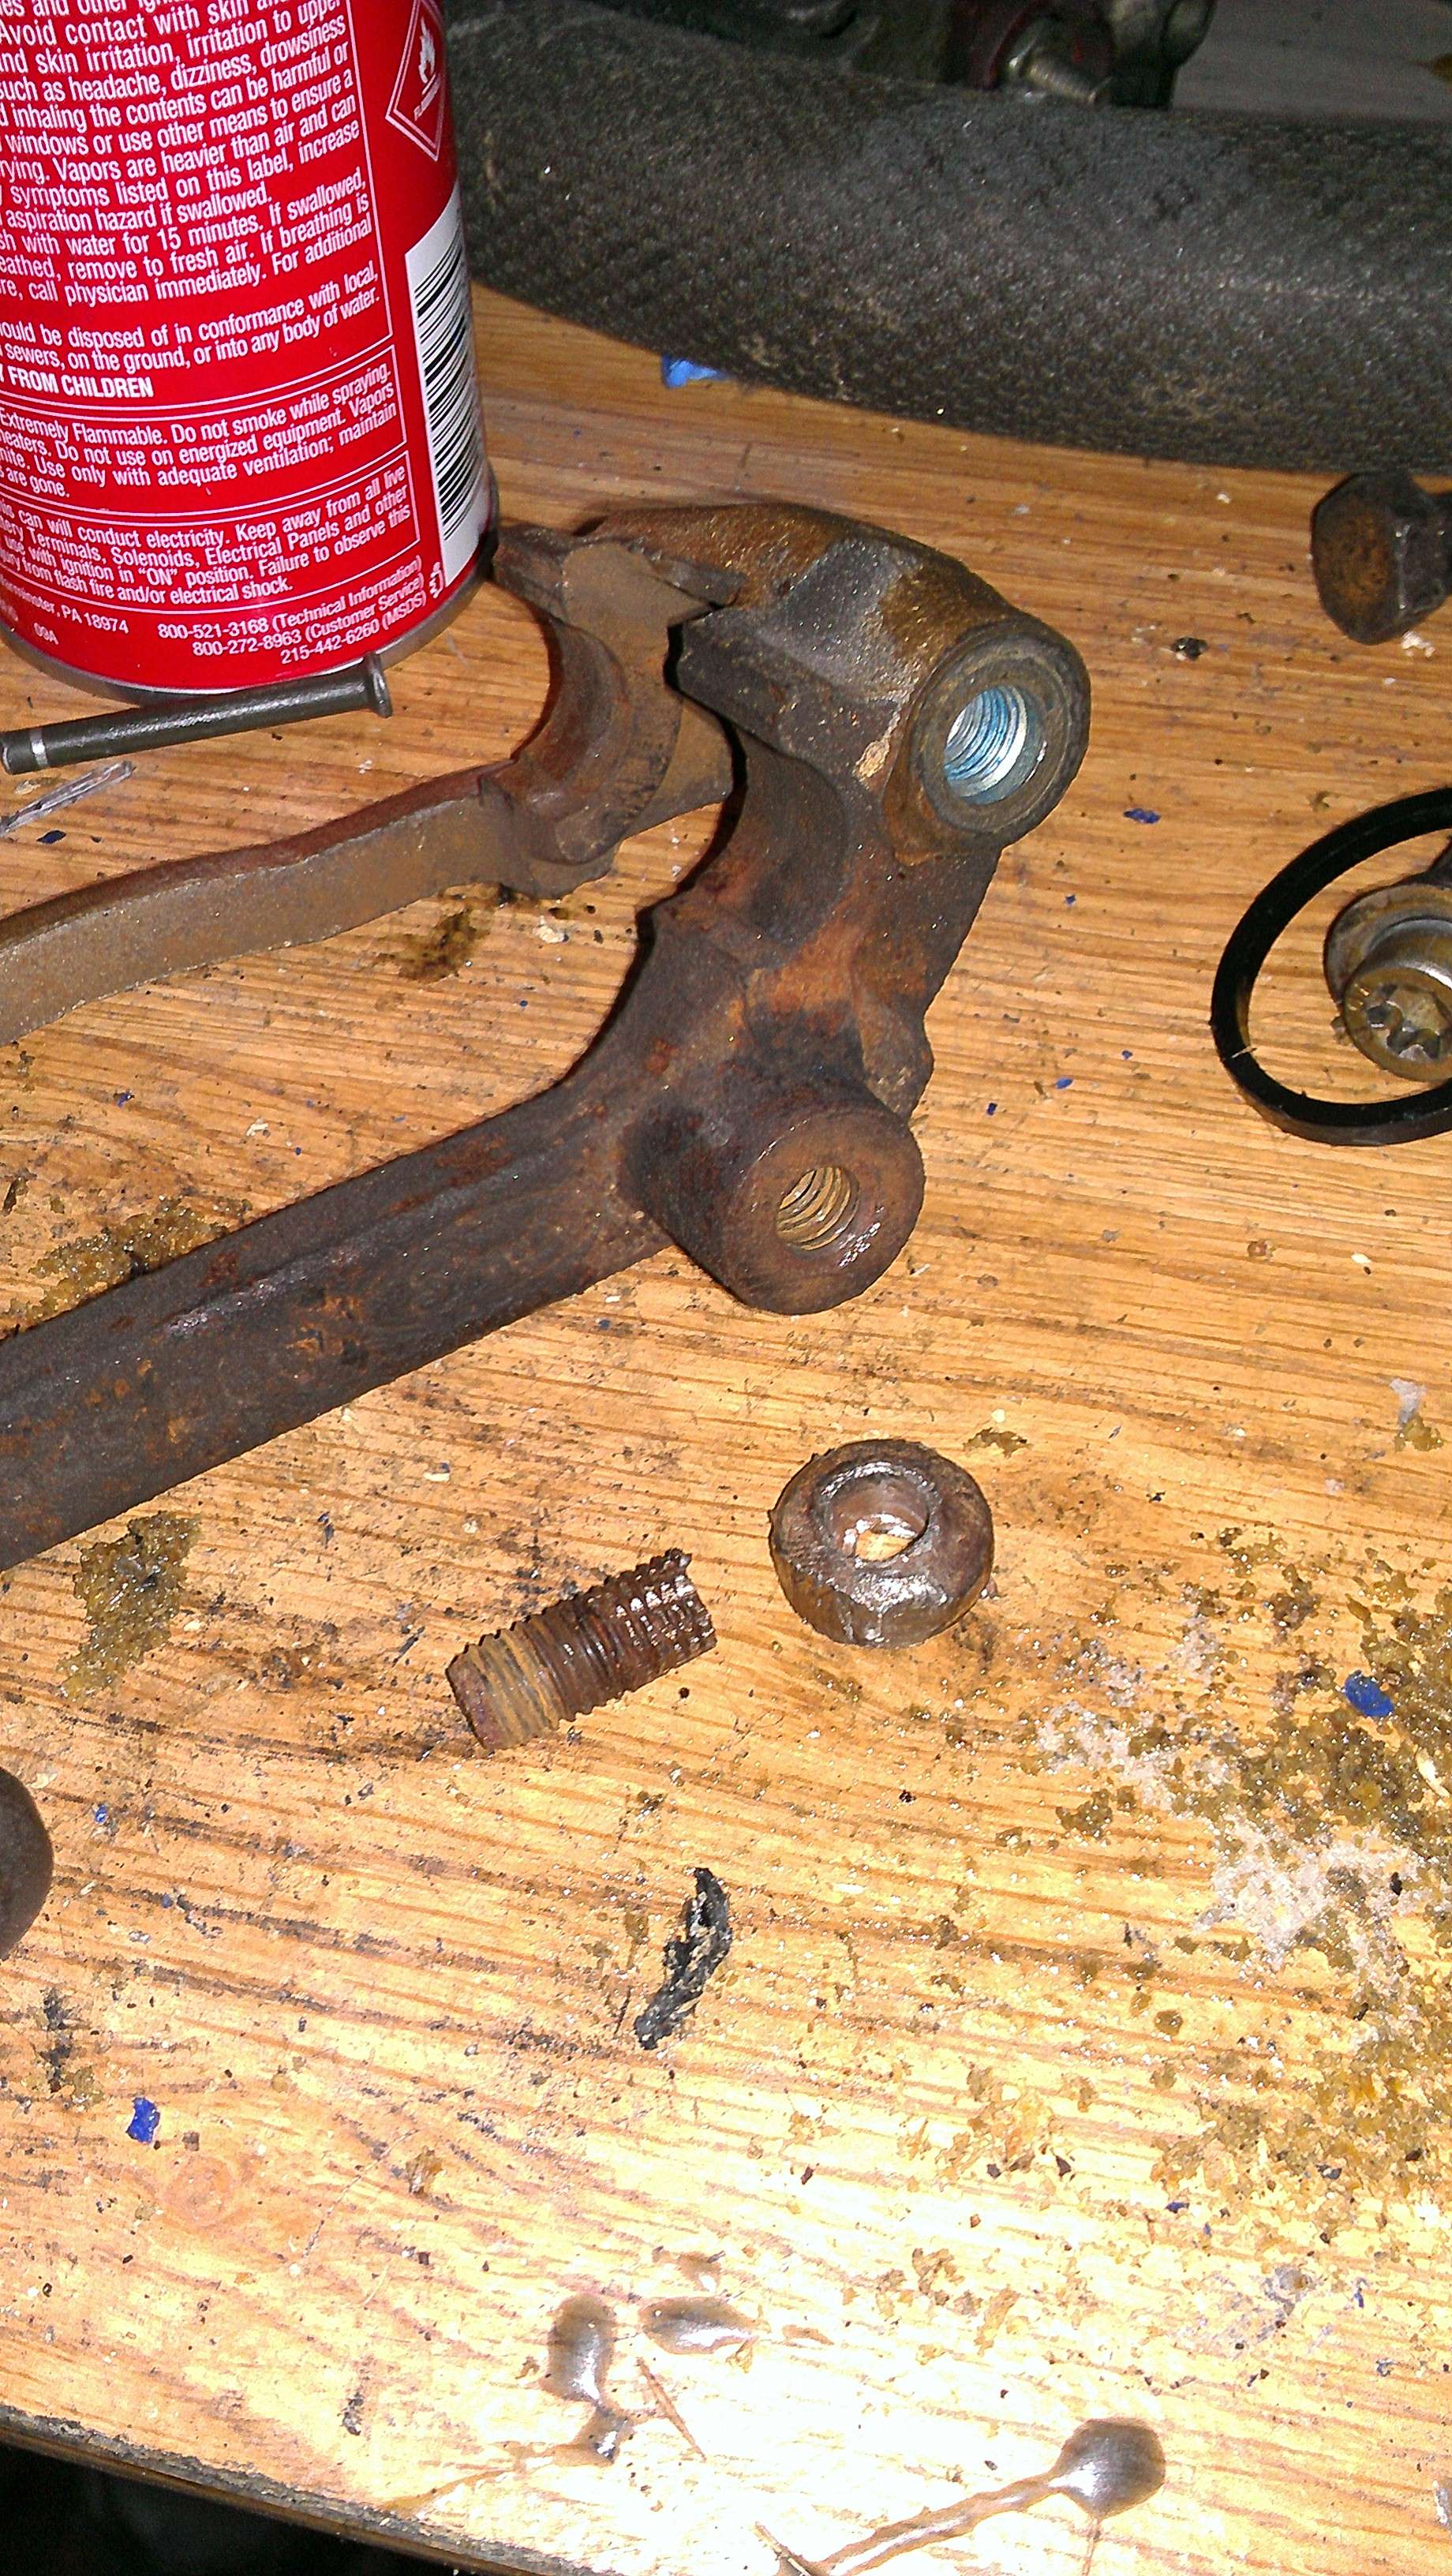
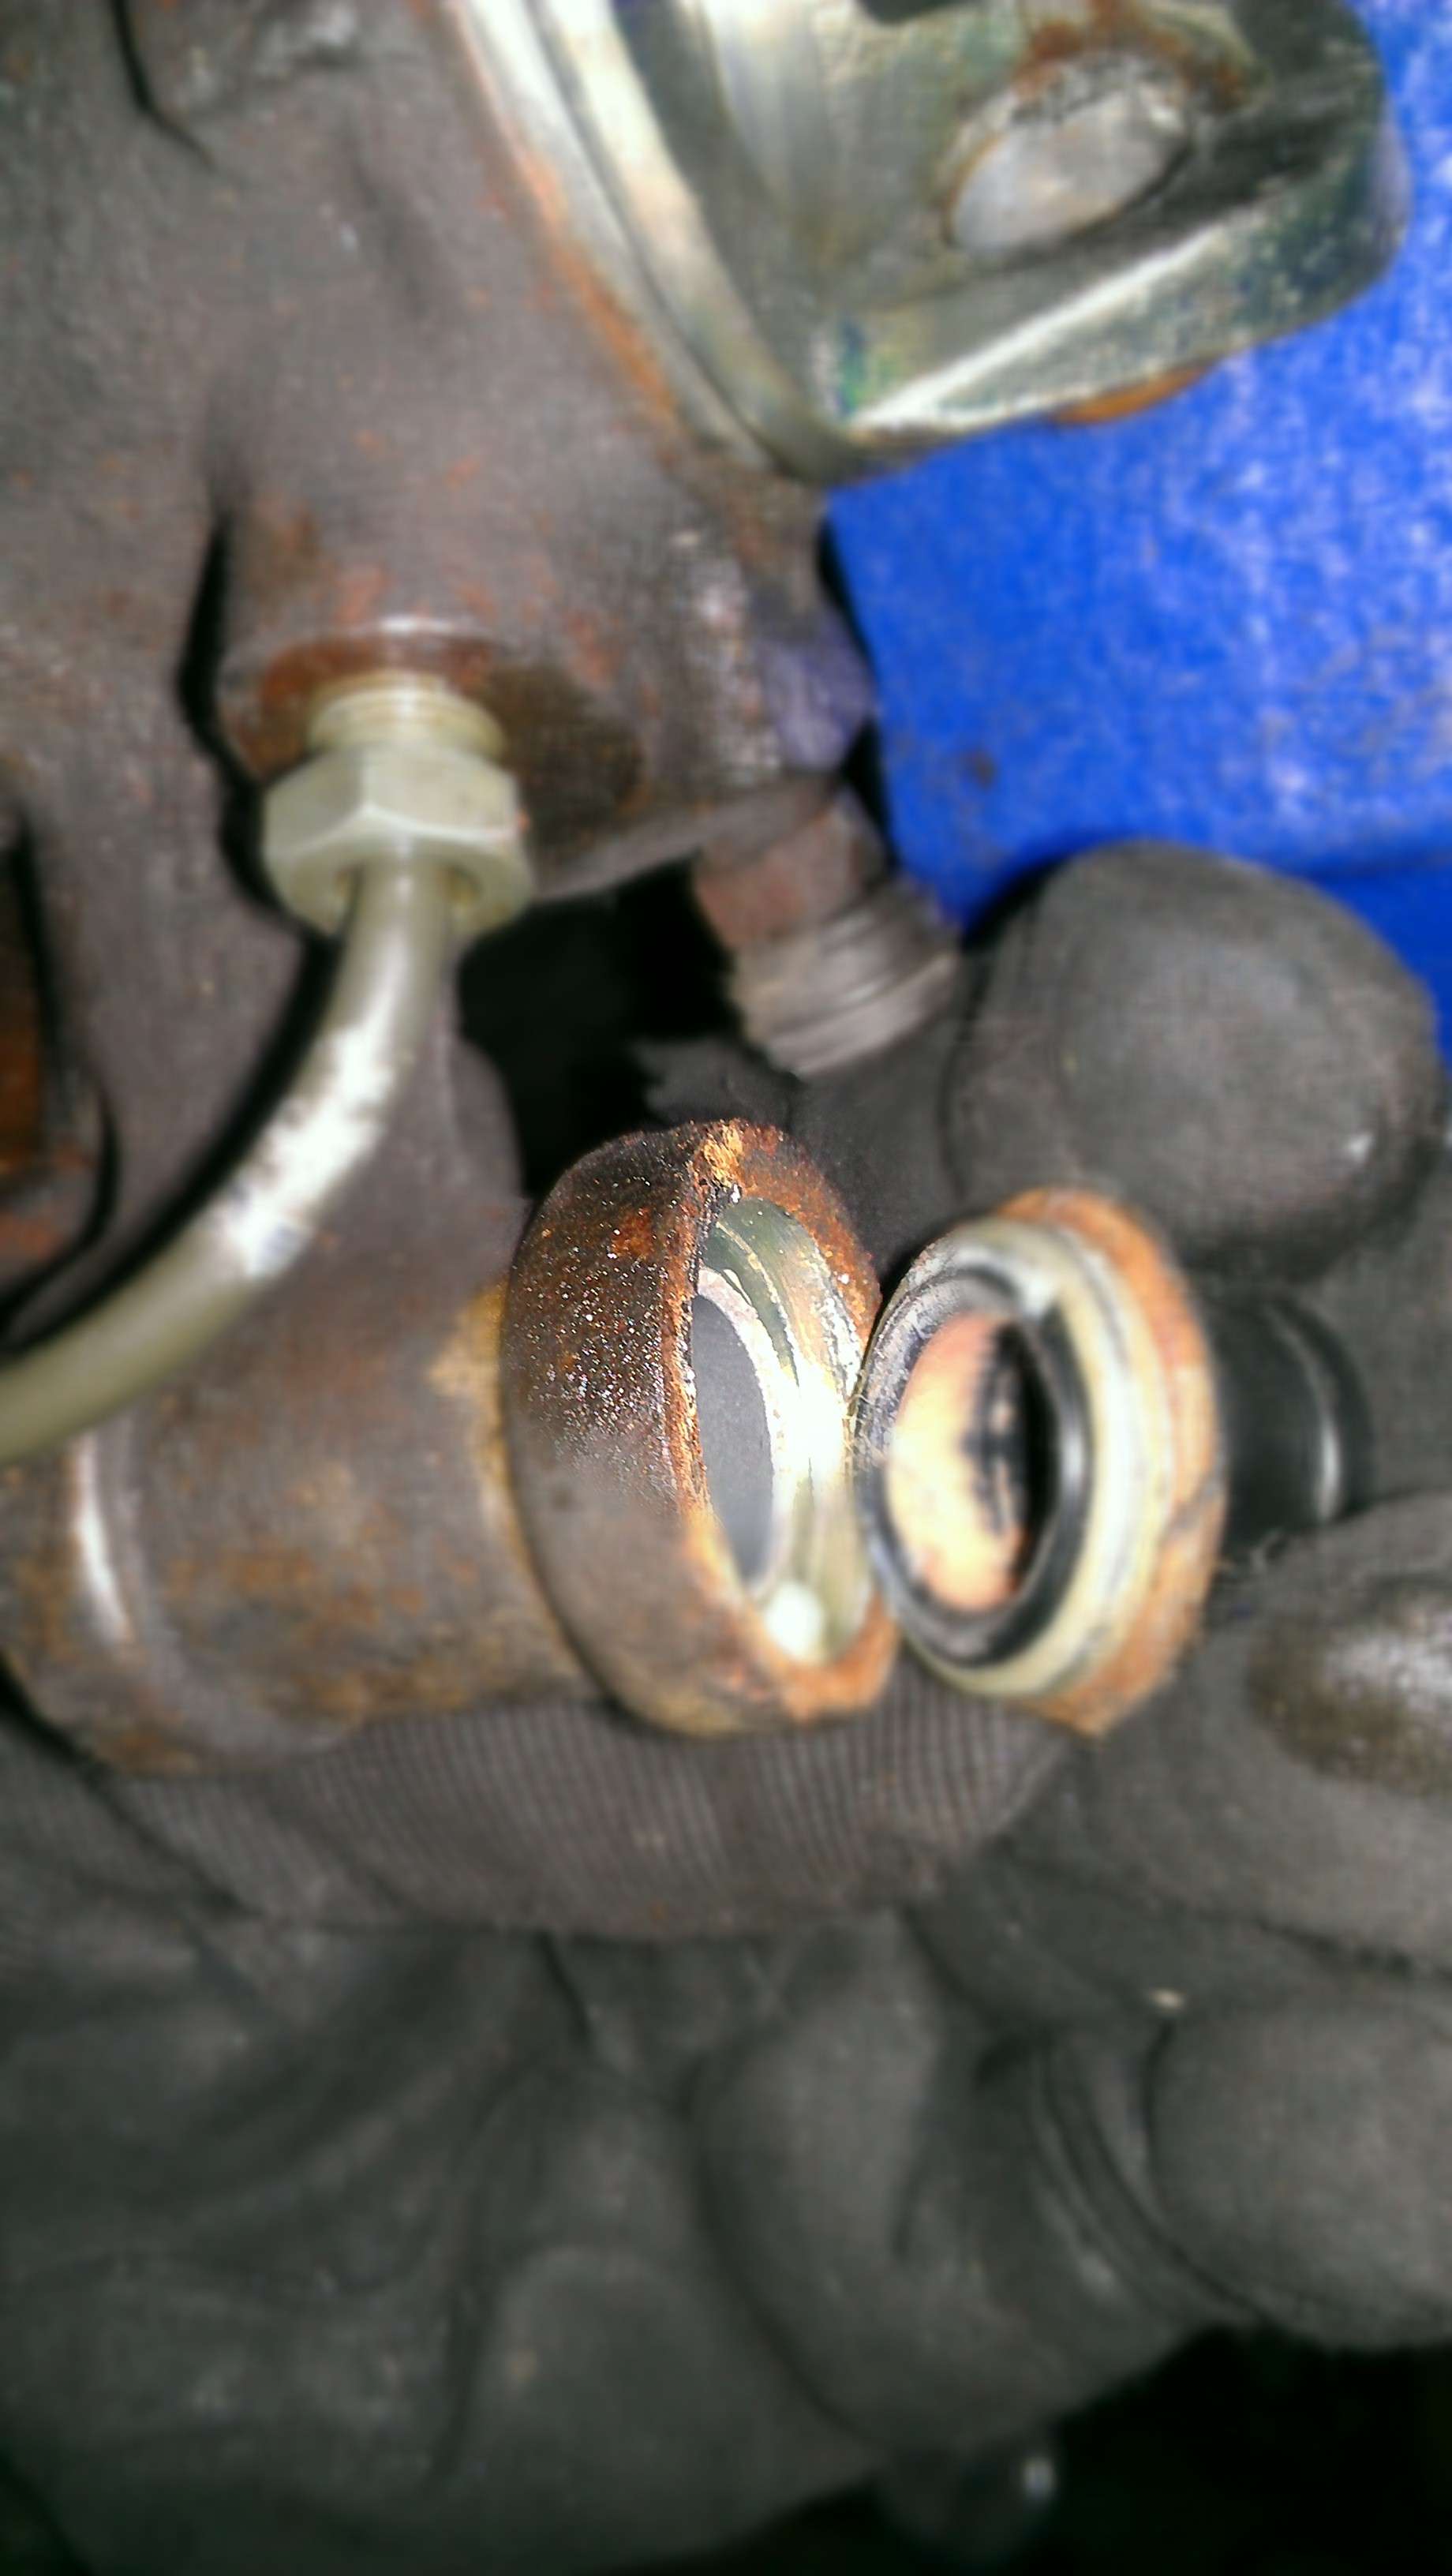
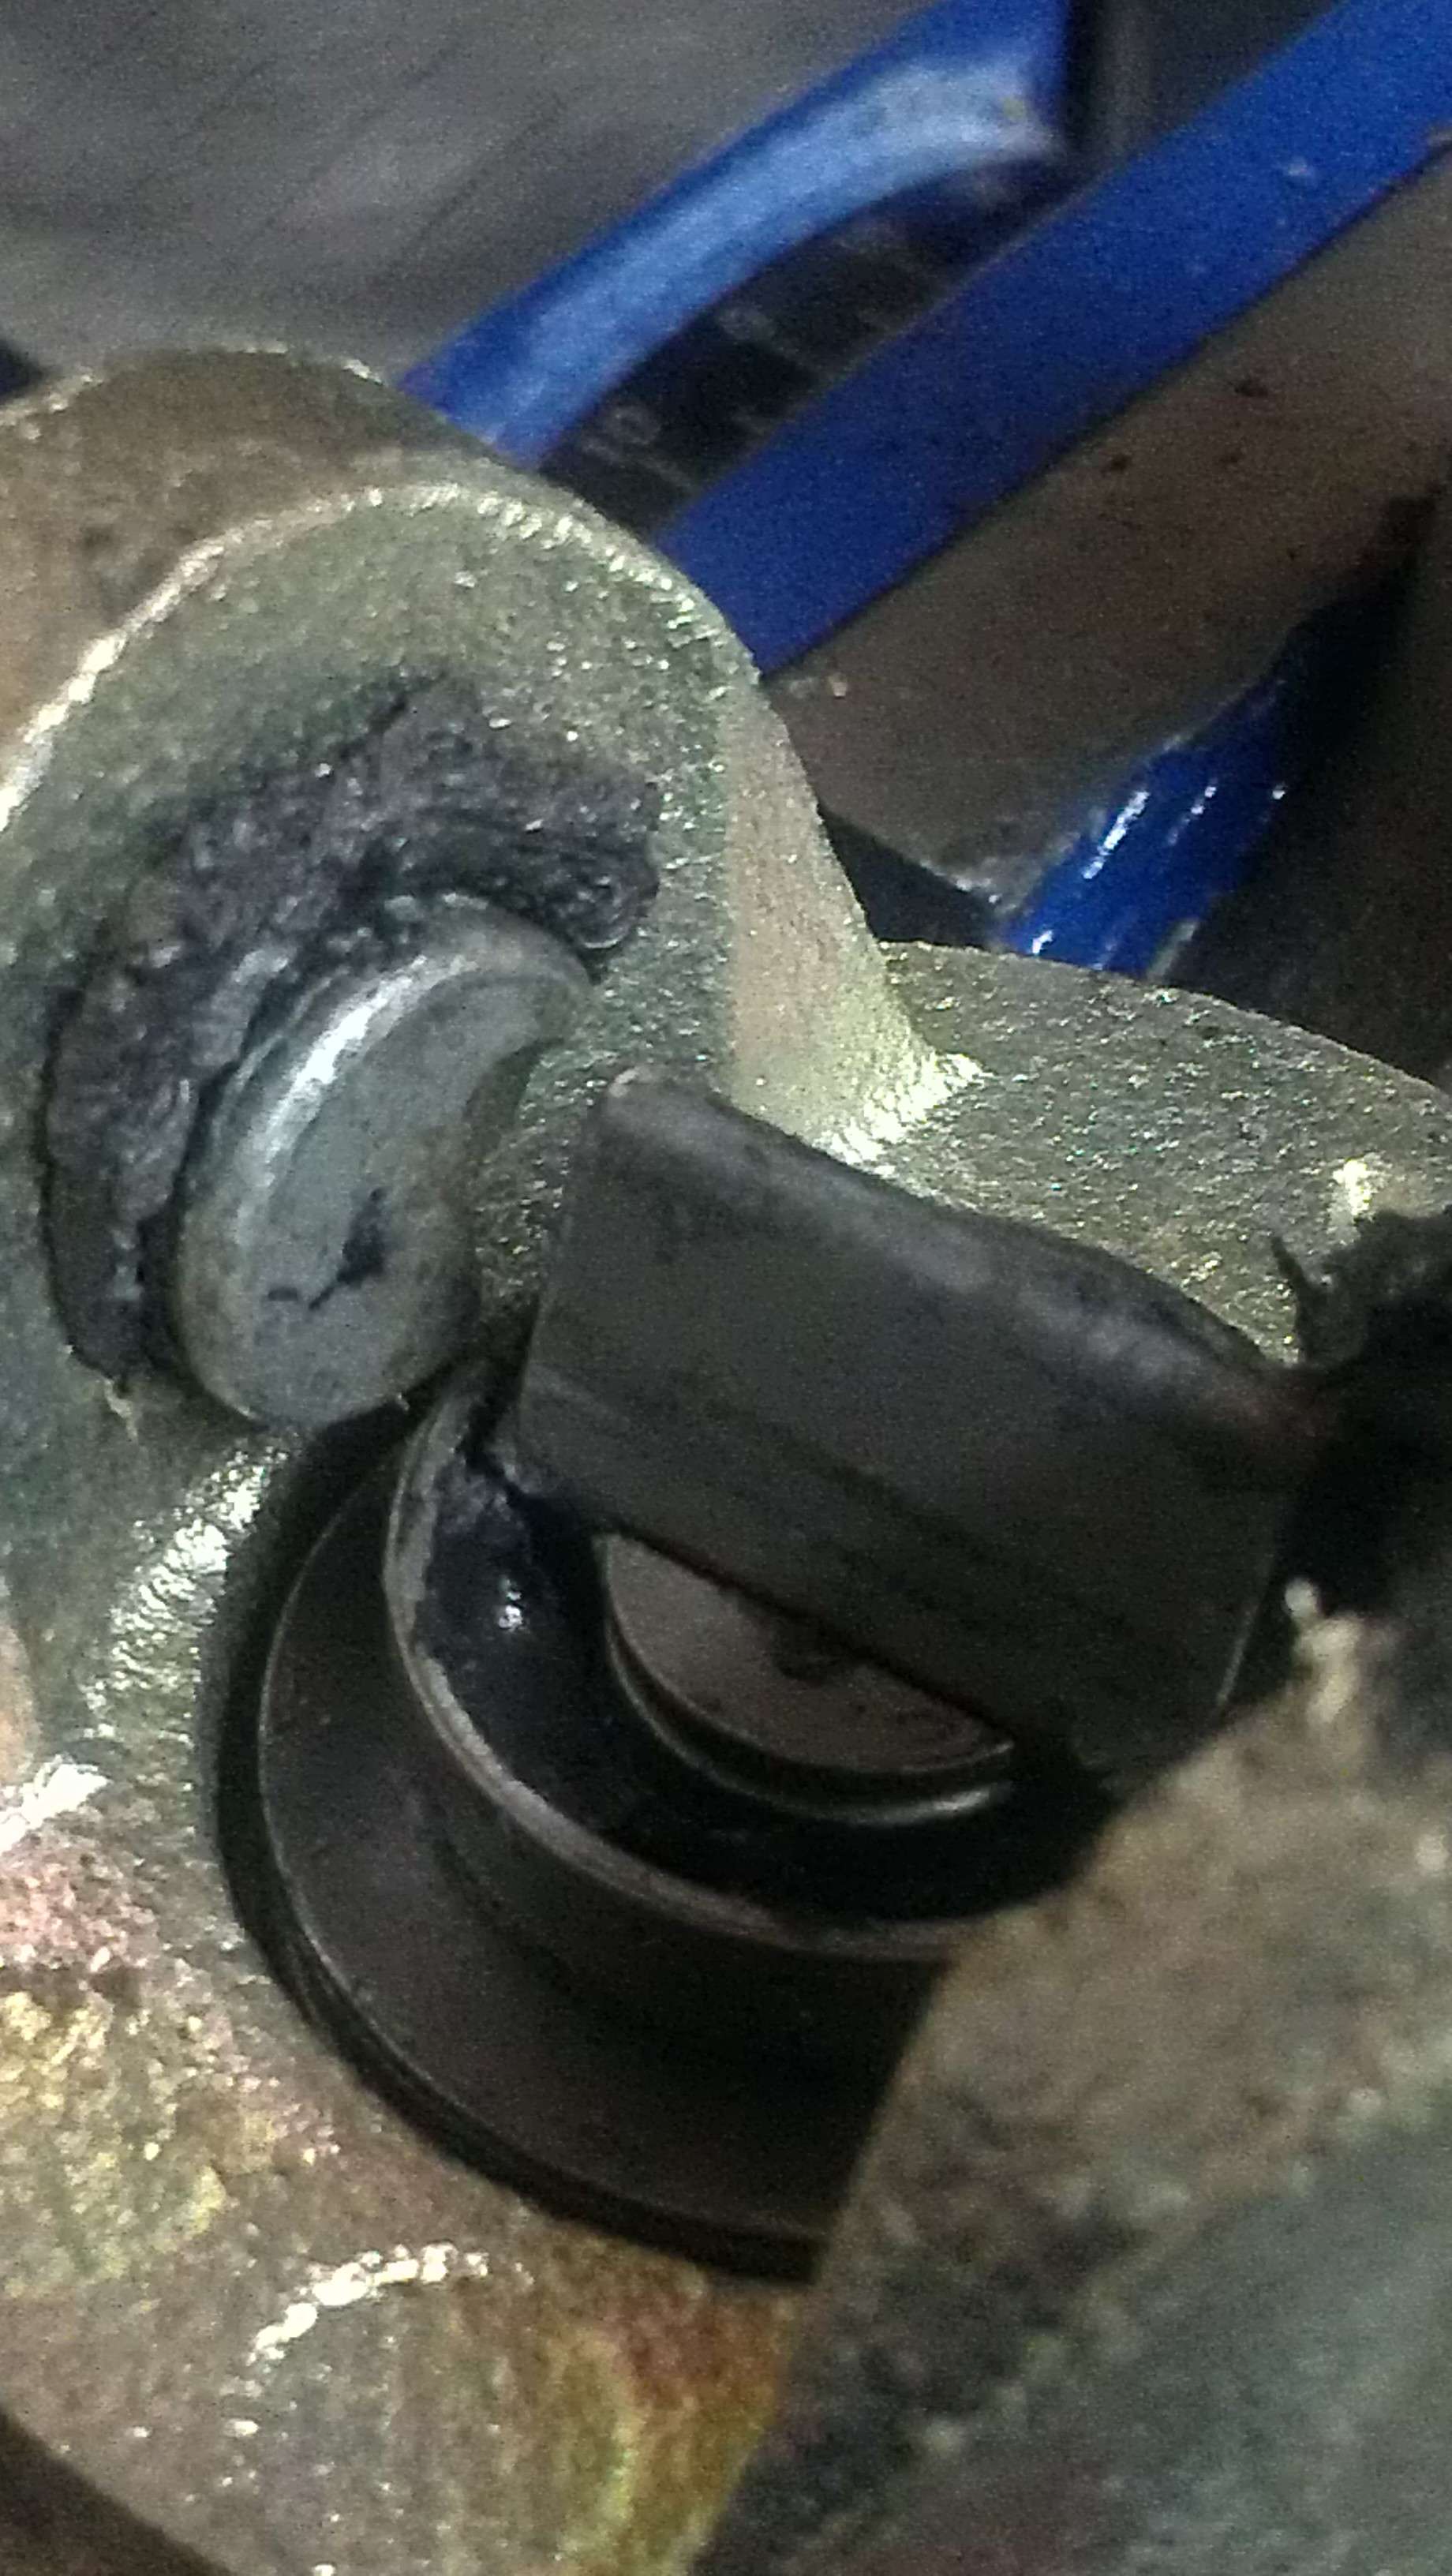
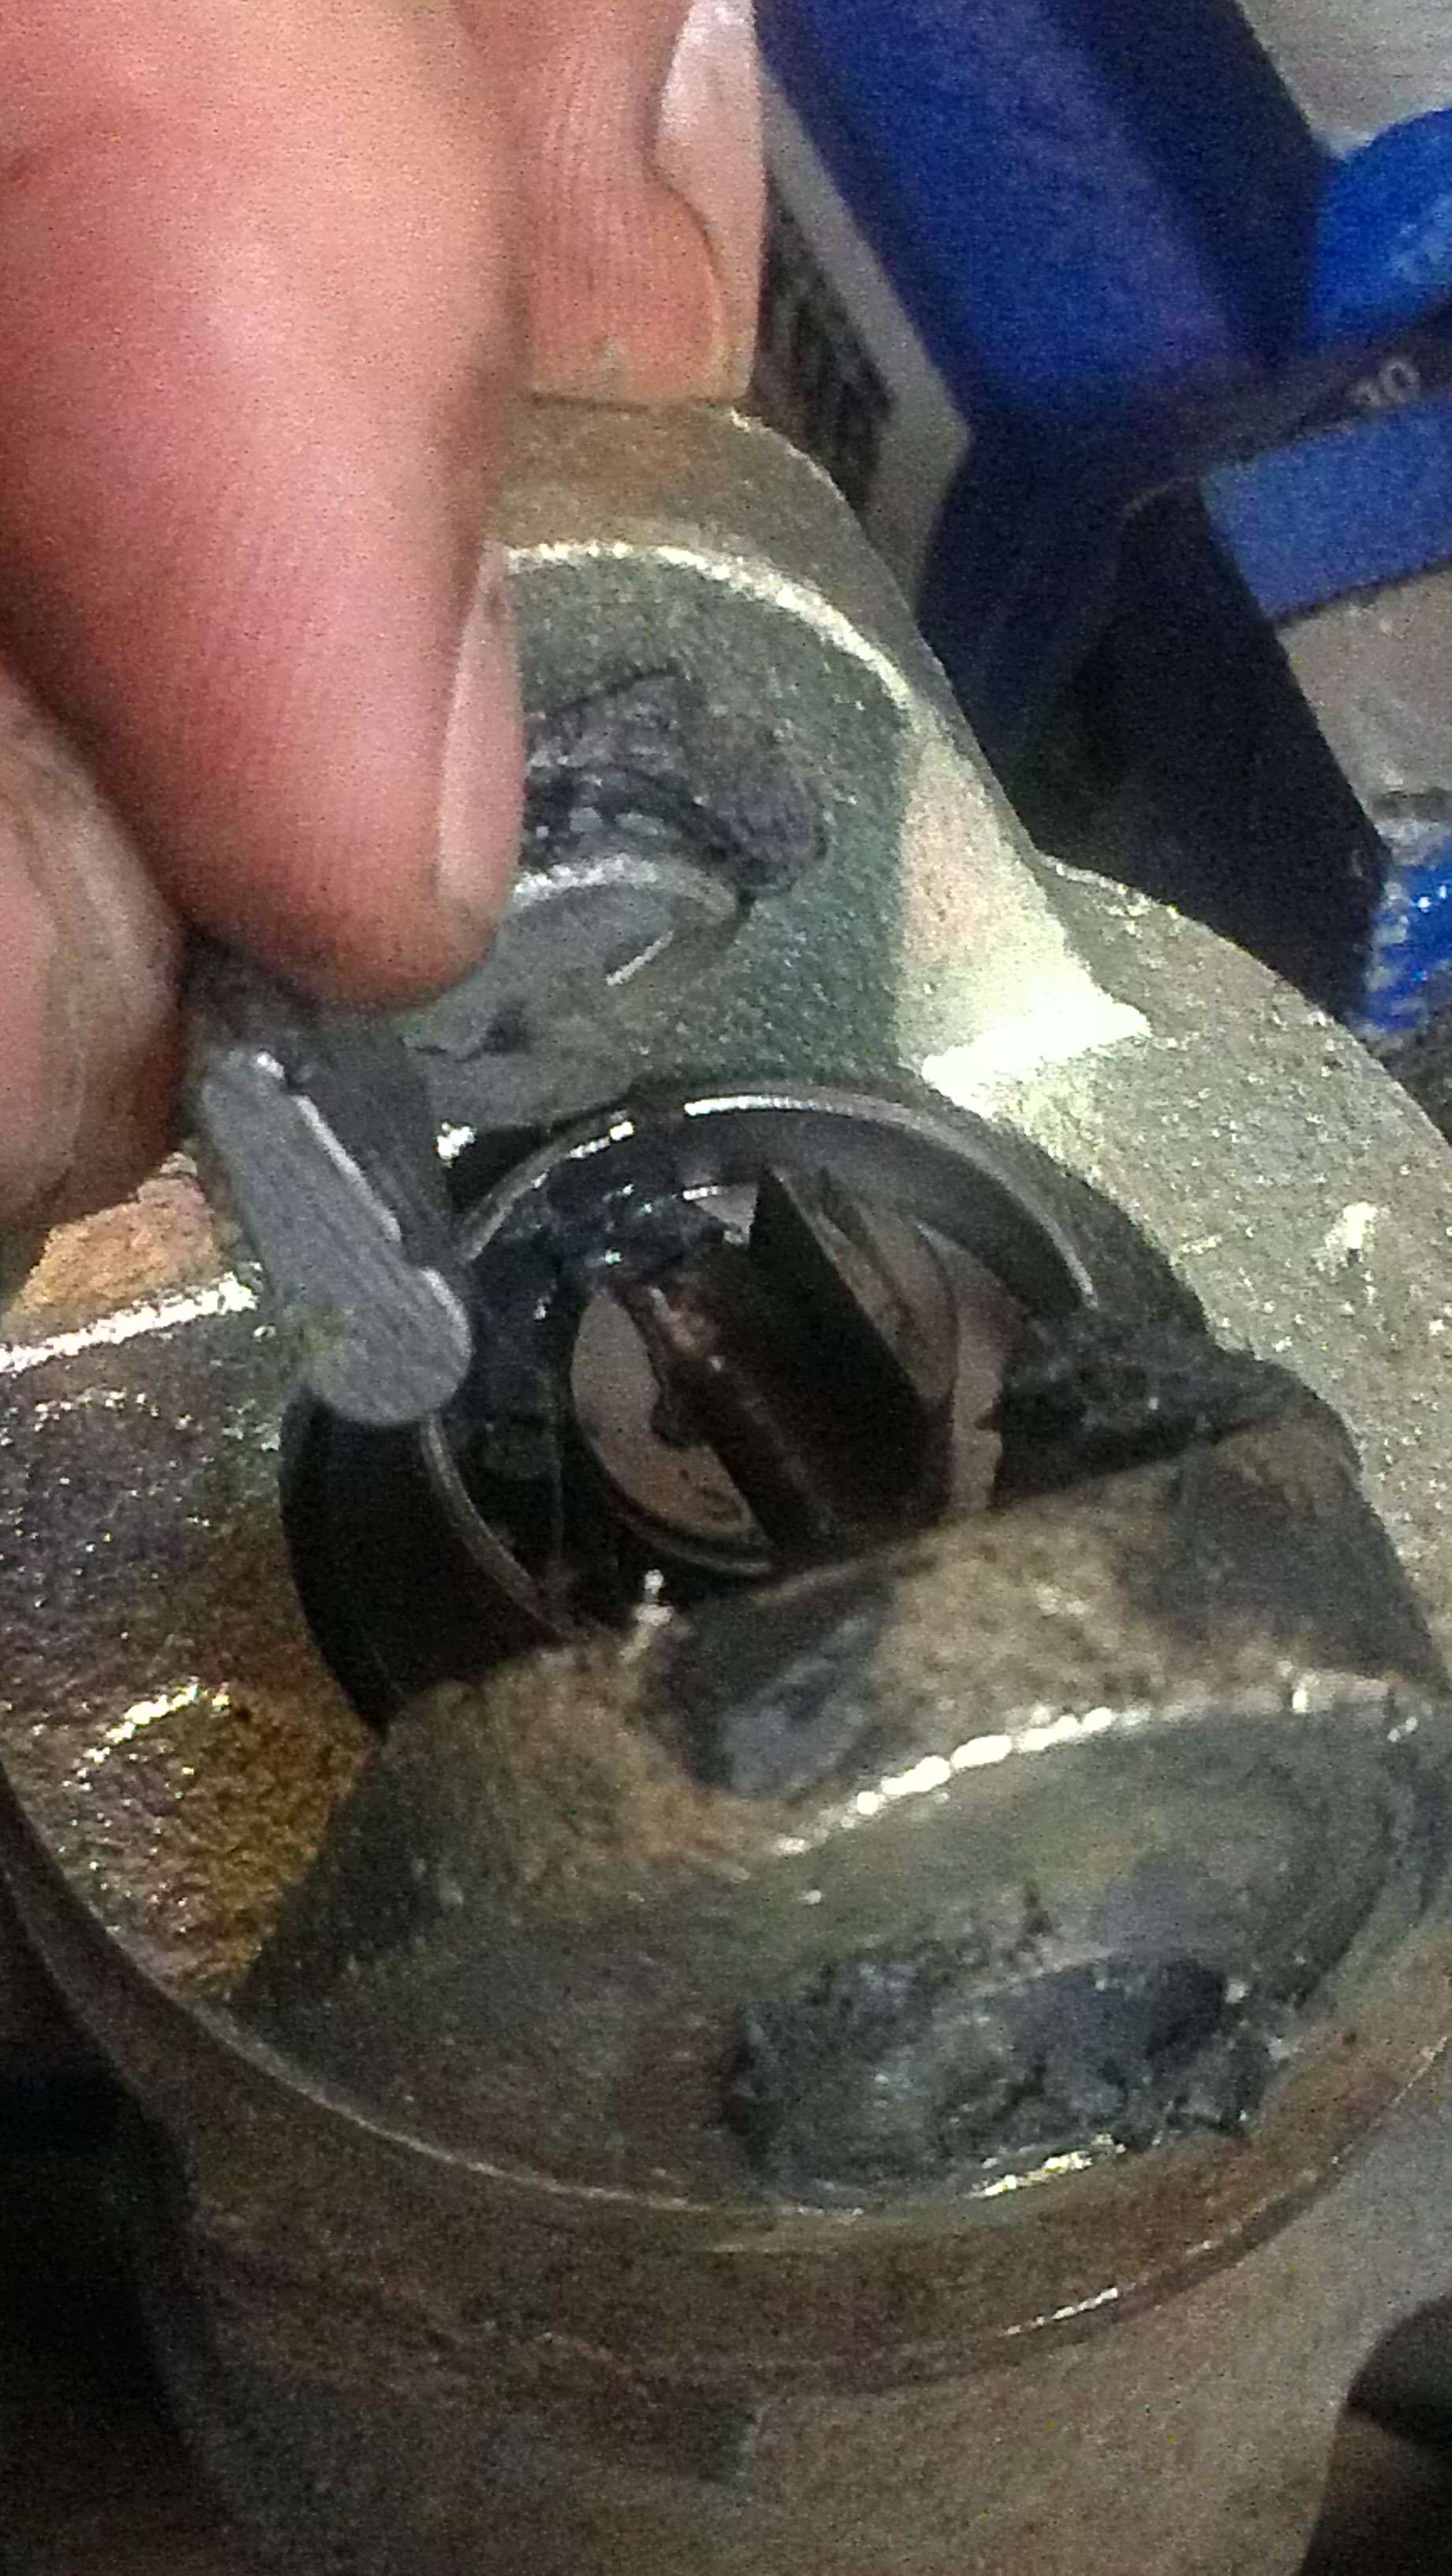
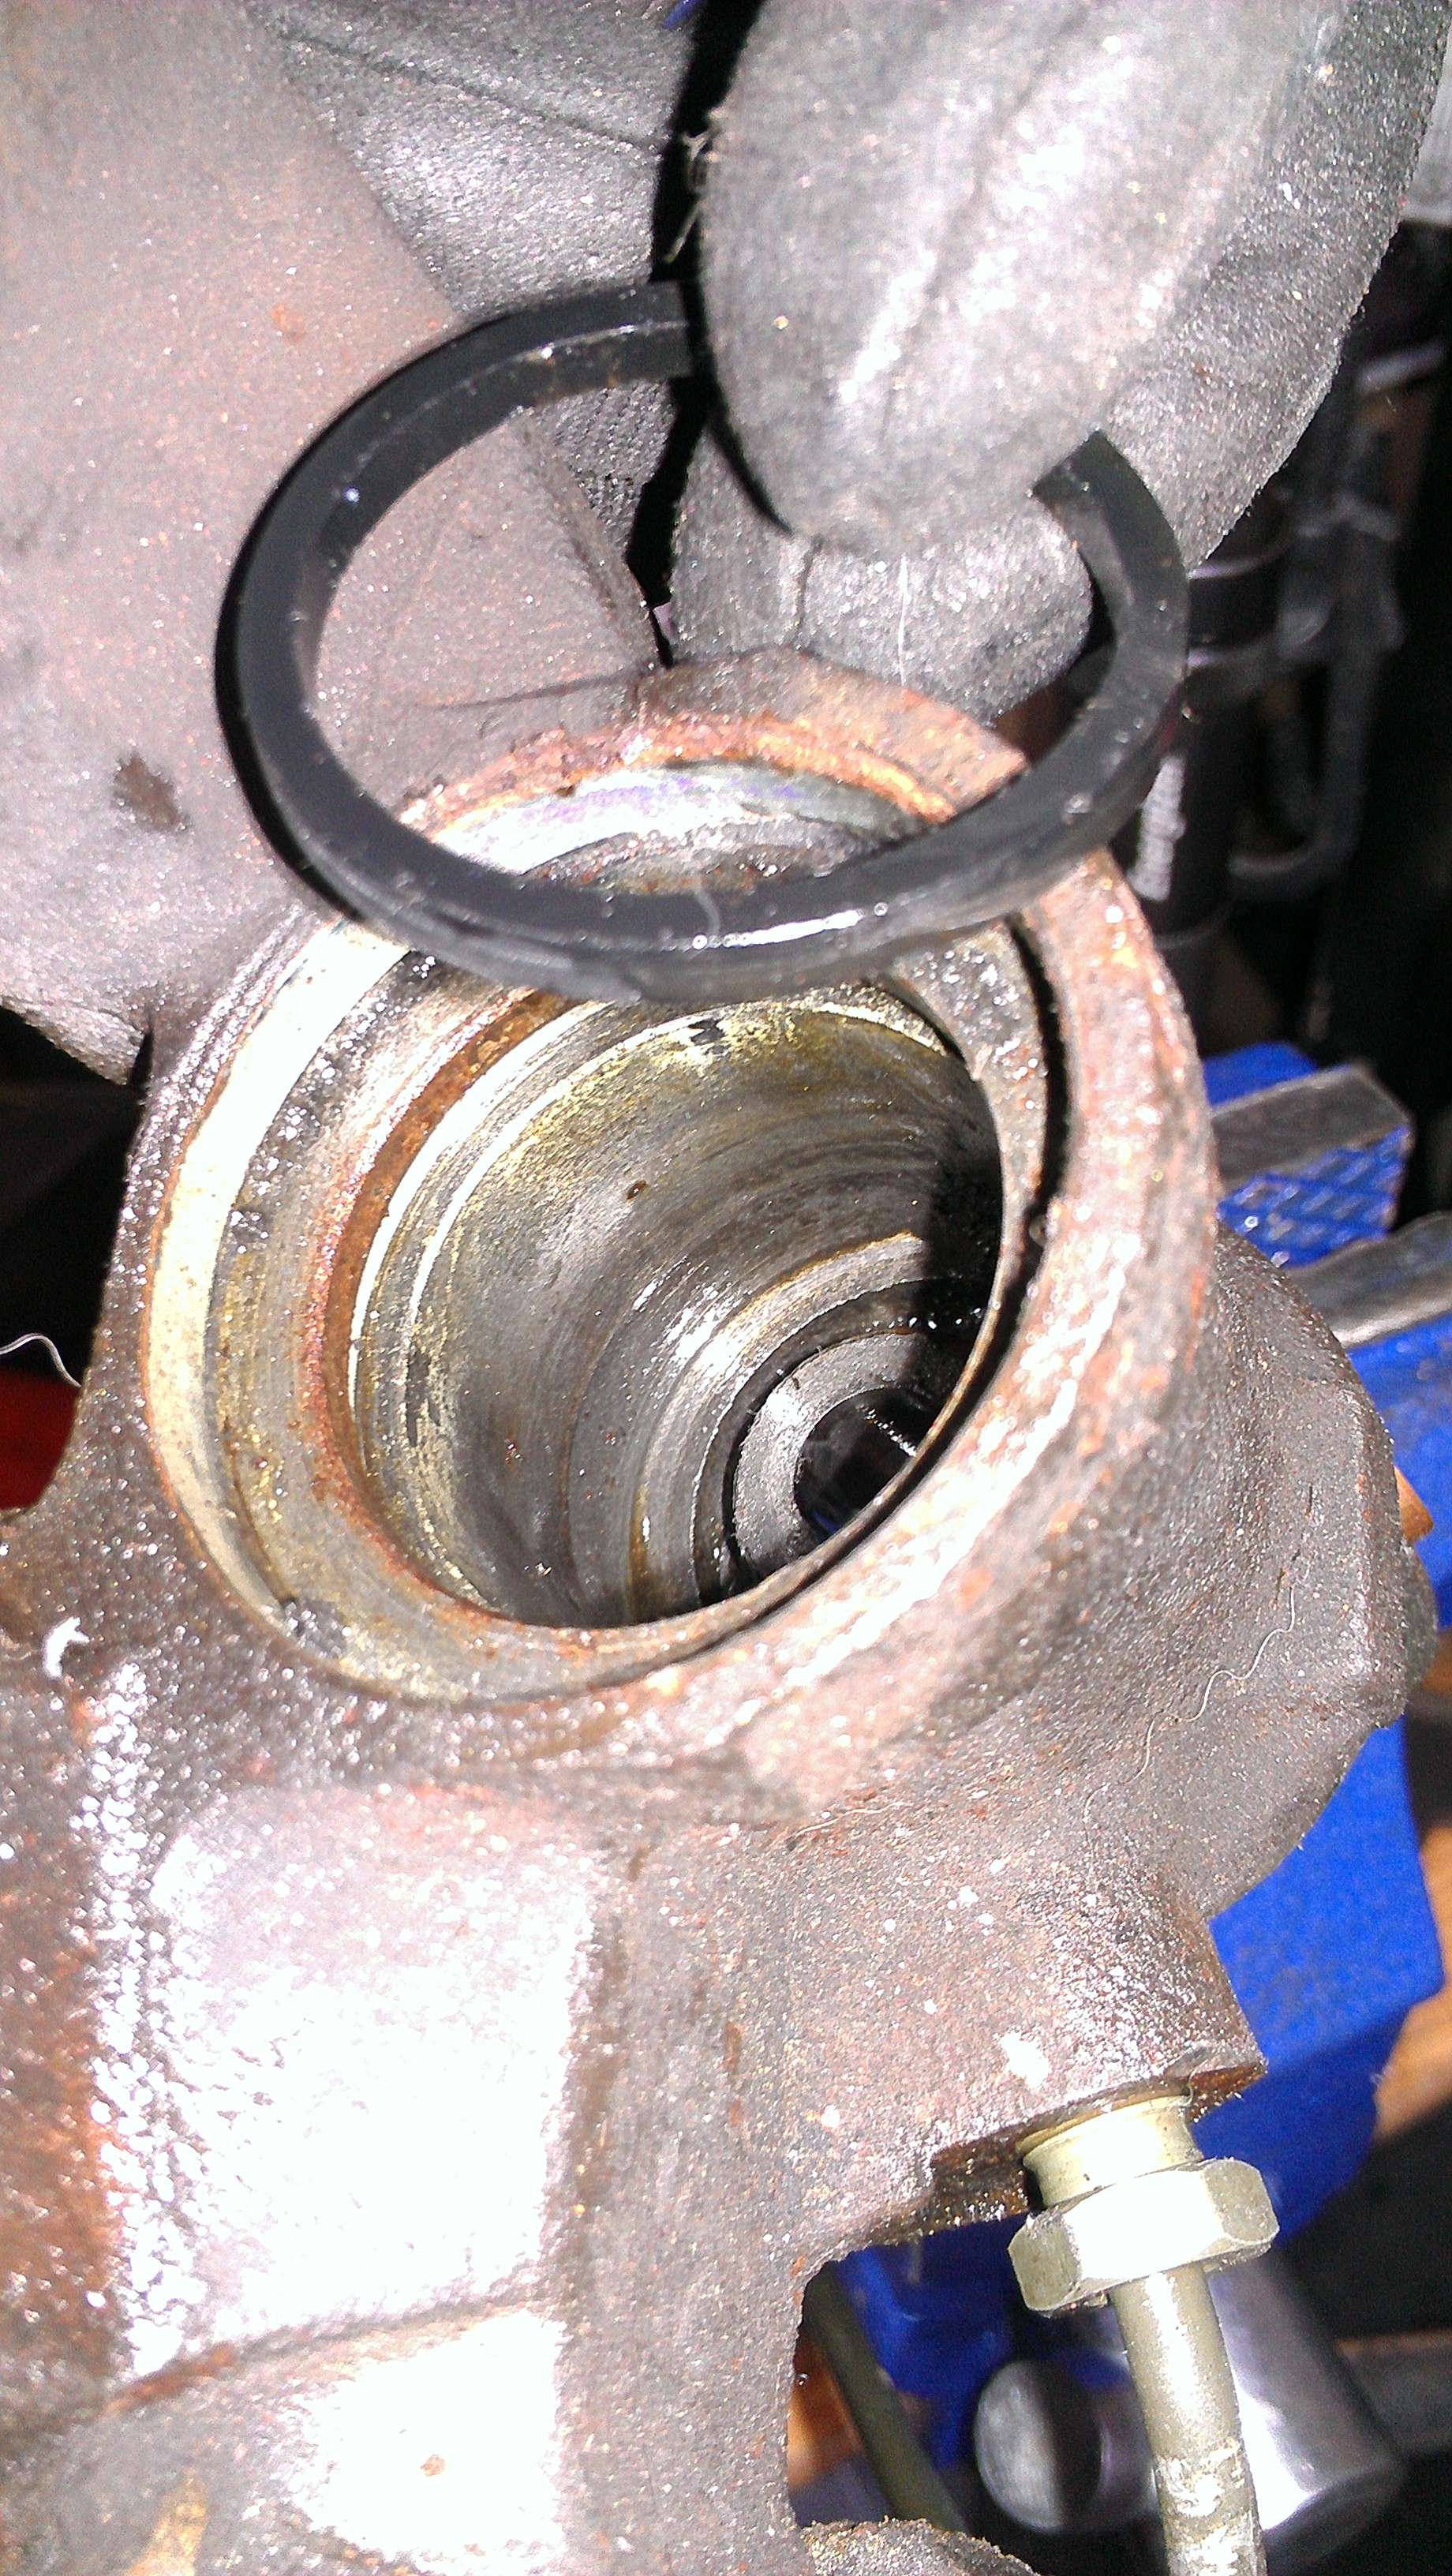
Well started prepping my rear calipers for sand blasting and powder coating. Had to fight through one turd of a bolt though. One of the T55 screws holding the caliper bracket to the knuckle decided to sieze in the bracket, which resulted in me rounding out the torx on the head of the screw. Ended up having to drill through it, separating the head from the threads so that I could remove the bracket. Where I then proceeded to wrench on it with a vise-grip clenched to the exposed threads. Finally got it out though, but what a mess.
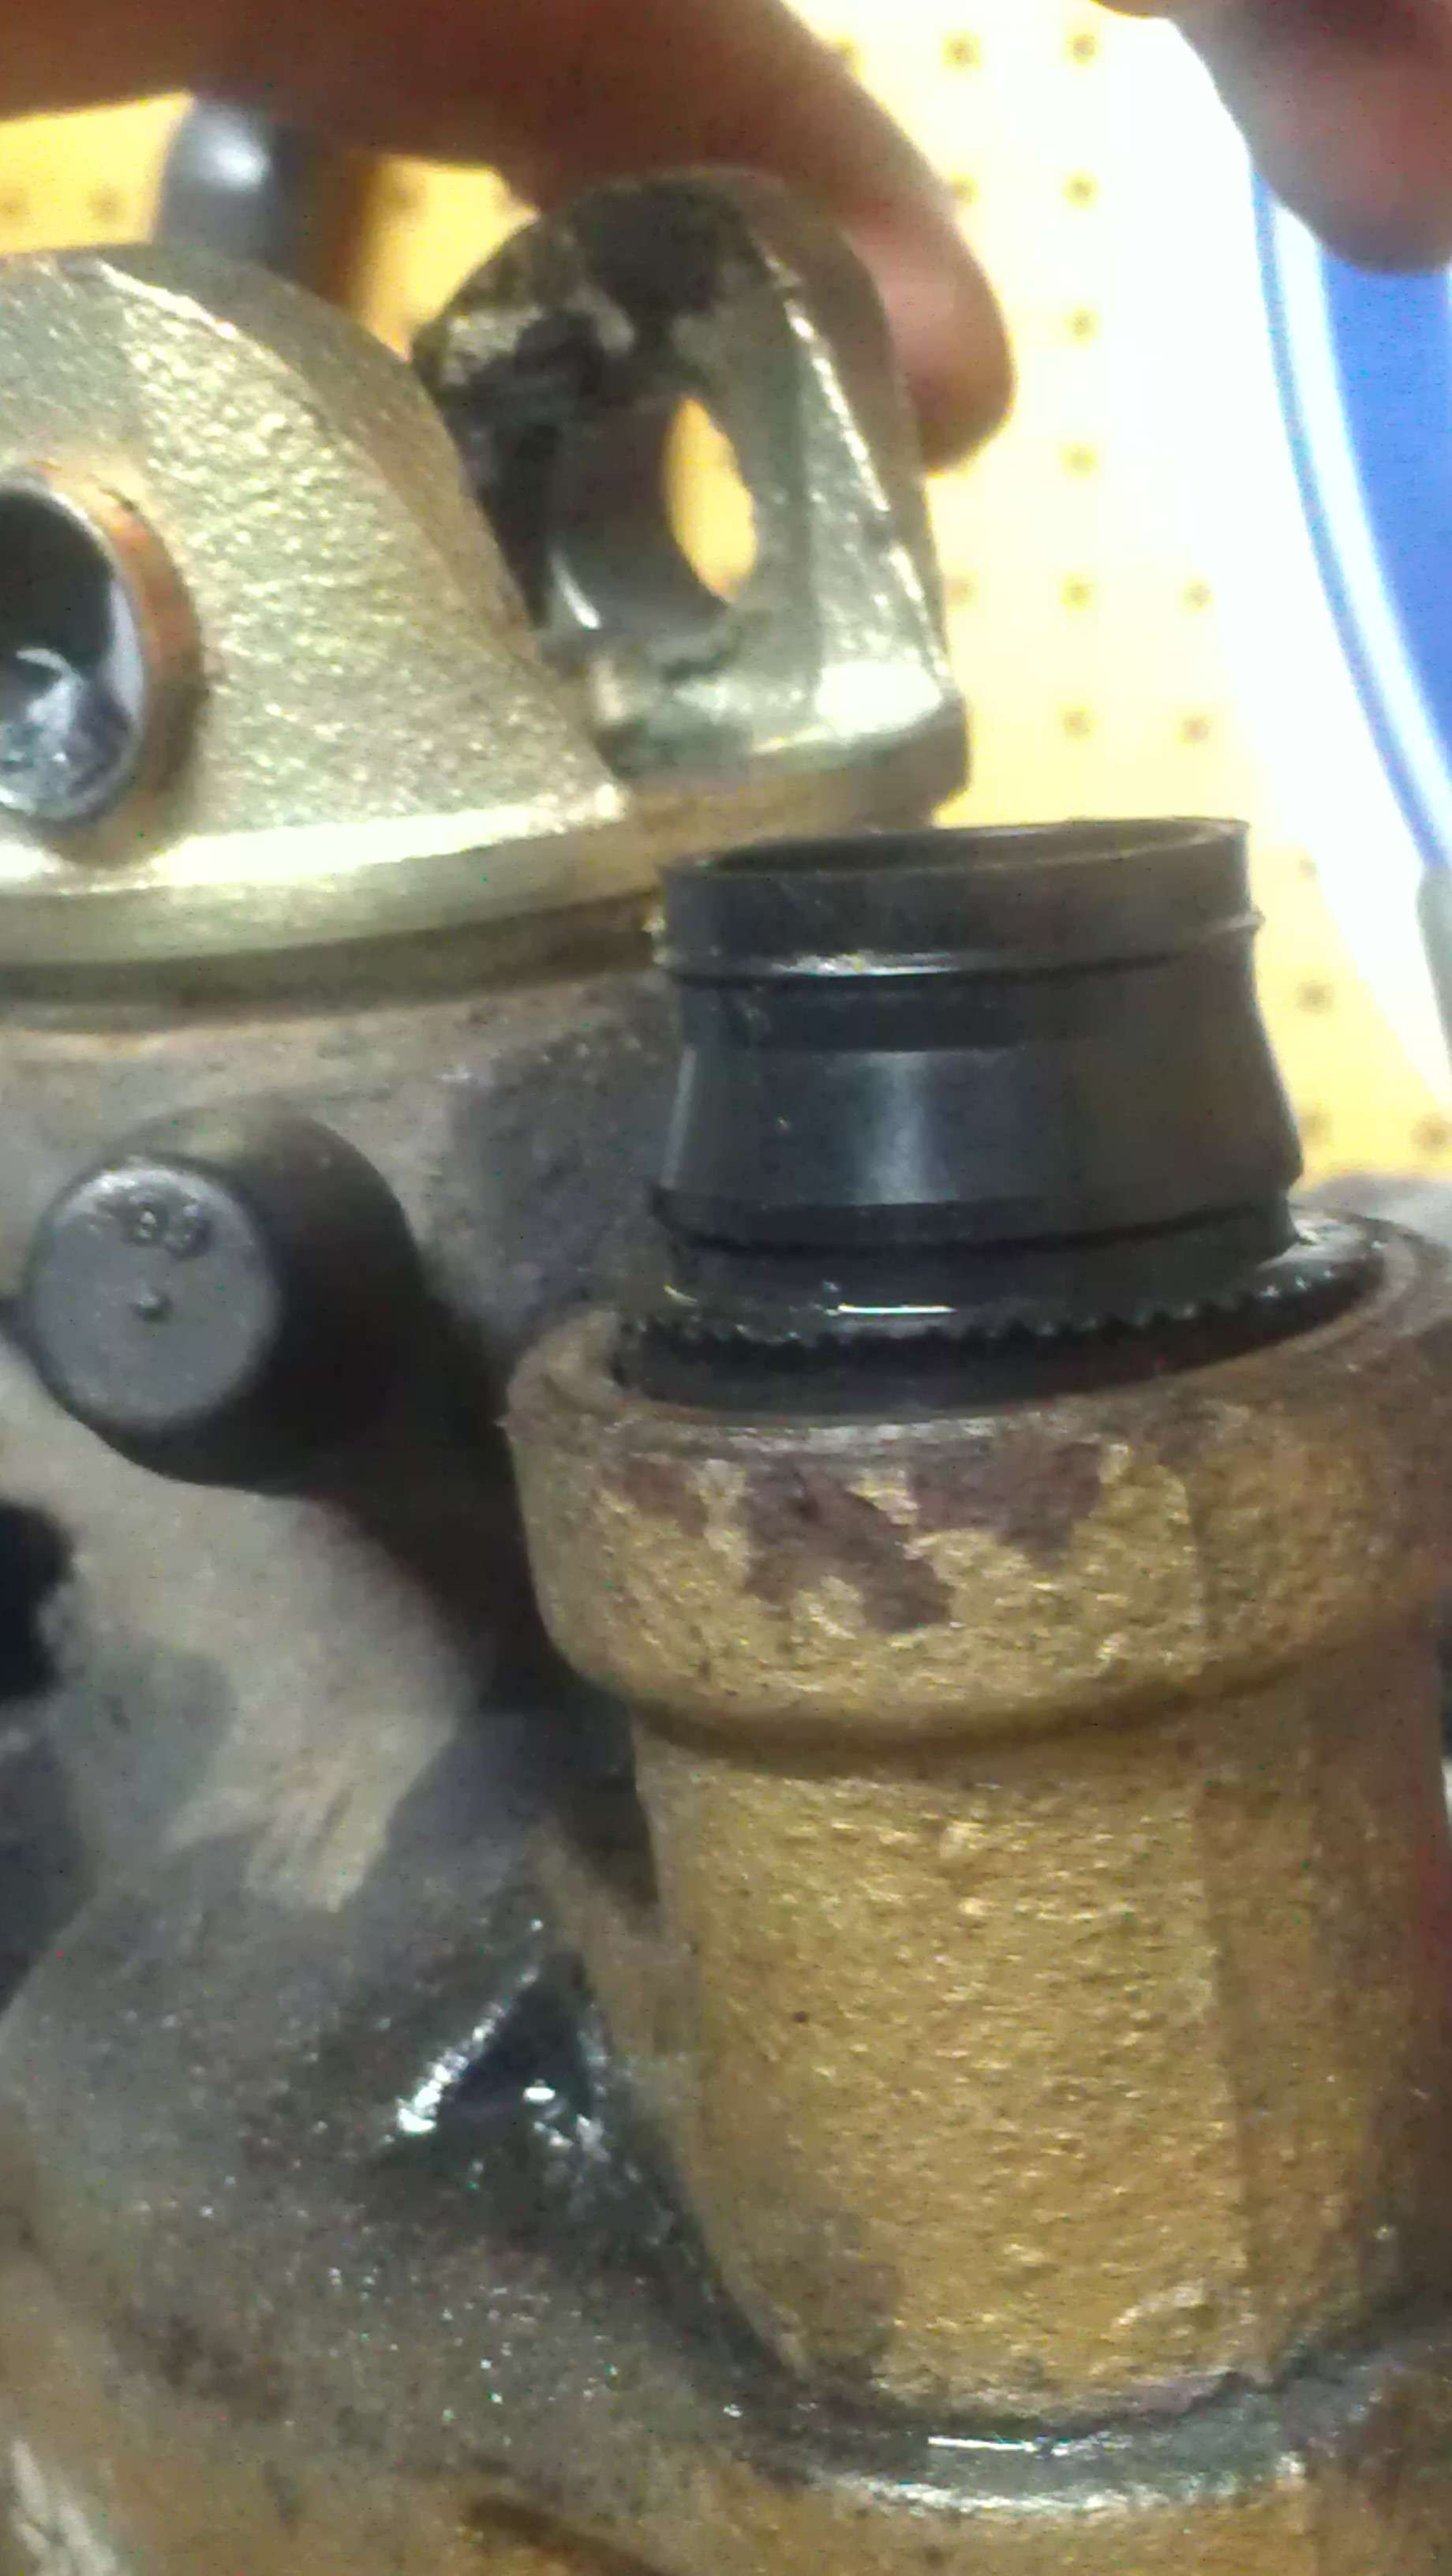
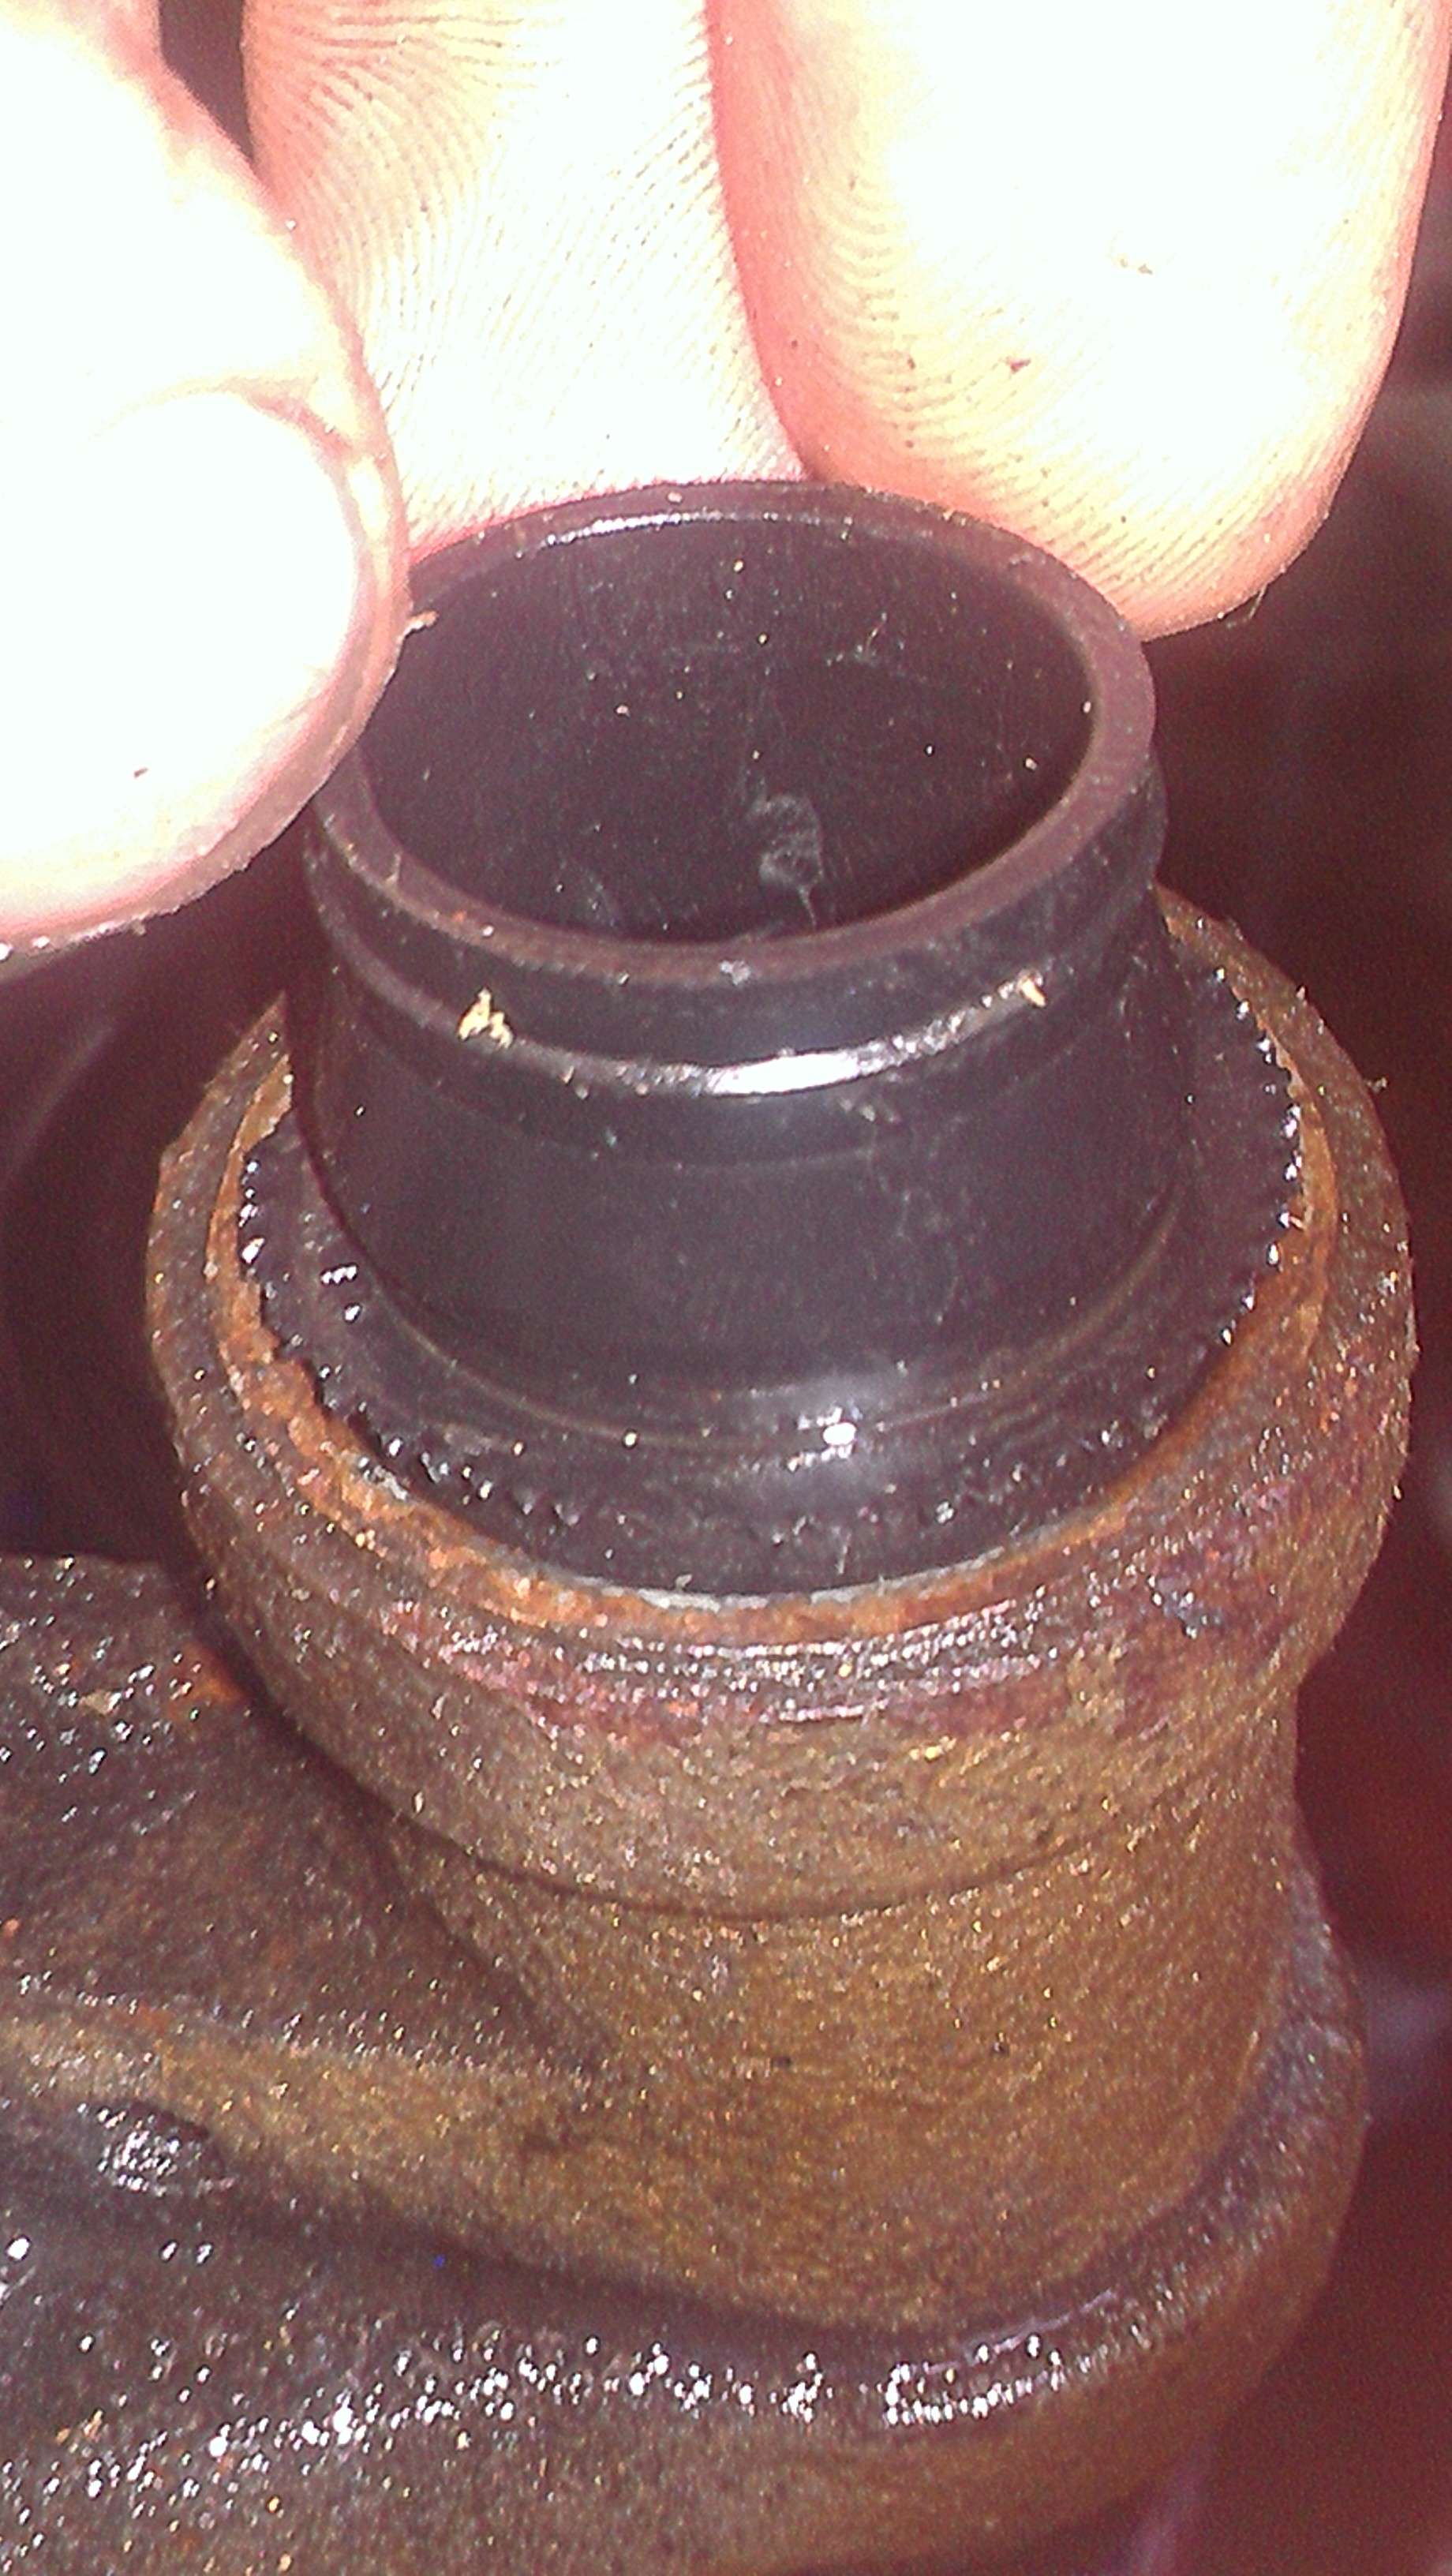
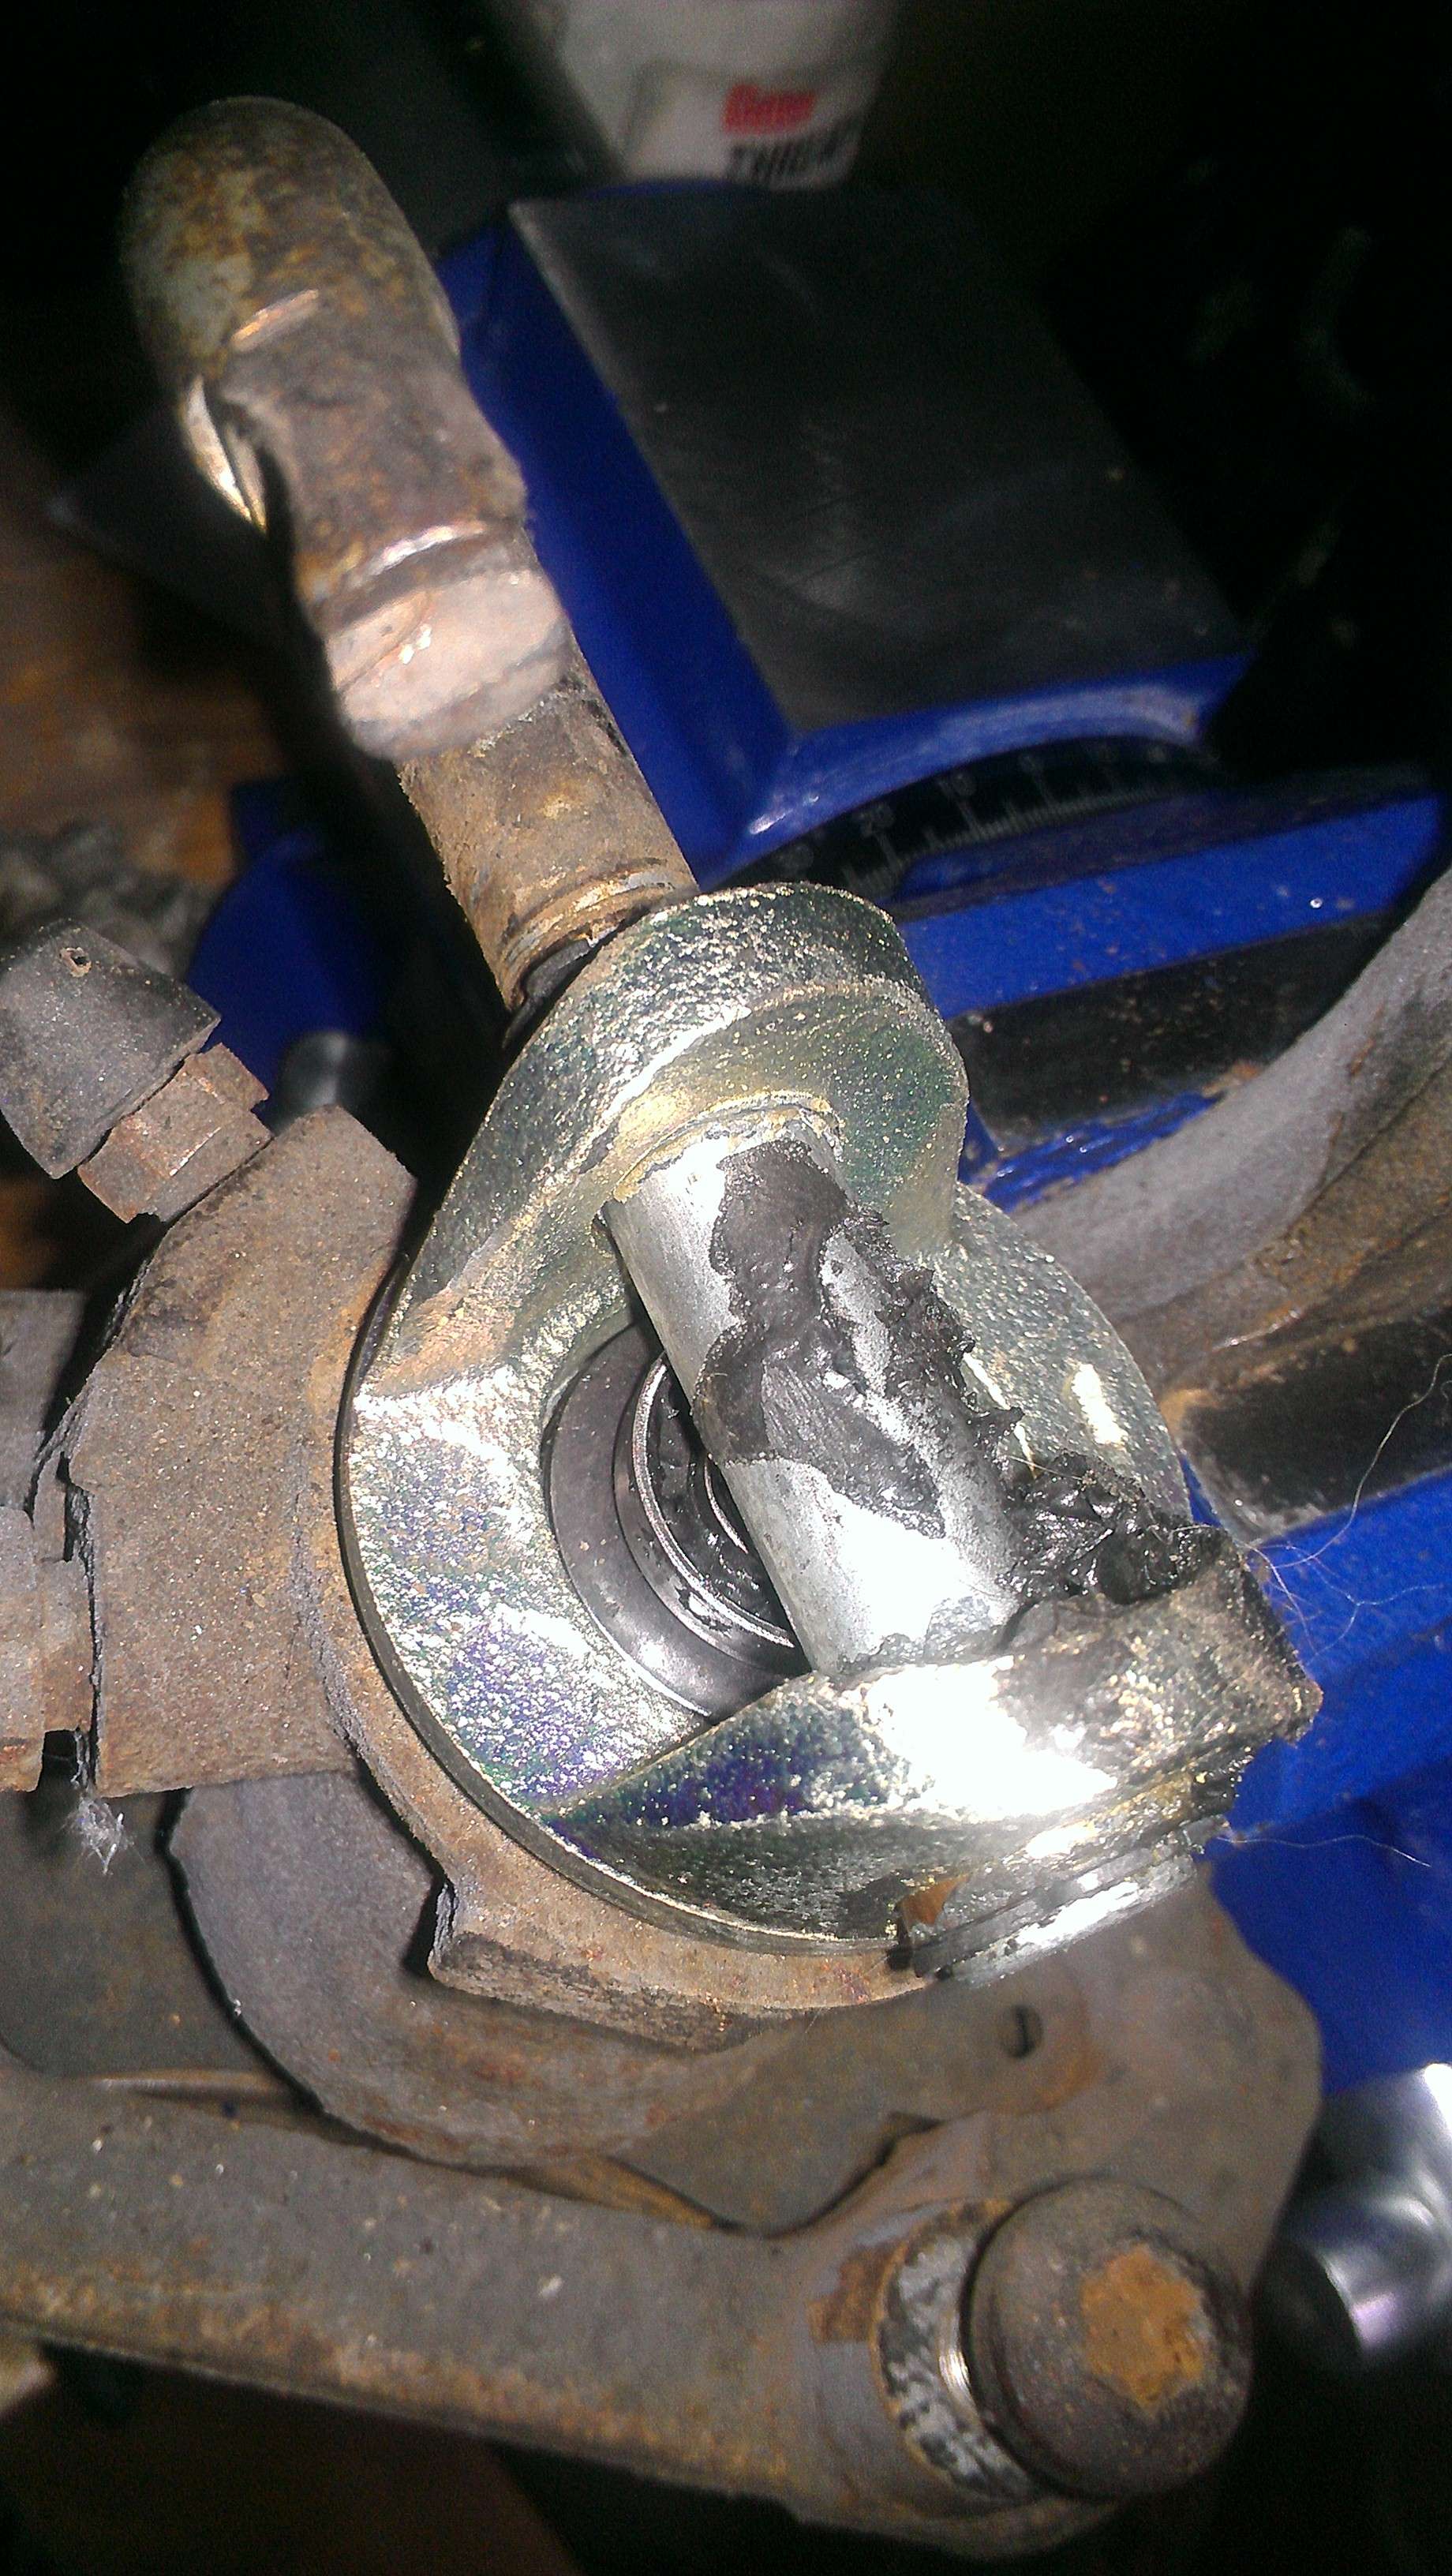
Then when I was taking off he boots for the slider pin I was having a helluva time too. It seemed as if the boots had rusted into the caliper bores and would not come out. I finally ended up tear one of the slider bolt boots off and noticed my mistake. All of the boots on the rear calipers are crimped into a steel bushing that is then pressed into the caliper. You can see the rusted ring around the boots, which is the bushing. That said here are some pics of the tear down...
FU bolt!
Initial attempt at removing the boots on the slider pin. Notice the ring around the boot in the second pic.
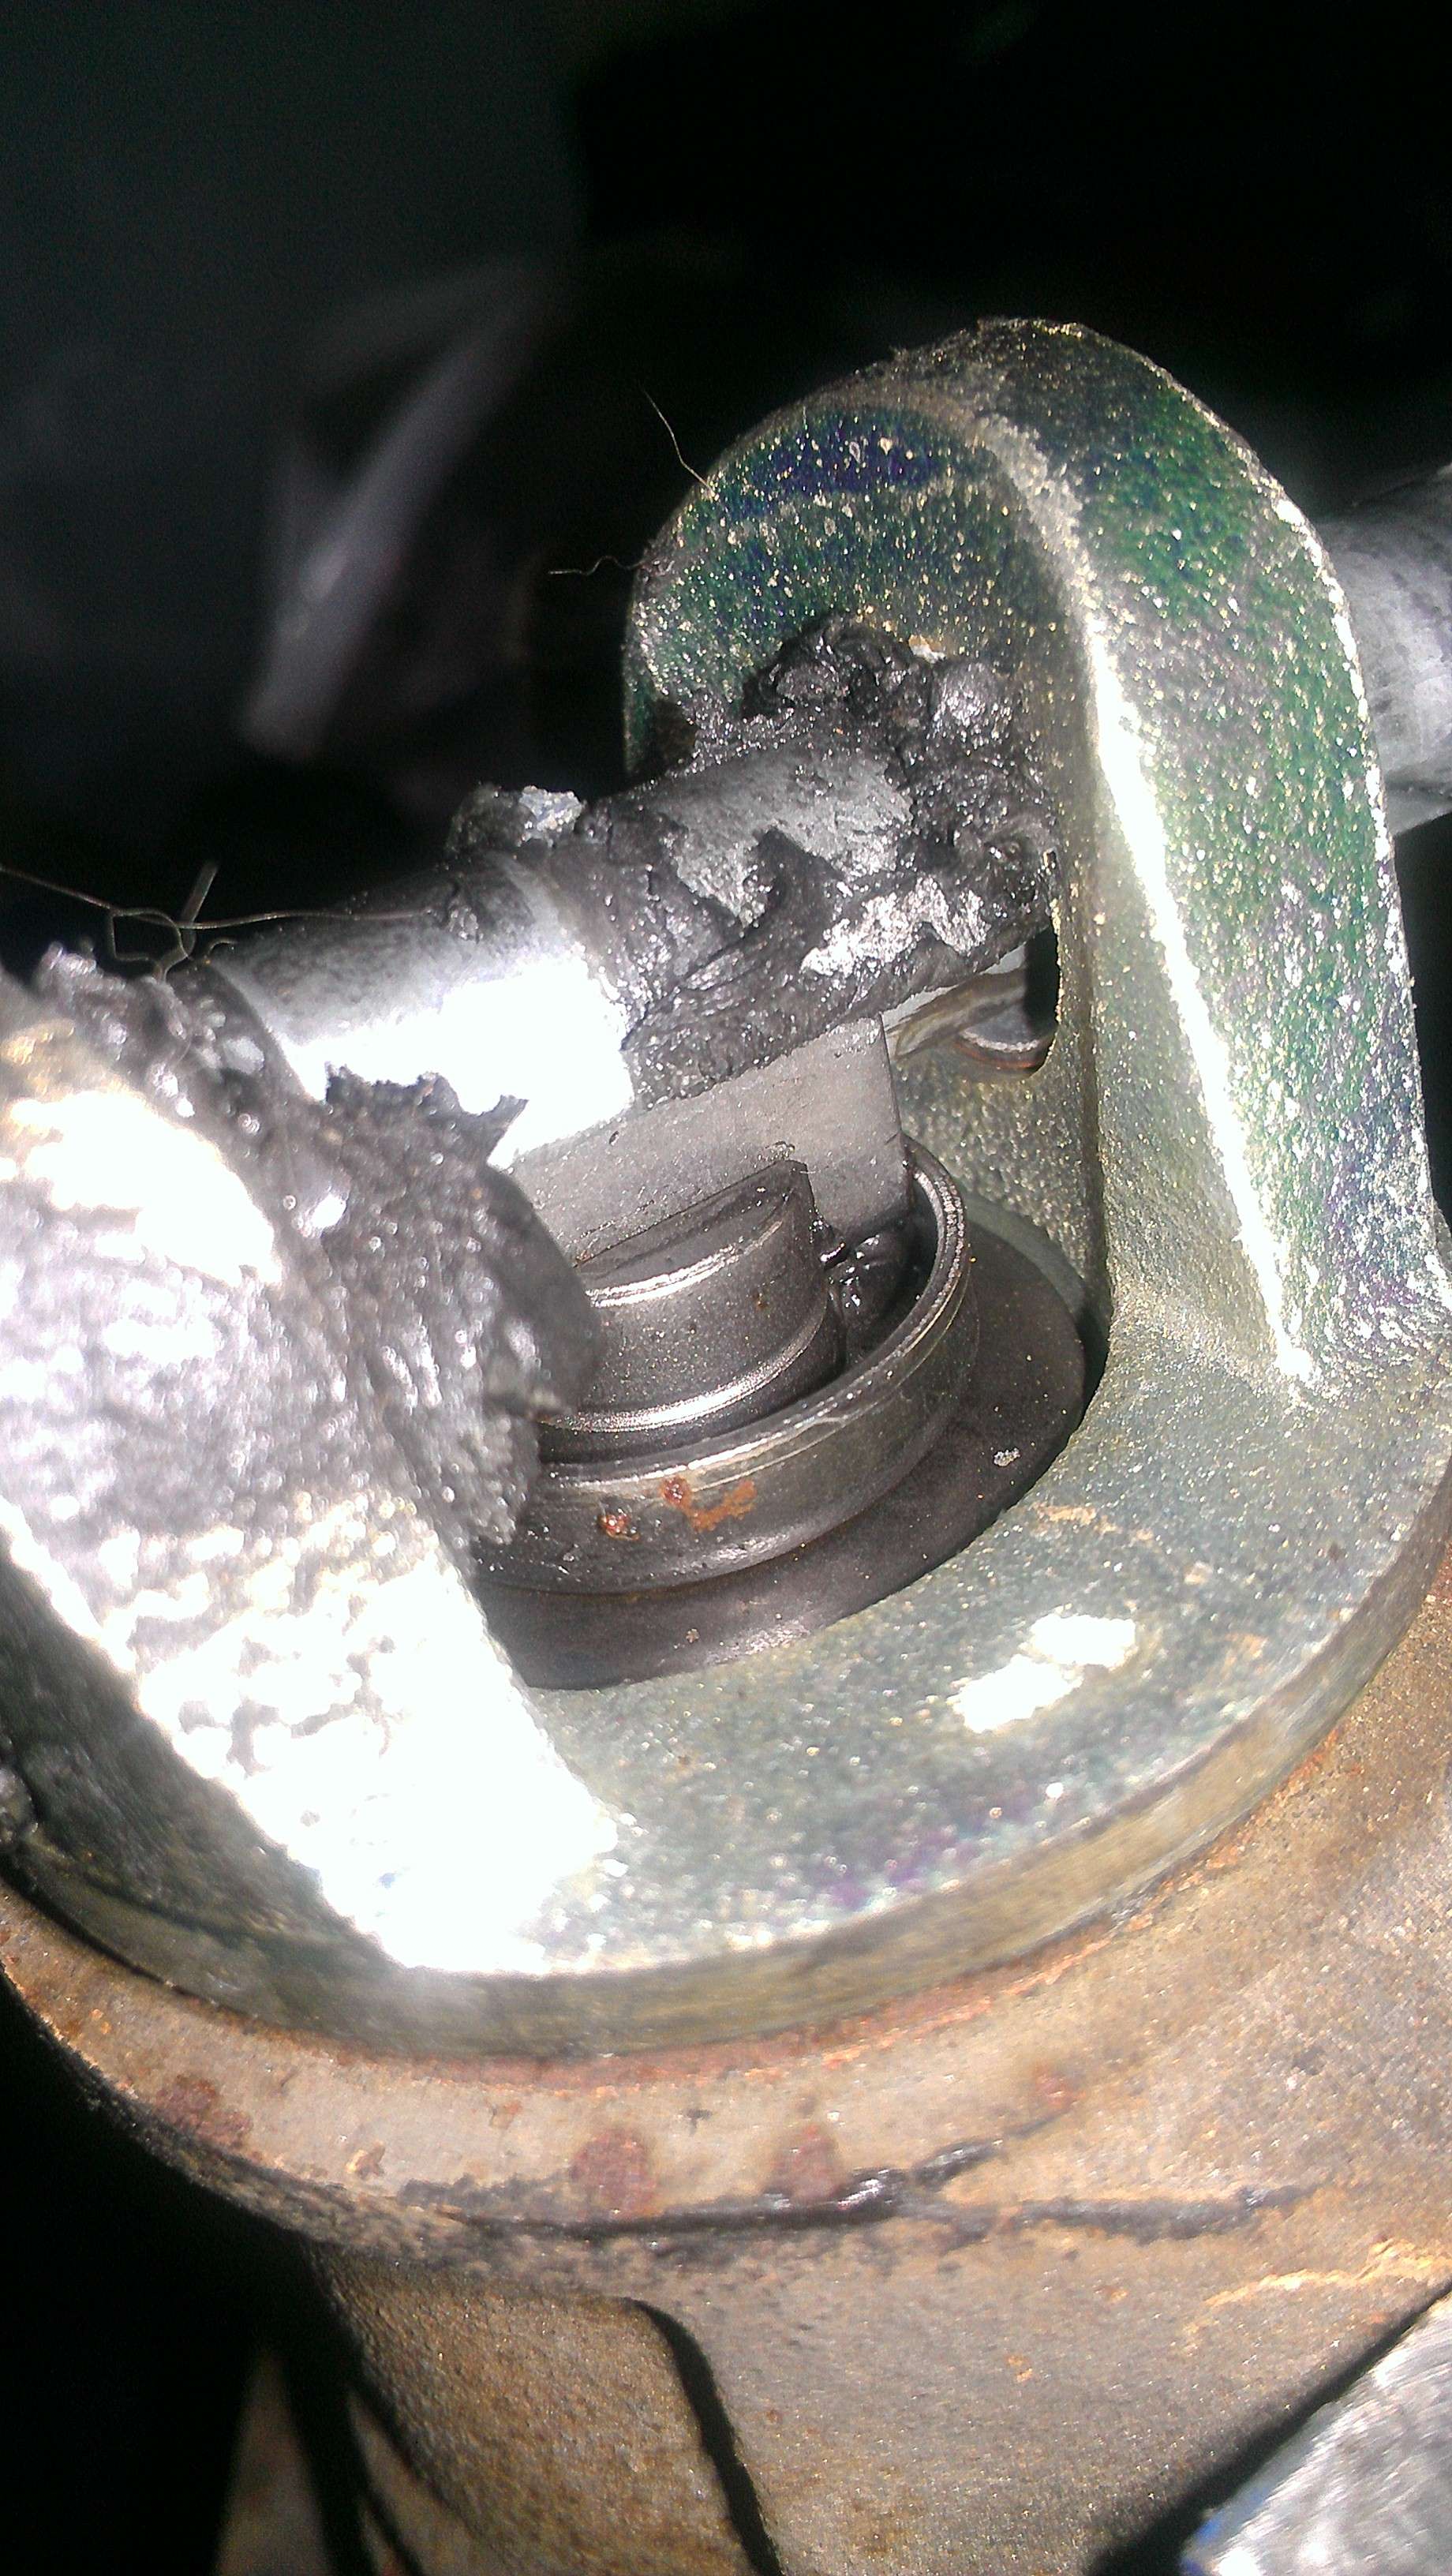
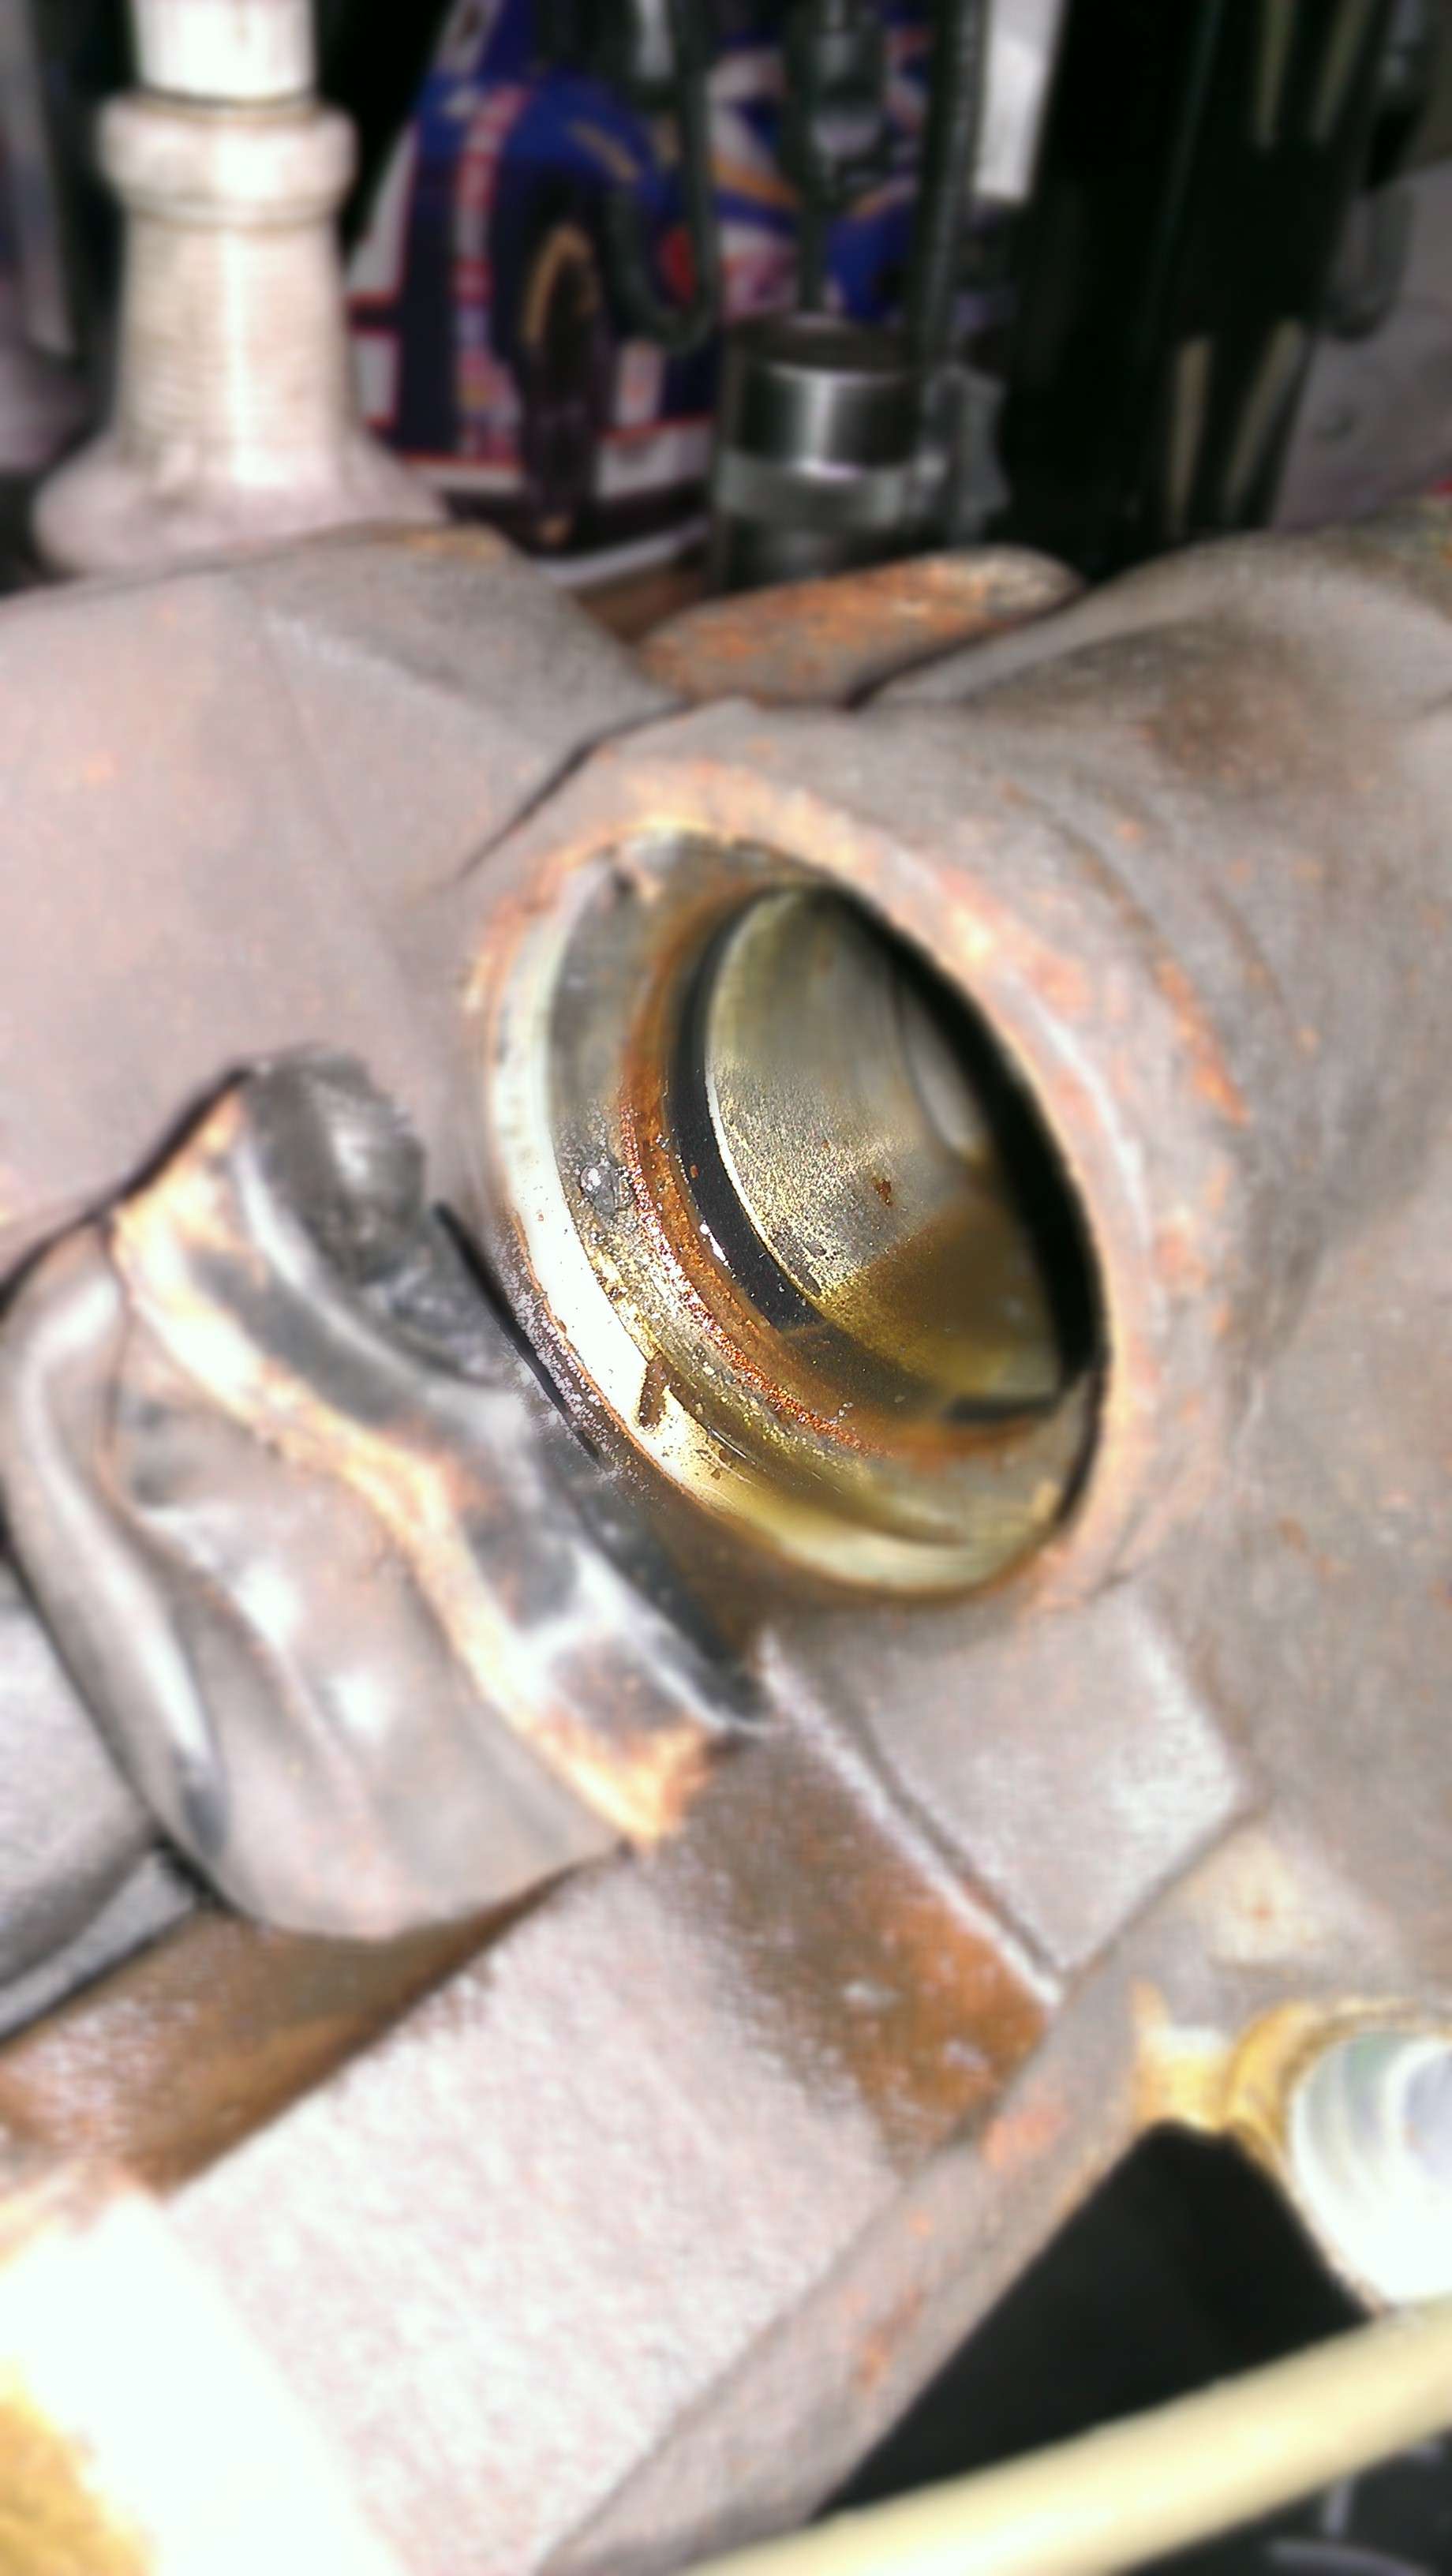
Taking the slider boots off correctly...
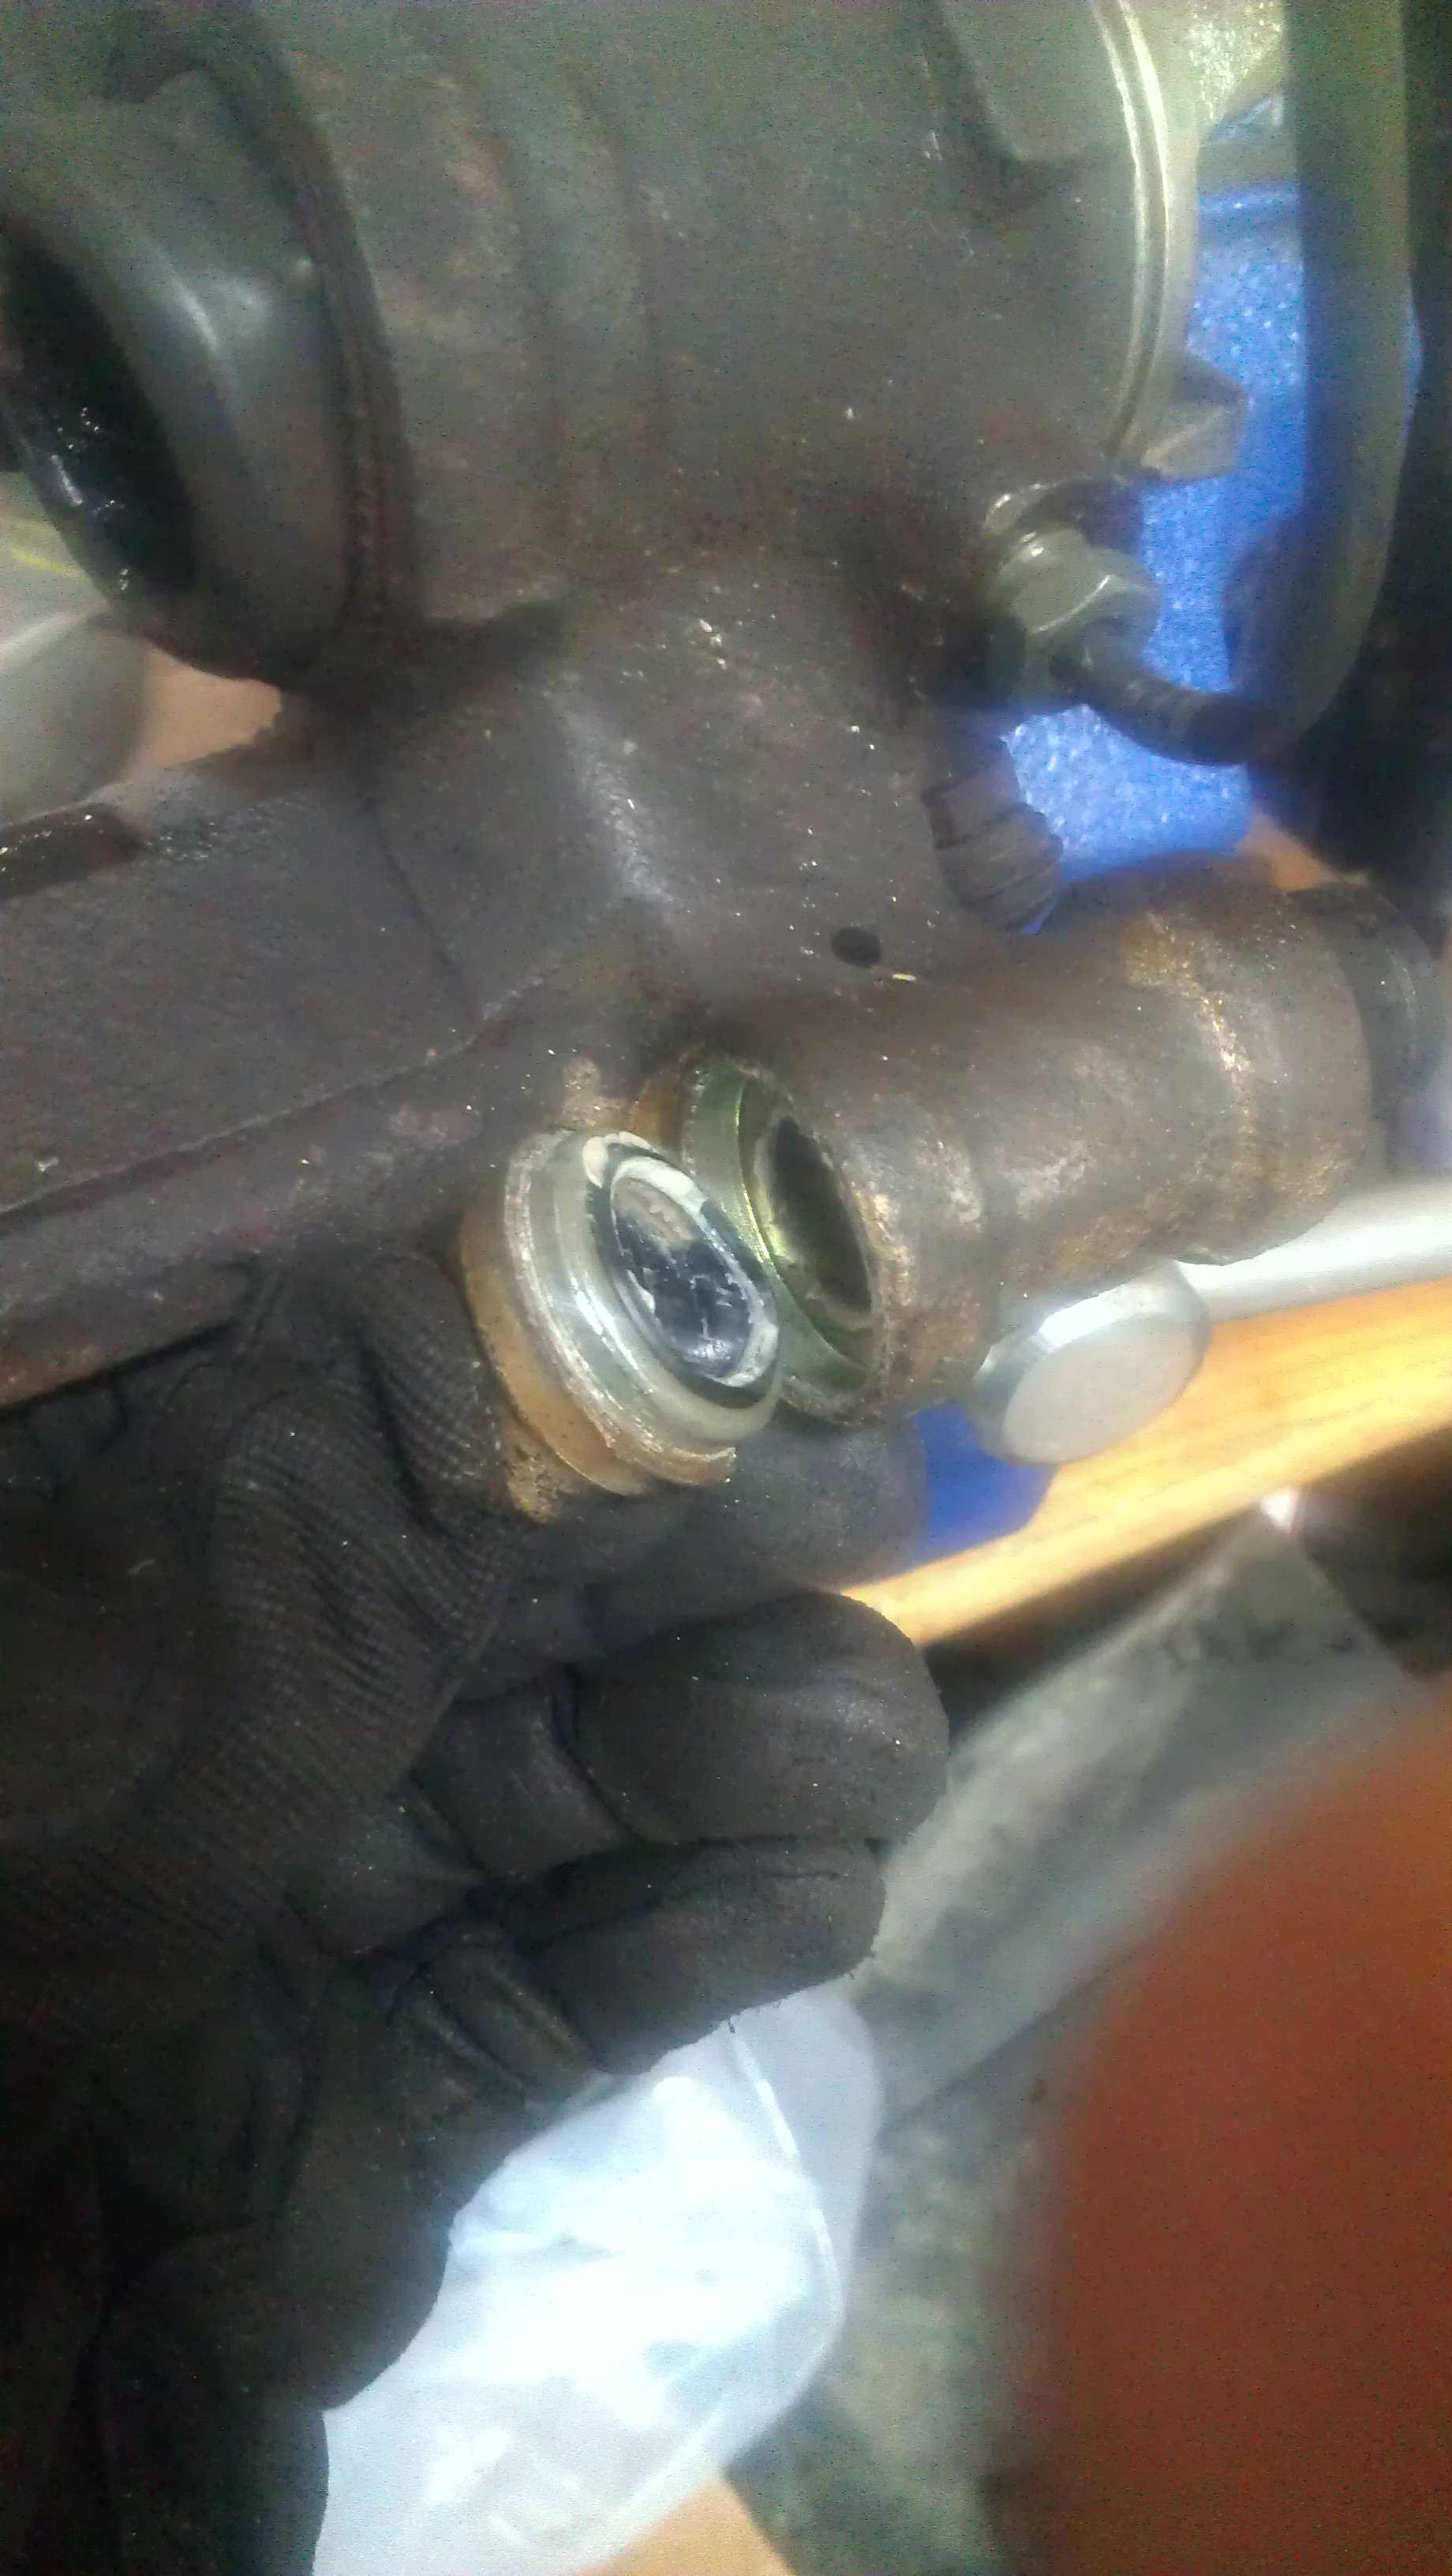
Disassembling the park brake. This is after I removed the plastic cover, white zip tie, and rubber boot.
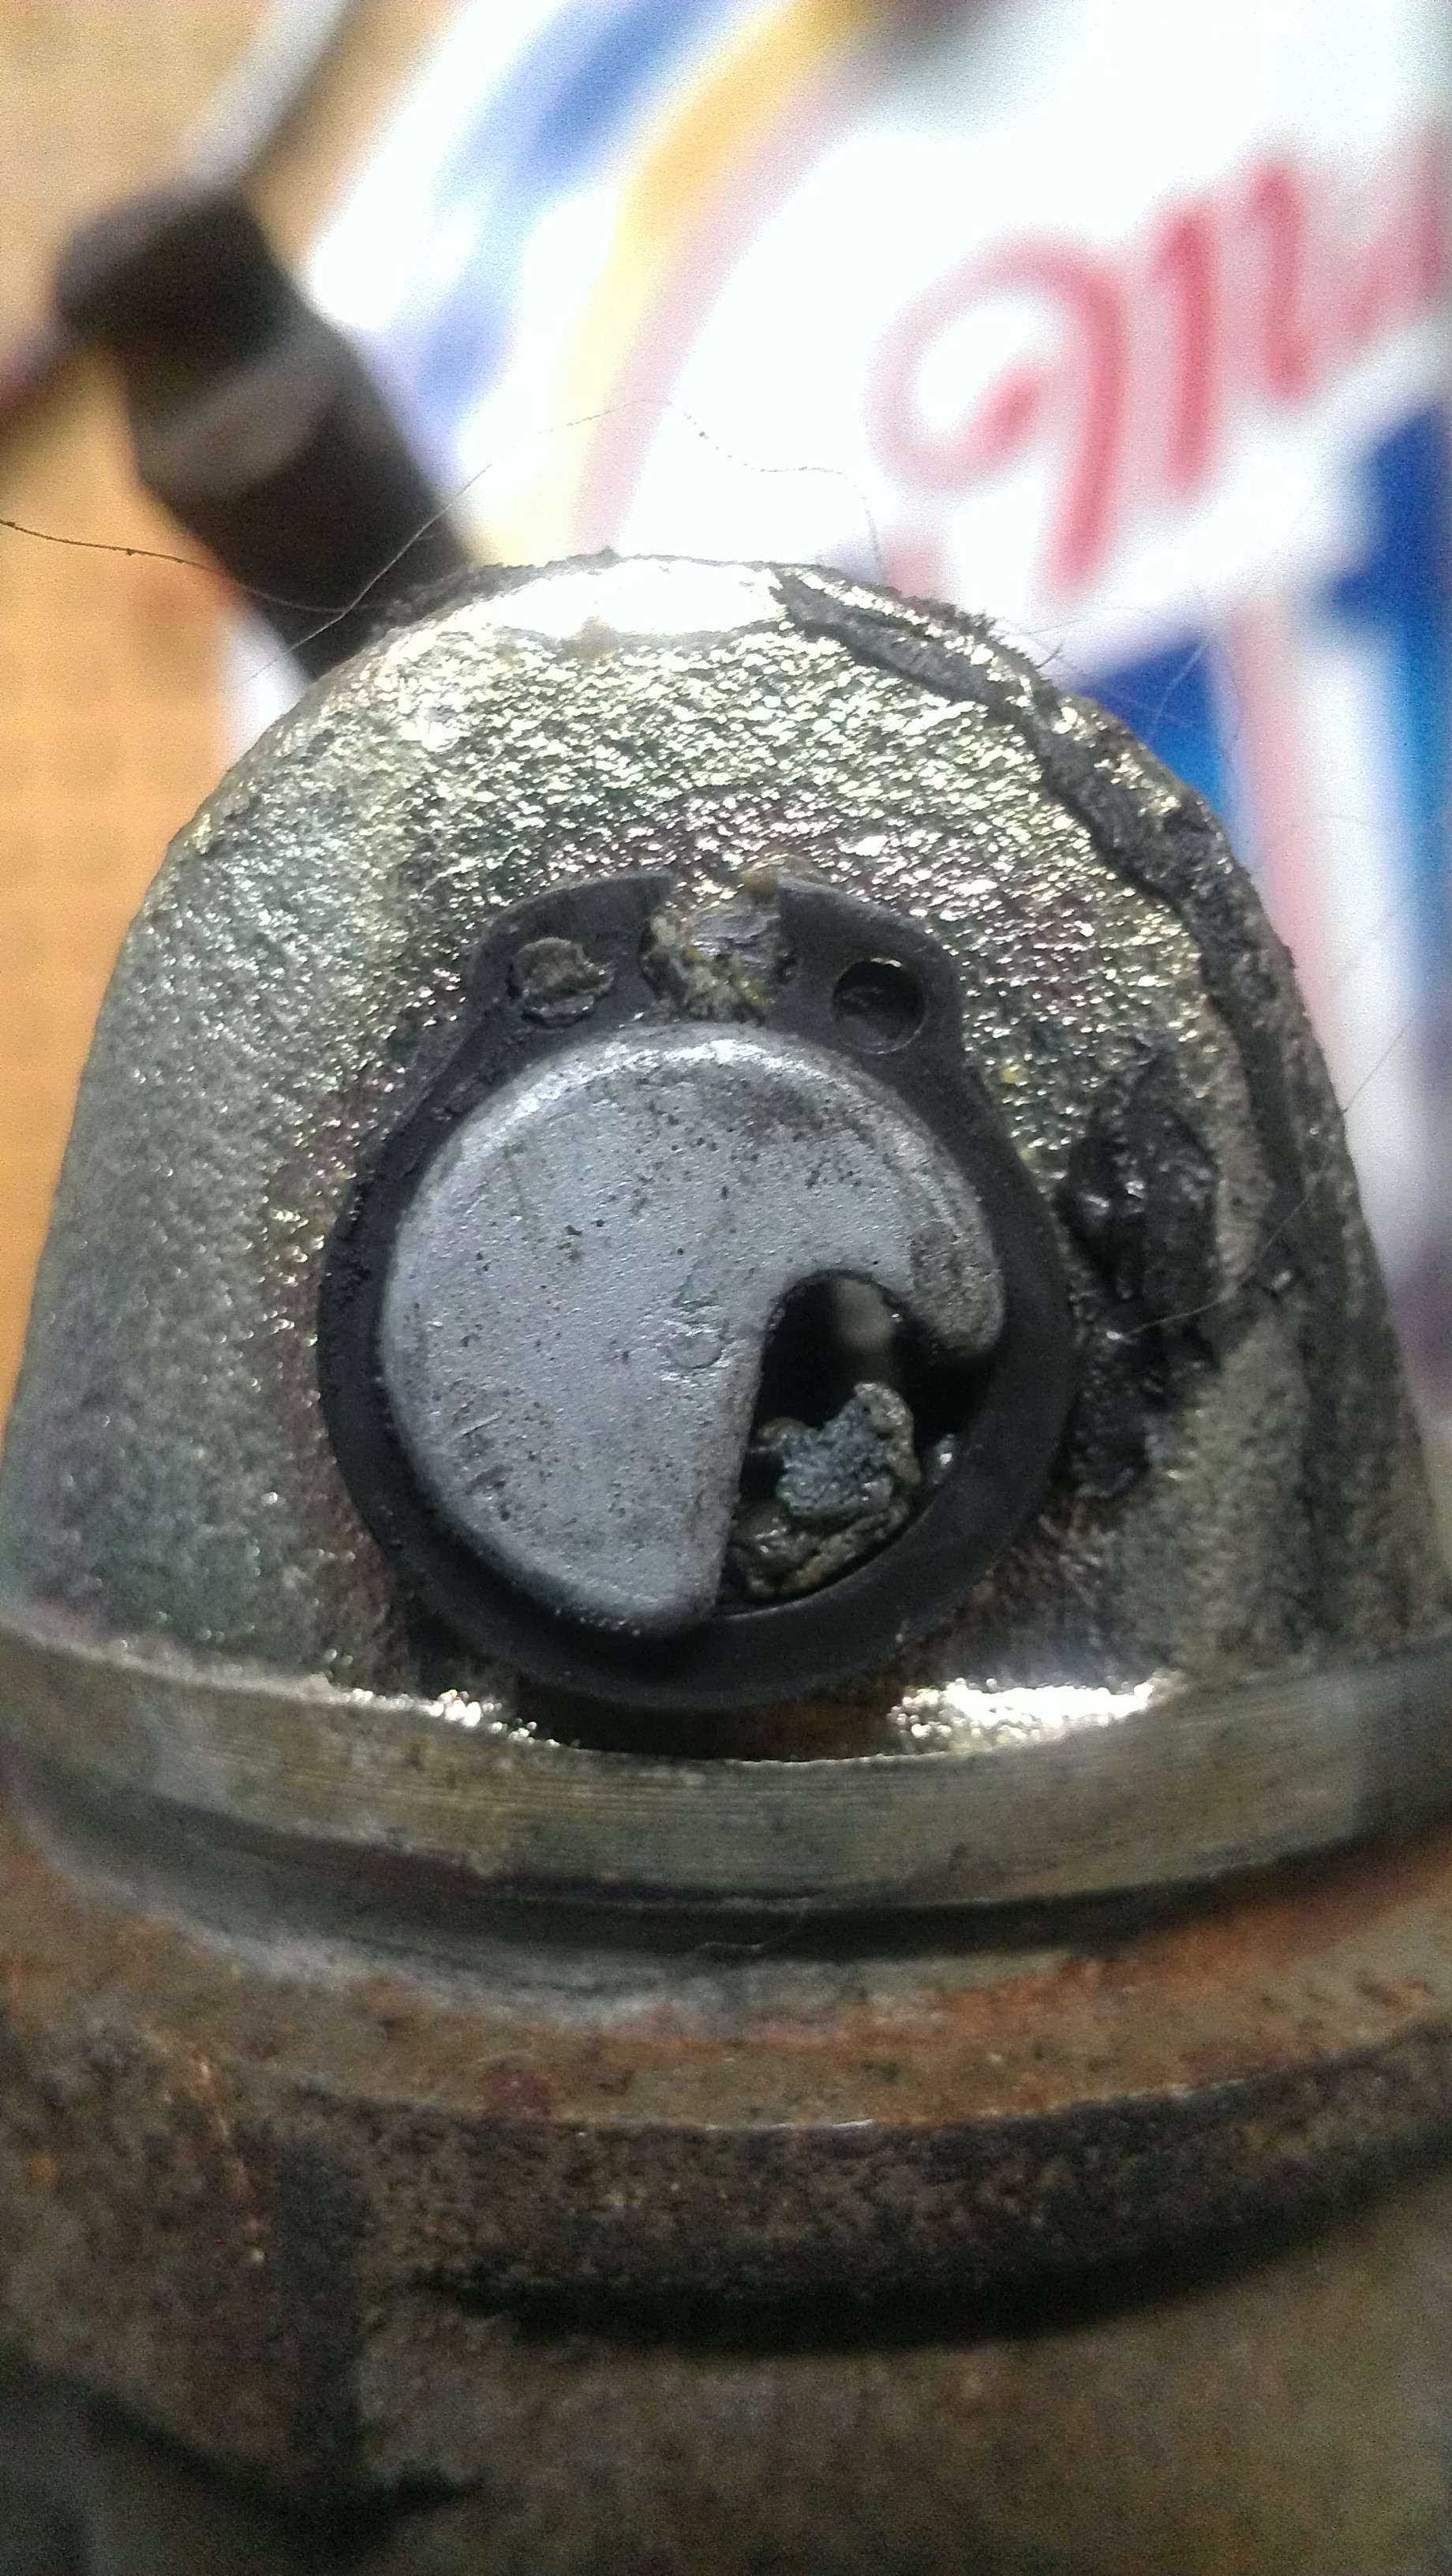
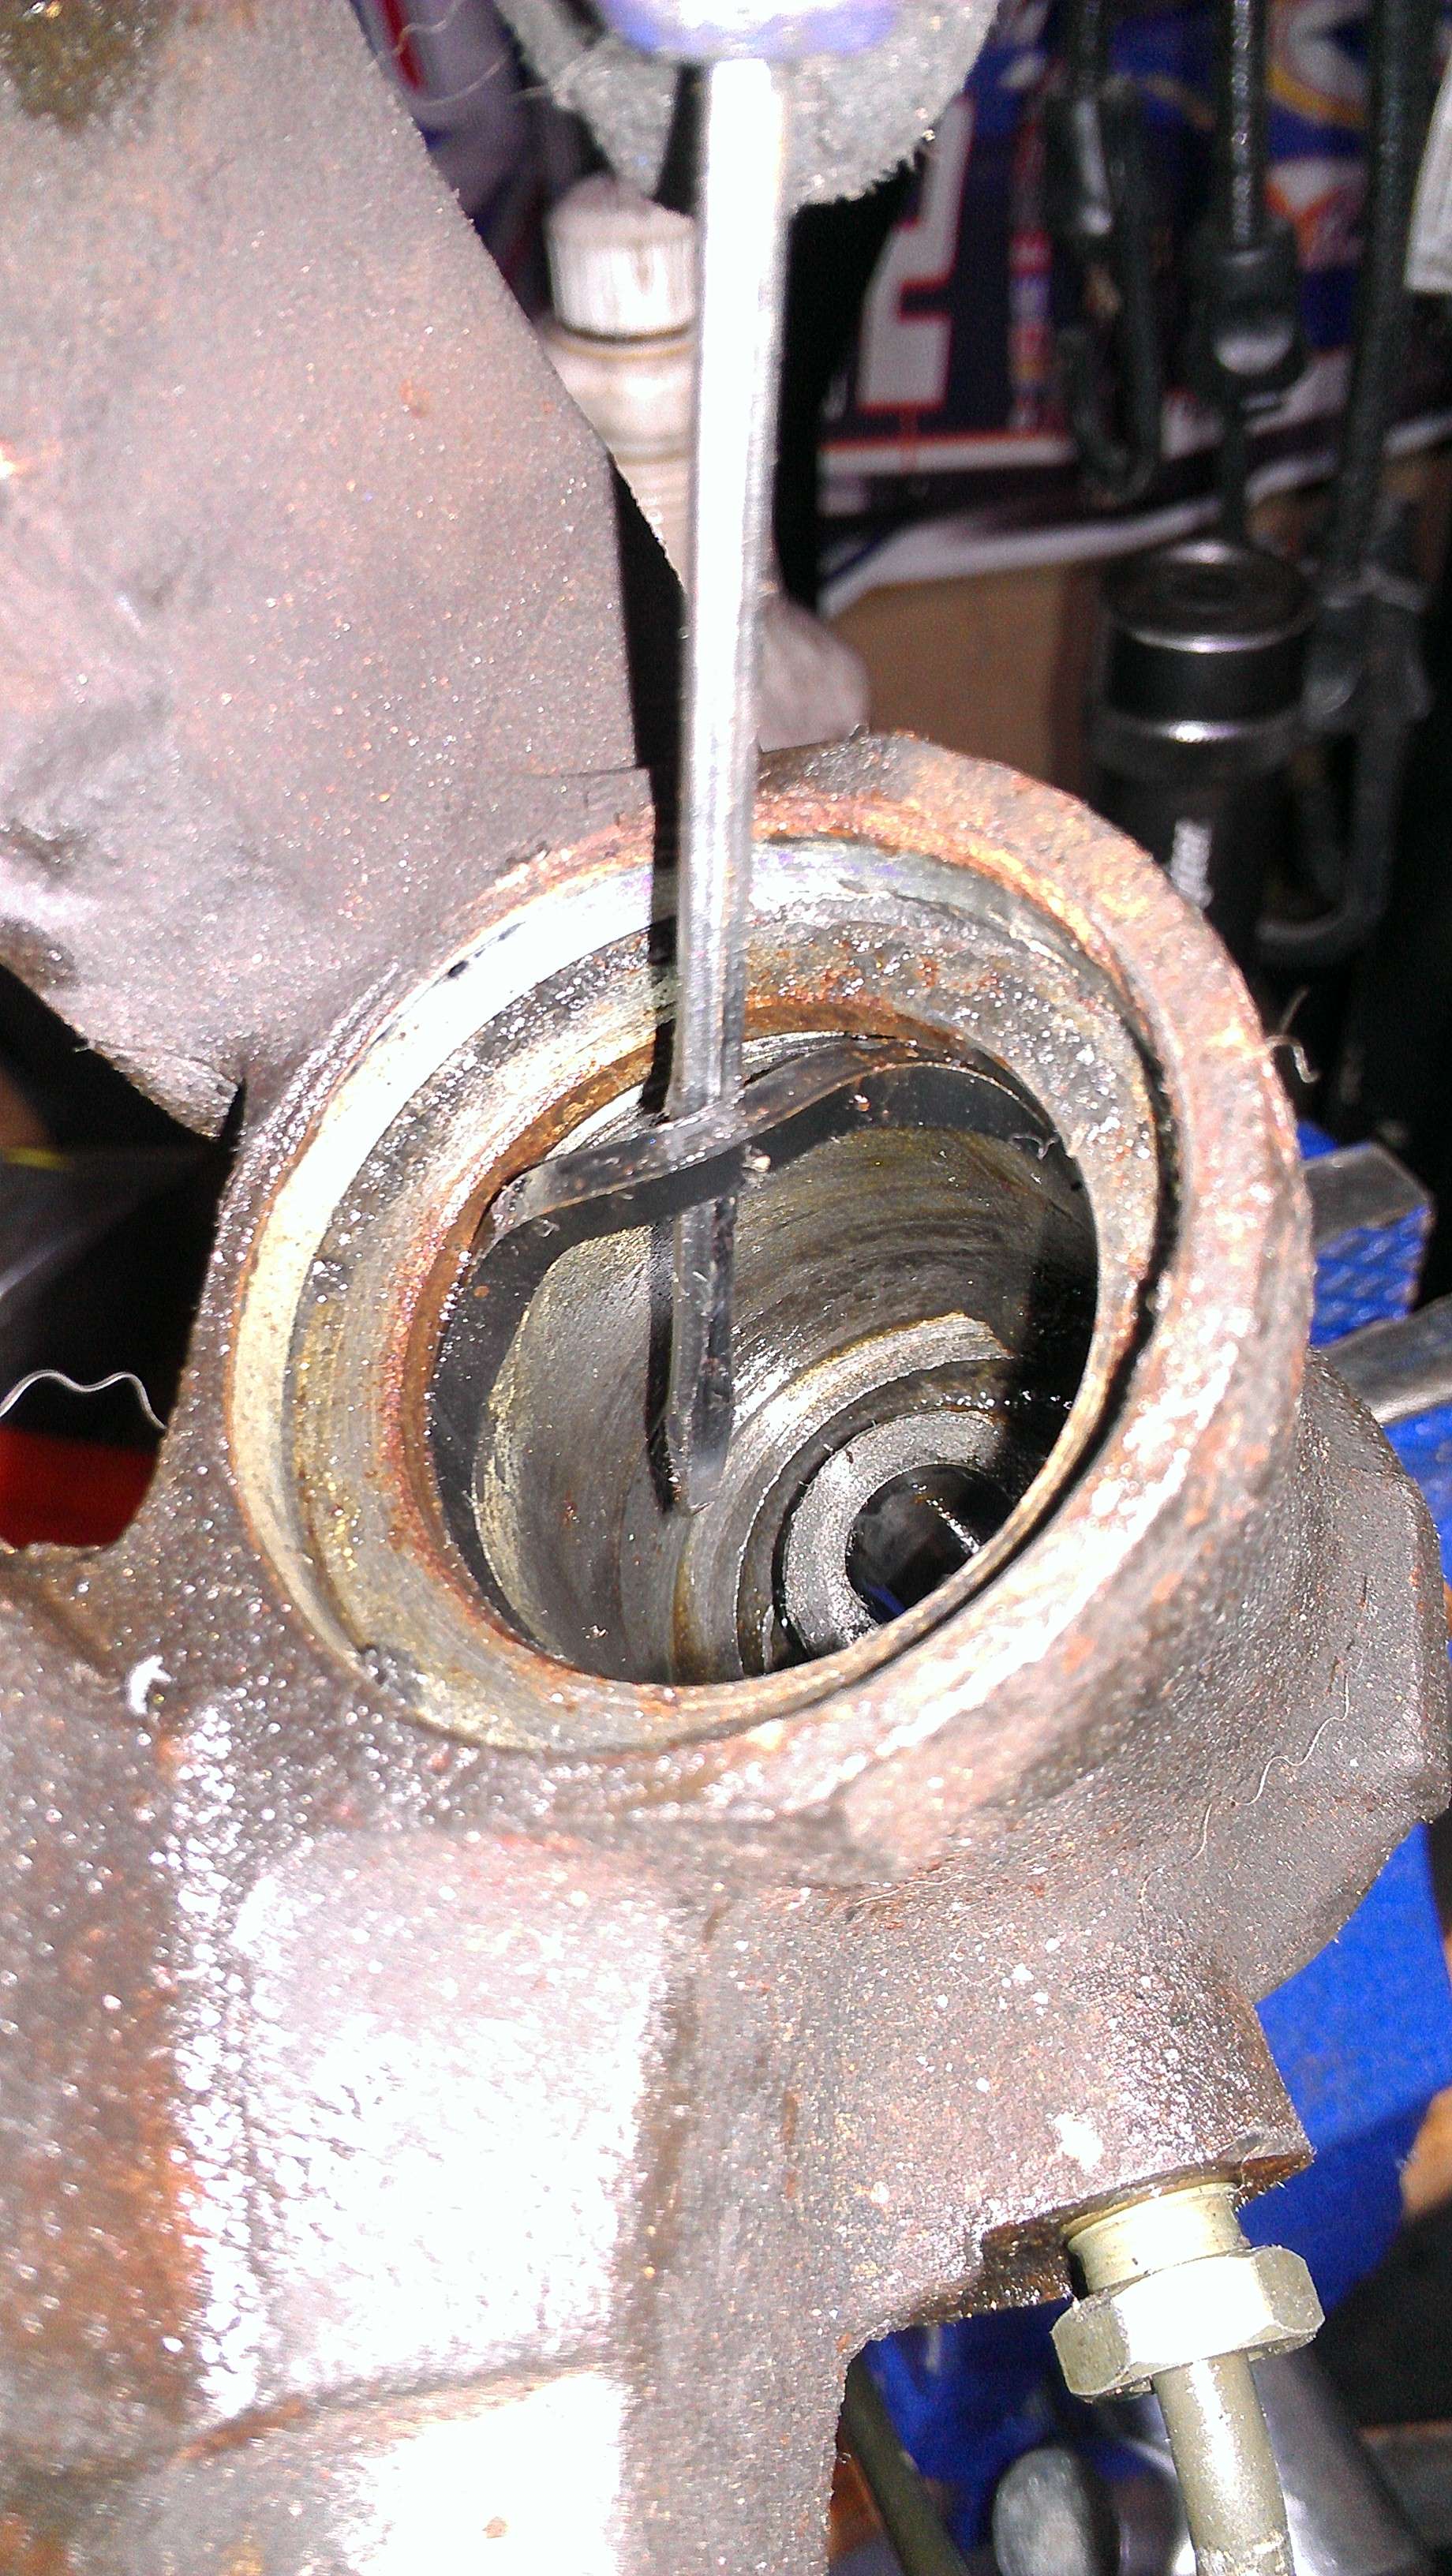
I didn't take any pictures of it, but that piece under the wedge screws out of the piston very easily. Just take a flat head screw driver and rotate it. Take care in doing this as you do not want to scratch up that surface.
Then when I was taking off he boots for the slider pin I was having a helluva time too. It seemed as if the boots had rusted into the caliper bores and would not come out. I finally ended up tear one of the slider bolt boots off and noticed my mistake. All of the boots on the rear calipers are crimped into a steel bushing that is then pressed into the caliper. You can see the rusted ring around the boots, which is the bushing. That said here are some pics of the tear down...
FU bolt!
Initial attempt at removing the boots on the slider pin. Notice the ring around the boot in the second pic.
Taking the slider boots off correctly...
Disassembling the park brake. This is after I removed the plastic cover, white zip tie, and rubber boot.
I didn't take any pictures of it, but that piece under the wedge screws out of the piston very easily. Just take a flat head screw driver and rotate it. Take care in doing this as you do not want to scratch up that surface.
CSVT#49
Addicted CEG'er
Here are the rest of the pics, which show removing the piston boot and seal.
blu_fuz
New Member Classroom vulture
I don't miss coating calipers one bit. Matter of fact, you will have a b-t-ch of a time trying to get parking brake assembly back together without marking up the coating. I stopped taking apart the ebrake before blasting. I would leave the rubber boot on to keep grit out of the mechanism, slide off the boot, mask off the butt end of the caliper for coating, then re-grease the mech and install the boot/zip ties like normal. The caliper doesn't heat up hot enough or long enough to damage the seal inside the back of the caliper.
KAOS_3.0
Hard-core CEG'er
Those t55's on the calipers are a PITA, I stripped three of them between two cars when I was building the coug from the wrecked contour.
Wound up sourcing grade 10 bolts with a 13mm hex head from NAPA. Problem solved!
Wound up sourcing grade 10 bolts with a 13mm hex head from NAPA. Problem solved!
CSVT#49
Addicted CEG'er
I don't miss coating calipers one bit. Matter of fact, you will have a b-t-ch of a time trying to get parking brake assembly back together without marking up the coating. I stopped taking apart the ebrake before blasting. I would leave the rubber boot on to keep grit out of the mechanism, slide off the boot, mask off the butt end of the caliper for coating, then re-grease the mech and install the boot/zip ties like normal. The caliper doesn't heat up hot enough or long enough to damage the seal inside the back of the caliper.
I'm not going to be powder coating the end of the caliper that is going to be covered by the boot. There really isn't a point since it won't be visible. I will powder coat the lever arm, but again just the portion that is visible. The calipers have ~160k on them so I wanted to rebuild them with new seals and boots anyway. So I'll just be masking/plugging all the ports when I coat it. Only point where I'll have to be careful about the coating is when I re-install the park brake spring onto the arm.
Those t55's on the calipers are a PITA, I stripped three of them between two cars when I was building the coug from the wrecked contour.
Wound up sourcing grade 10 bolts with a 13mm hex head from NAPA. Problem solved!
Yup, I'll be replacing the T55 screws with hex head bolts when I put them back on the car.
Pole120
Addicted CEG'er
This is why your an awesome guy Mike, because you're not a dick when people question you and/or try to give suggestions...
...not like that Pole120 guy.
Last edited:
elraido
I kant speel
update!
Pole120
Addicted CEG'er
update!
Patience!
blu_fuz
New Member Classroom vulture
I'm not going to be powder coating the end of the caliper that is going to be covered by the boot. There really isn't a point since it won't be visible.
I didn't say coat the area under the boot. The line "you will have a b-t-ch of a time trying to get parking brake assembly back together without marking up the coating" was saying that the coating on the caliper body (not in the booted area because you don't coat there) will be marked up from you trying to wrench that ebrake assembly back into the caliper. You can't do it by hand, you need a big channel locks pliars.
Just mentioned it for future info if anyone reads this. You can leave the ebrake mech alone, leave the ebrake boot on during blasting, pull the boot and mask during coating, and the mech and seals will be fine. Just re-grease the mech when finished.
elraido
I kant speel
Pole120
Addicted CEG'er
2 years isn't long enough?
Perfection takes time. I just needed to give you crap.
CSVT#49
Addicted CEG'er
...You can leave the ebrake mech alone, leave the ebrake boot on during blasting, pull the boot and mask during coating, and the mech and seals will be fine. Just re-grease the mech when finished.
Since you can't buy the boot I didn't want to risk blasting it and damaging it. So I've opted to just cover the area with another means.
2 years isn't long enough?
It took me 6-7 months just to work on my cam situation with Mountune.
Perfection takes time. I just needed to give you crap.
Exactly.
However for the update... Still working on the subframe situation. Shipping has become more of an issue that it should have, paritially because the ATI subframes are coming from an individual rather then a company because the division was killed in 2005. Haven't been able to work on the car for a couple weeks because of some problems with the dogs having to go into the vet a lot lately that and work has been crazy since I am taking vacation from the 14th to the 2nd and need to finish up some things before leaving.
That said I don't have anything more going on with the interior so I think I can start reinstalling the carpet, center console, etc. Just need to make sure I have the wiring routed for my fuel pump controller, HKS boost controller, and gauges first. However I probably won't get to that until the 15th.