Savior
CEG'er
HVAC LED How-To
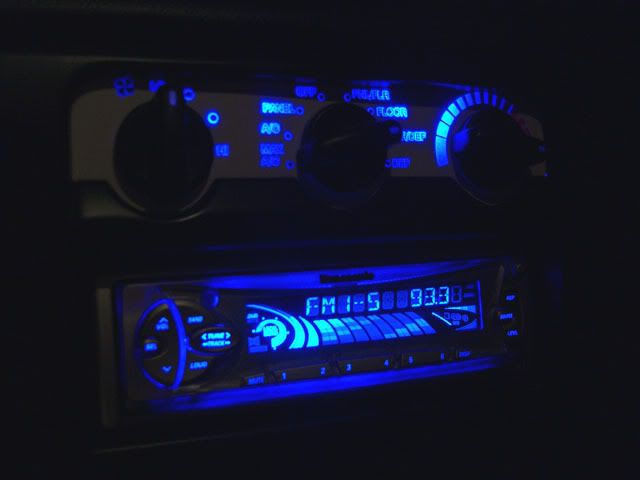
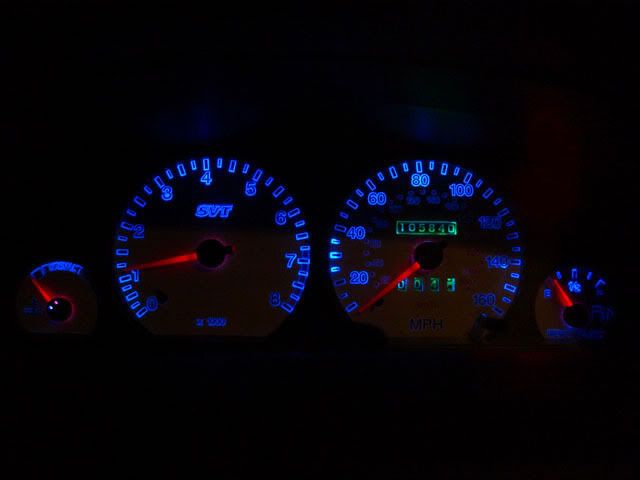
There is so much controversy and confusion about which size of LED to buy that fits into the little plastic bulb-cradles in the back of your HVAC panel.
Well, the incandescent bulbs that come stock are #194, just like the floorboard courtesy lights. I bought these LED replacements from AutoLumination.com for about $7 apiece, and they did not fit; the bases were just a little too big around for the HVAC sockets, as can be seen in the first pic. And the flat part where the metal contacts reside are a little too long. A pity, because these are great LEDs; wonderful, strong coloration and a wide angled lens for widespread illumination. So I improvised, and with great success.
I have made this simple, photo-guided How-To in order to solve this issue once and for all.
In this tutorial, we are going to both sand down and shorten your new bulbs in order to make them fit snugly in place. You will need four things:
-Your two new bulbs
-Sandpaper (I used 3M 160 grit, but this is probably not that important)
-A power drill/screwdriver that can open wide enough to accept the clear end of your bulbs (most probably can).
-Wire cutters
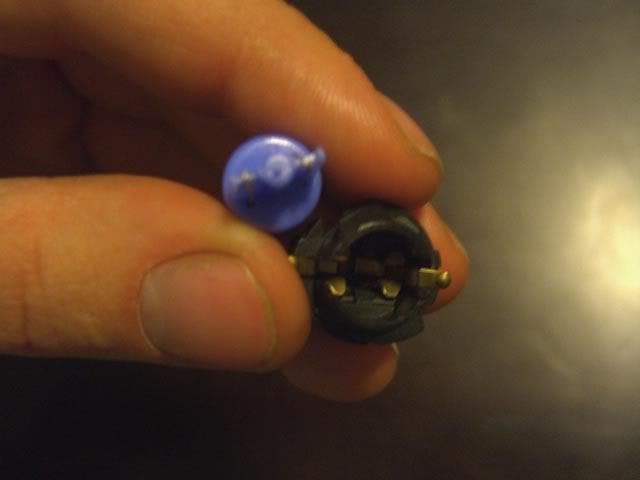
Here, we see the new LED bulb, unmodified, next to the HVAC socket.
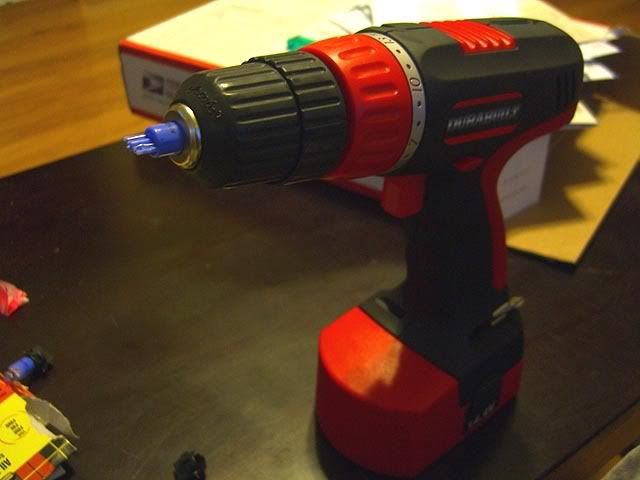
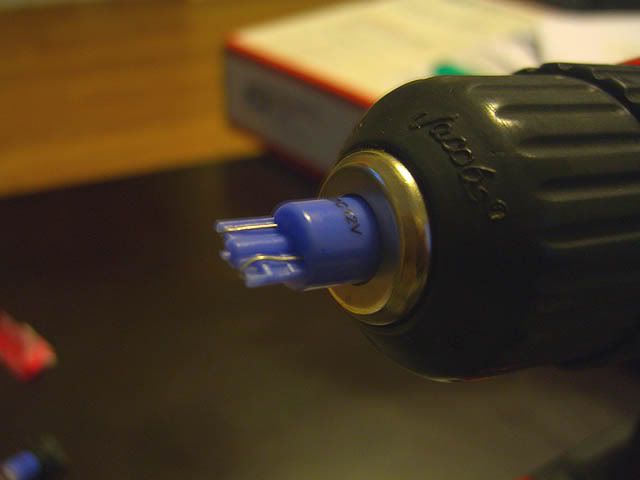
To sand the bulb in a radial manner, I simply inserted the clear end into the power screwdriver/drill where you would normally insert the drill, making sure to leave plenty of the base of the bulb exposed, and also making sure to chuck the drill down firmly onto the tip of the bulb, but not so tight that it would break or damage it. This doesn't seem to be a big issue, as the plastic seems pretty tough and my bulbs' lenses came out perfect and unscratched.
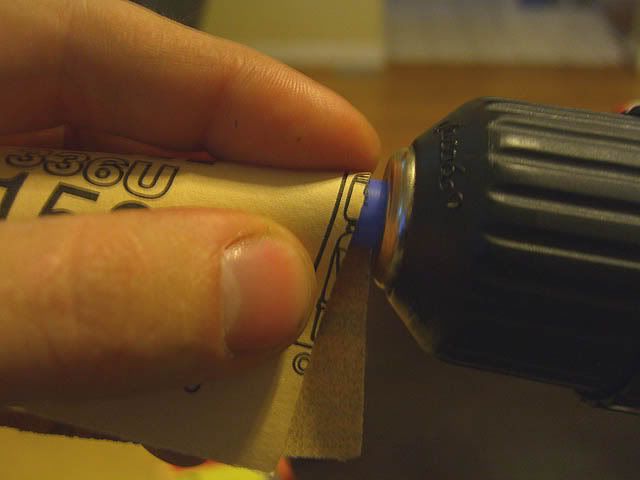
Once the bulb was secured in the drill, I used my forefinger/thumb to hold a piece of the sandpaper, folded, over the bulb's base, as seen below.
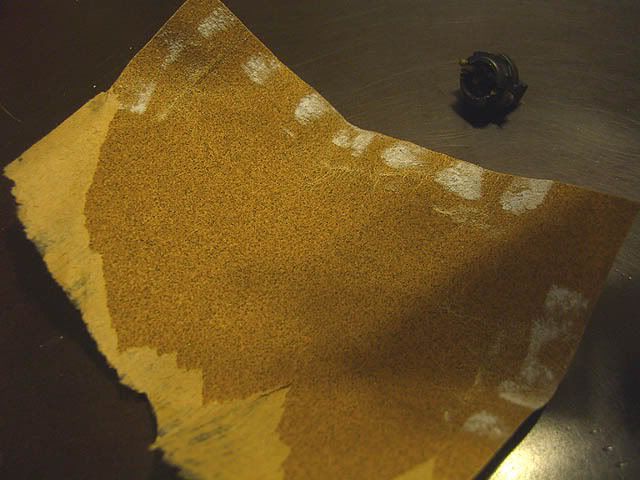
At first, while using the other hand to operate the drill, I gently held the sandpaper there as the bulb spun, and gradually increased the pressure betwen my fingers. You must keep stopping the drill moving the sandpaper around, as it gets dull and full of plastic dust quickly, as seen in the following image:
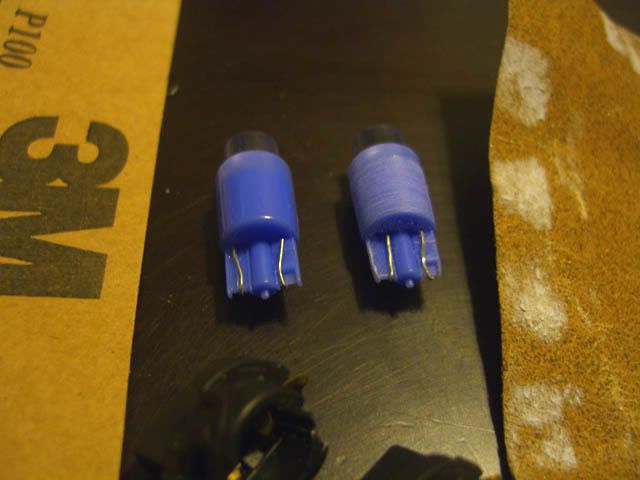
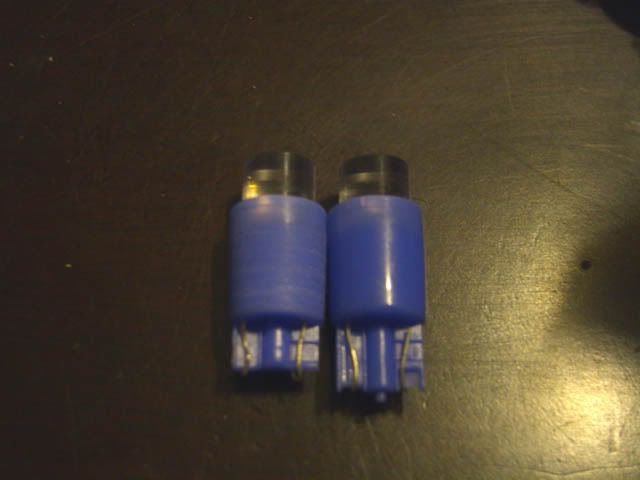
Sand the bulb in this manner until the base's circumference is about as big around as the contact tab is wide. Below is a picture of the two bulbs next to each other, the unmodified one on the left and the sanded one on the right. The difference is not huge; as you sand, keep trying to place the socket over the bulb, until it fits without having to apply a lot of force; you don't want an oversized base that will widen the socket or it might not fit into the holes on the back of the HVAC panel.
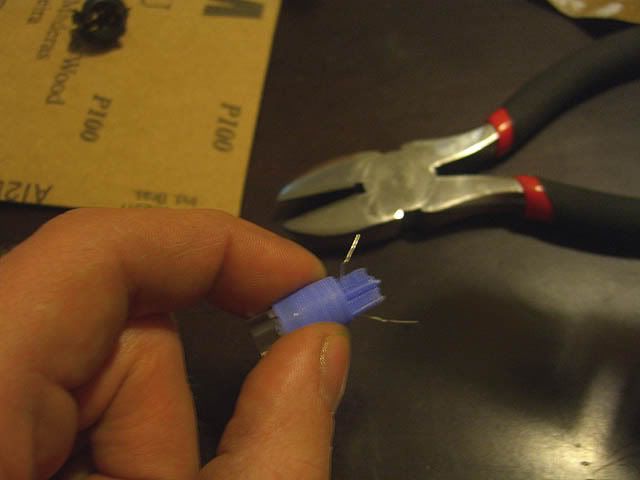
Now for the last modification: Making the contact tab shorter. All you have to do is bend the contact wires out straight to get them out of the way and expose the tab. Then, using the wire cutters, simply snip off about one third of the length of the tab. Then bend the contact wires back,cutting off a little bit of them if they are too long now.
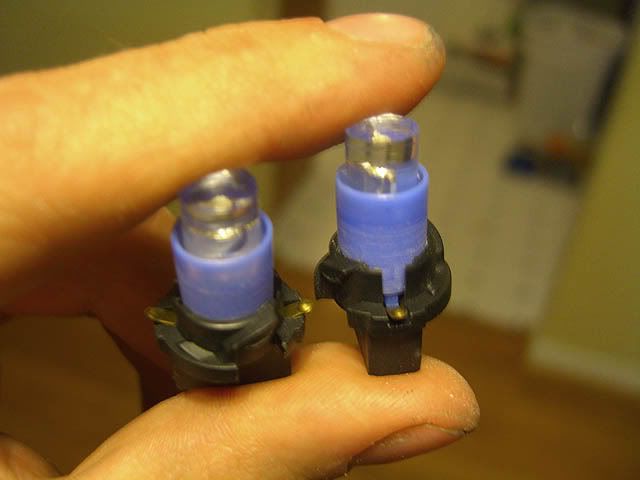
On the left is the sanded, shortened bulb. On the right is the original. Go ahead and modify the other bulb.
Now you have two custom-fit LED bulbs for your HAVC panel.
There is so much controversy and confusion about which size of LED to buy that fits into the little plastic bulb-cradles in the back of your HVAC panel.
Well, the incandescent bulbs that come stock are #194, just like the floorboard courtesy lights. I bought these LED replacements from AutoLumination.com for about $7 apiece, and they did not fit; the bases were just a little too big around for the HVAC sockets, as can be seen in the first pic. And the flat part where the metal contacts reside are a little too long. A pity, because these are great LEDs; wonderful, strong coloration and a wide angled lens for widespread illumination. So I improvised, and with great success.
I have made this simple, photo-guided How-To in order to solve this issue once and for all.
In this tutorial, we are going to both sand down and shorten your new bulbs in order to make them fit snugly in place. You will need four things:
-Your two new bulbs
-Sandpaper (I used 3M 160 grit, but this is probably not that important)
-A power drill/screwdriver that can open wide enough to accept the clear end of your bulbs (most probably can).
-Wire cutters
Here, we see the new LED bulb, unmodified, next to the HVAC socket.
To sand the bulb in a radial manner, I simply inserted the clear end into the power screwdriver/drill where you would normally insert the drill, making sure to leave plenty of the base of the bulb exposed, and also making sure to chuck the drill down firmly onto the tip of the bulb, but not so tight that it would break or damage it. This doesn't seem to be a big issue, as the plastic seems pretty tough and my bulbs' lenses came out perfect and unscratched.
Once the bulb was secured in the drill, I used my forefinger/thumb to hold a piece of the sandpaper, folded, over the bulb's base, as seen below.
At first, while using the other hand to operate the drill, I gently held the sandpaper there as the bulb spun, and gradually increased the pressure betwen my fingers. You must keep stopping the drill moving the sandpaper around, as it gets dull and full of plastic dust quickly, as seen in the following image:
Sand the bulb in this manner until the base's circumference is about as big around as the contact tab is wide. Below is a picture of the two bulbs next to each other, the unmodified one on the left and the sanded one on the right. The difference is not huge; as you sand, keep trying to place the socket over the bulb, until it fits without having to apply a lot of force; you don't want an oversized base that will widen the socket or it might not fit into the holes on the back of the HVAC panel.
Now for the last modification: Making the contact tab shorter. All you have to do is bend the contact wires out straight to get them out of the way and expose the tab. Then, using the wire cutters, simply snip off about one third of the length of the tab. Then bend the contact wires back,cutting off a little bit of them if they are too long now.
On the left is the sanded, shortened bulb. On the right is the original. Go ahead and modify the other bulb.
Now you have two custom-fit LED bulbs for your HAVC panel.