First, you have the right idea. Learn all you can and be as prepared as possible.
Second, allow for the possibility that you won't be able to finish it in one day. Be prepared to finish the fronts and start on the rears. There is a lot of work to do. You may want to paint the calipers on still a different day, after you finish the brake upgrade.
Some highlights. Don't attempt the job without good grinders. A small 4" or 4 1/2" one to trim the spindles. A large one, seems like I borrowed a 9" one to open the throat of the rear brackets.
Another way to open up the throats would be with a milling machine if you have access to one. My guess is that about .065" off each inner face would give you room that you would not even need to machine the rotors. Once you get started with grinding the throats you will see the wisdom of this suggestion.
You also need a drum sander to open up the hat area of the rear rotors or (my preference) slightly reduce the outer diameter of the rear hubs.
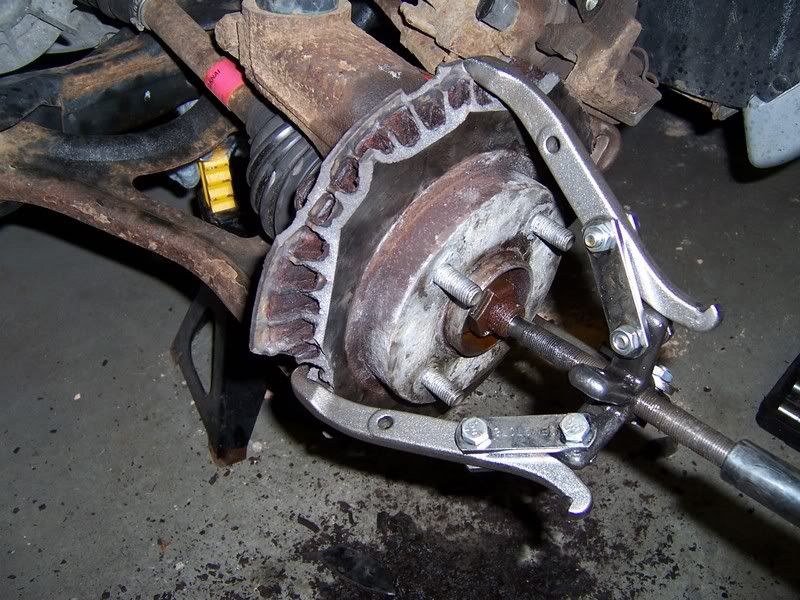
So, my suggestion is to start with the fronts. Do one side at a time. Pull off the caliper, the caliper bracket (bridge), and the rotor. Trial fit the new brackets and you will see where the spindle needs trimming. Trim it enough
that there is good clearance for the fasteners without cocking them off to the side. It has been a while so I may not be clear on the whole process, but I had an early kit and had to enlarge a mounting hole in the spindle. The later kits may have studs that better matched the holes. Check your instructions and be prepared to drill the hole oversize if needed.
When you push the caliper piston into place, open the bleed port so you don't force fluid backward. You could damage the ABS hydraulic control unit or master cylinder if you push dirty fluid backward into them.
You will need to remove the rear calipers, caliper brackets, and rotors for access to modify things for the rears.
On the rears, the rotors won't fit onto the hubs unless you either open up the inner hat area of the rotor or reduce the outer diameter of the hub. I prefer the hub. To reduce the size of the hub, spin the hub by holding one of the studs and rotating the hub while holding the spinning drum sander against the edge of the hub. This will evenly remove metal. Stop as needed to test fit the rotor. You need to remove enough that the rotor fits with some clearance. Enough to rock the rotor. Too tight and it will cause fit problems when the rotor heats up, probably similar to warped rotors.
Once you get rotor fitment. move on to trimming the spindle. Test fit things to see what needs to be trimmed. The rears require more trimming than the fronts. You need some trimming to make a test fit. You will not be able to do the final test fit until the factory caliper brackets are opened up. You won't be able to determine you have trimmed the spindles enough until you have opened up the brackets. You may need to go back and forth to dial it in.
This may be the point you reach when you fold things up for the day. Put the stock rear parts back on and wait for the next weekend.
Like I said before, if you have access to a machine shop, you will do much better milling out the throats of the rear brackets to clear the thicker rotors. You might consider finding a pair of rear brackets and getting them machined before starting the job.
If you grind out the throats of the rear brackets. find a 9" grinder and remove the guard. Mount it in a vice. Don't do this by yourself. Have a friend help. Use heavy leather gloves. Remove metal evenly from both sides, one side at a time. If you do it evenly, you can test fit the rotor so that the bracket can be fit over the rotor. You will not be able to final test fit until the rotor is mounted and the bracket is test fitted in place.
When it comes to final fitting of the pads, some have posted that the have needed to remove the shims from the pad backing plates for clearance, or remove a little from the pads. I re-used the lightly used front and pads and had no trouble.
Its getting late. Those are some of the highlights. Read the instructions carefully. Don't rush. When all is said and done, IT IS WORTH IT!