
svT-Rex
CEG'er
Long story short: Two weeks ago, replaced battery because when I took out my original and put my wife's battery in, the car started. The car was just clicking the solenoid on the starter so I charged the battery for 8 hours and still no crank, just click. The wife's battery was a little taller than the Contour battery so the stretch on the positive cable must have made a better connection, which in turn started the car. This made me believe that the battery was dead.
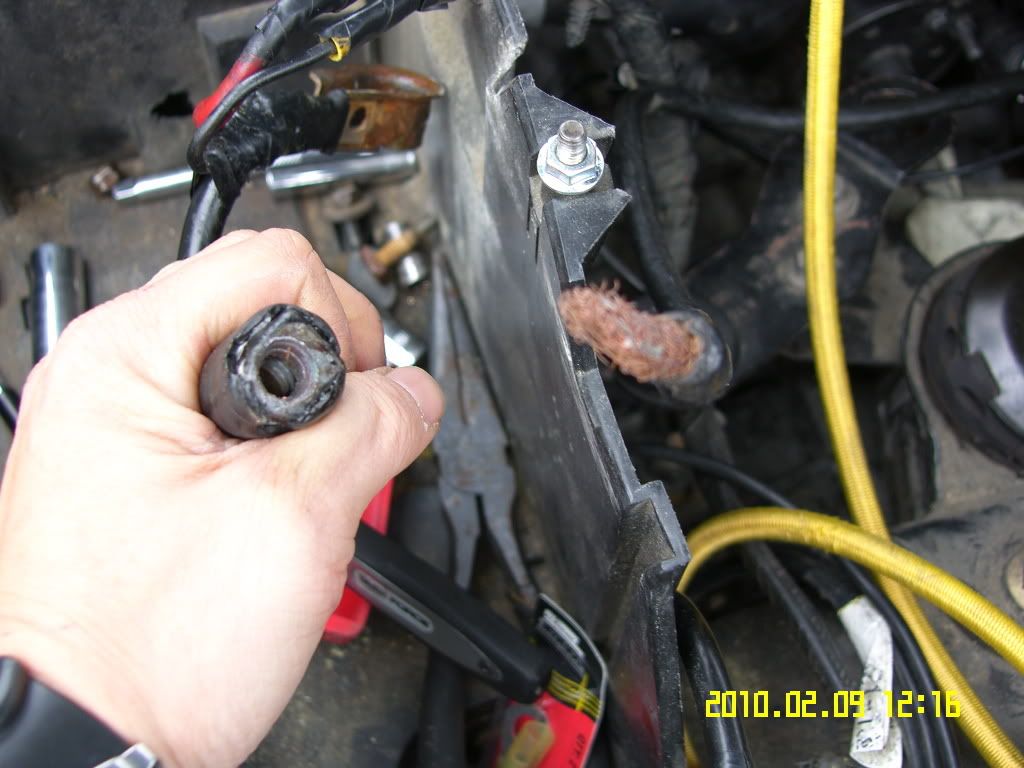
One week later, the same thing happens. So I get battery tested and she is perfectly charged, but the crank test only showed 60 amps instead of 200+. Noticed a taped up "bulge" on the positive cable and undid the tape. I found one of those cables where you connect the cut end of the bad end into and tighten down the lock screw. Well the screw was loose and the cable pulled apart, hence the no start.
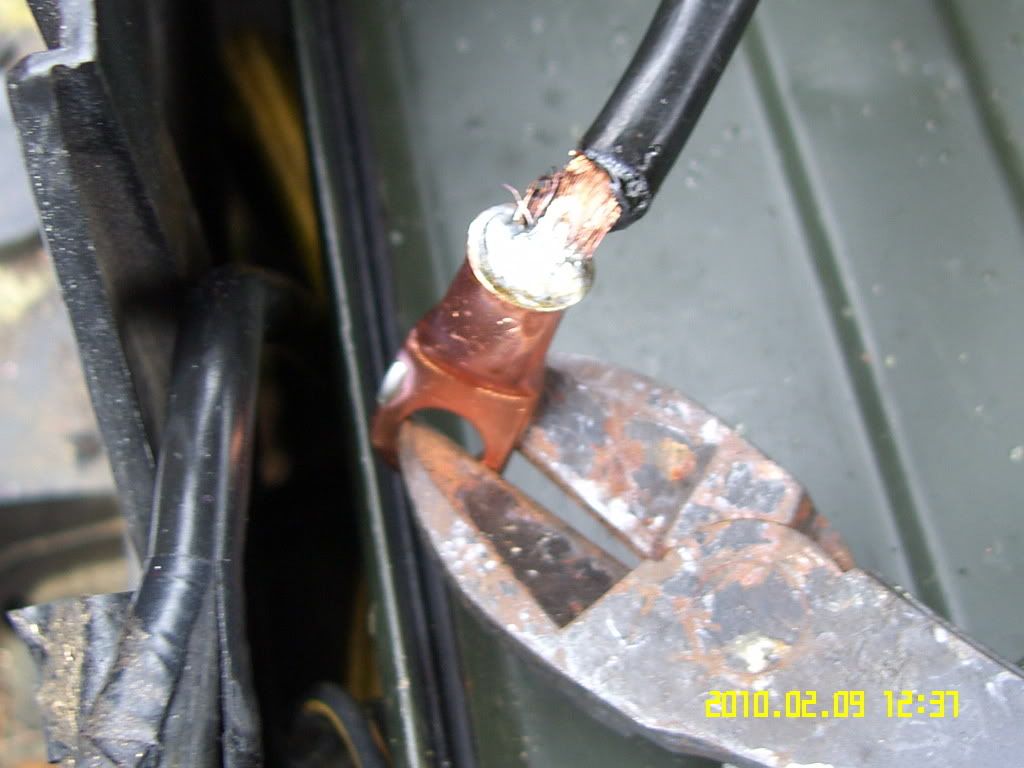
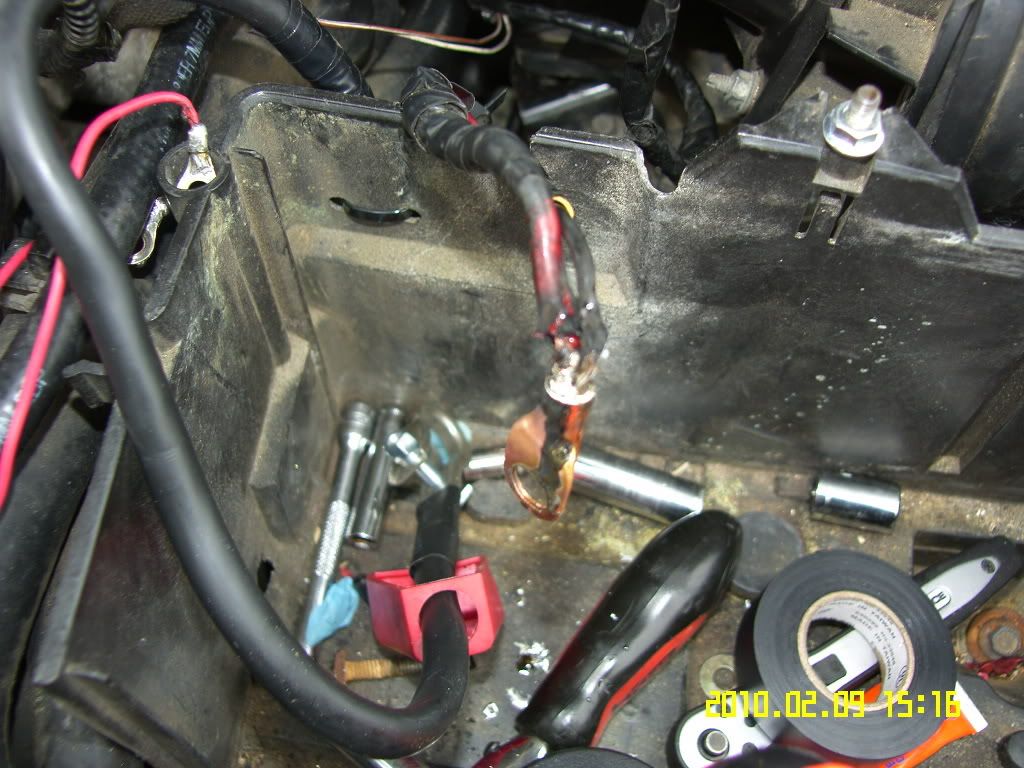
I got some 2 gauge cable lugs and a 19 inch length of 2 gauge cable with a terminal on one end and went to town. first I cut a portion of the cable to the starter solenoid off for cleanliness and soldered on the 2 gauge lug. Then I connected the lugged end onto the lugged end of the new cable and secured it tightly with a M10-1.50 bolt and nut. Put a ton of di-electric grease all over the connections and taped the crap out of it.
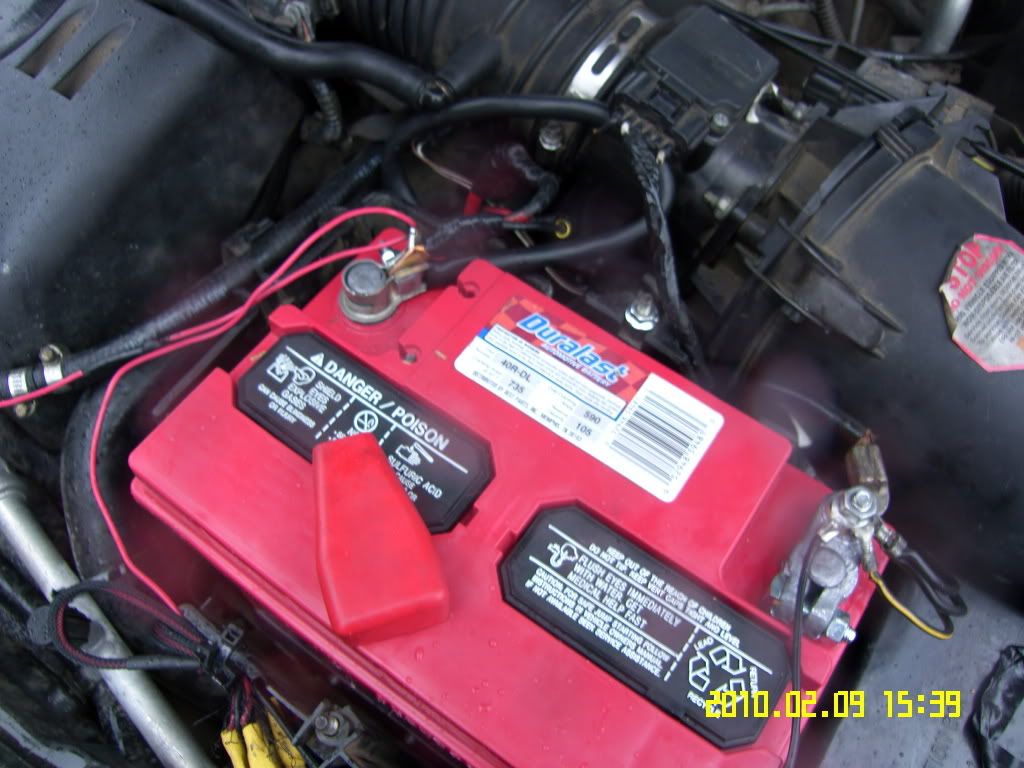
There are also two smaller battery cables that go to the fuse box so I cut off their heads and joined them into a 4 gauge lug and soldered them together. Hooked it up to the new terminal and bam! Starts right up and no more current problems to energize the starter.
Pics below with descriptions on top of pictures.
This is the cut end of the + cable to the starter solenoid that goes into the other end of the cable and secured by a lock screw. The soft lead threads were stripped so it was a very loose connection.
2 Gauge cable lug with some cut pieces of solder at the bottom

This is the lug soldered onto the end of the cable to the starter solenoid.
This is the two cables connected with the large M10-1.50 bolt and nut. It is very tight and tons of di-electric grease was put on for reliable performance and corrosion protection. I wrapped it really really well with electrical tape. Not the most beautiful looking connection but it works great.

This is the two other power cables to the fuse box soldered to the 4 gauge cable lug.
The final install with new terminals.
One week later, the same thing happens. So I get battery tested and she is perfectly charged, but the crank test only showed 60 amps instead of 200+. Noticed a taped up "bulge" on the positive cable and undid the tape. I found one of those cables where you connect the cut end of the bad end into and tighten down the lock screw. Well the screw was loose and the cable pulled apart, hence the no start.
I got some 2 gauge cable lugs and a 19 inch length of 2 gauge cable with a terminal on one end and went to town. first I cut a portion of the cable to the starter solenoid off for cleanliness and soldered on the 2 gauge lug. Then I connected the lugged end onto the lugged end of the new cable and secured it tightly with a M10-1.50 bolt and nut. Put a ton of di-electric grease all over the connections and taped the crap out of it.
There are also two smaller battery cables that go to the fuse box so I cut off their heads and joined them into a 4 gauge lug and soldered them together. Hooked it up to the new terminal and bam! Starts right up and no more current problems to energize the starter.
Pics below with descriptions on top of pictures.
This is the cut end of the + cable to the starter solenoid that goes into the other end of the cable and secured by a lock screw. The soft lead threads were stripped so it was a very loose connection.
2 Gauge cable lug with some cut pieces of solder at the bottom
This is the lug soldered onto the end of the cable to the starter solenoid.
This is the two cables connected with the large M10-1.50 bolt and nut. It is very tight and tons of di-electric grease was put on for reliable performance and corrosion protection. I wrapped it really really well with electrical tape. Not the most beautiful looking connection but it works great.
This is the two other power cables to the fuse box soldered to the 4 gauge cable lug.
The final install with new terminals.