• Welcome to the Contour Enthusiasts Group, the best resource for the Ford Contour and Mercury Mystique.

    You can register to join the community.

Another CEG'r doing a MPV 3.0 swap

Ignitioncoilrelocationpic.jpg
Photo Credit to Striker2

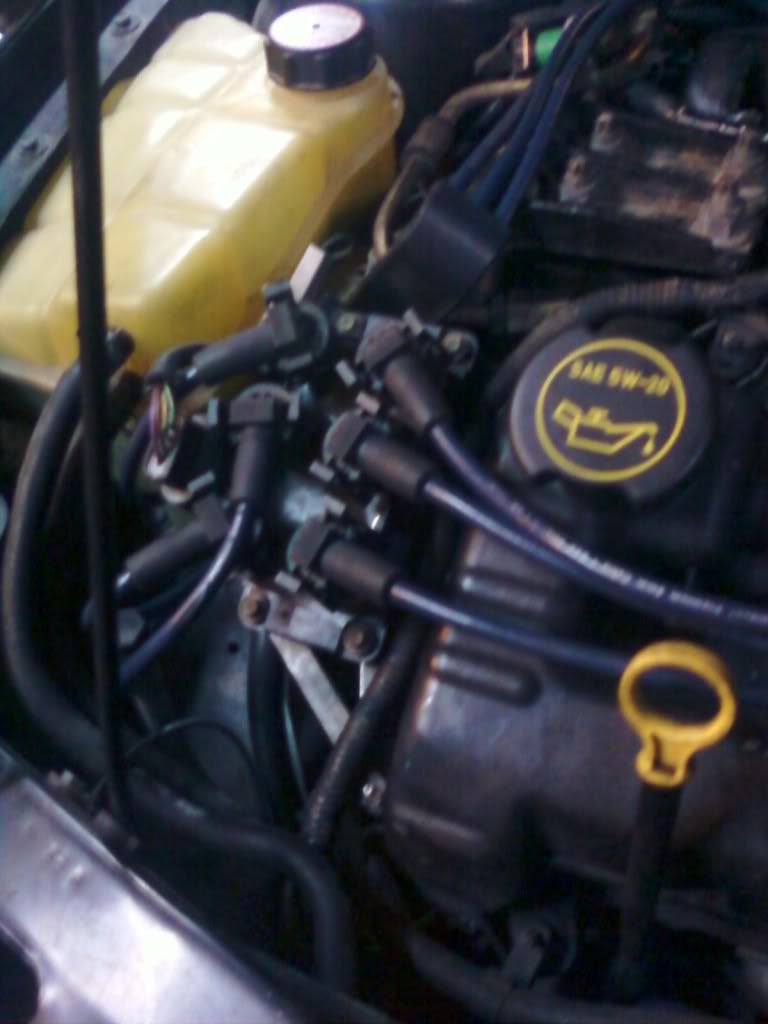
His instructions - just use some 1/2" wide steel bar stock cut to length and drilled holes in the appropriate places to mount it to the 2 valve cover studs. it will take some work to get it located so that the plug wire for cylinder 6 reaches, but is doable.


So today i decided to take a piece of aluminum plate grind it in many places to make a "coil pack plate" that mounts into the same location as the one pictured above ... it got late after i finished it and i had a lot to do today .. " drop child off at school, get alternator rebuilt, find a new clutch, pick up child from school and then go pick up alternator" so i didnt get started on it till later .. anyway i work tomorrow so i will only get to plat with it for an hour or so before work .. but I'll post pics. later ..
 
Spoke with Sam (svttour) earlier just wanted to confirm this is the correct routing info for the MPV 3L ... sorry about my talent .. it's all i could do withoug getting on my laptop and doing this on google sketchup .. prolly would have been nicer but you should get the idea ..

MPVRoutinginfo.jpg
 
if your wondering why im quoting you on here it's because this info is useful to me and i want it in my thread because i might not be able to search for it "in the moment" lol

which PCV system are you using, the newer 04+ 3L or the stock 2.5? if you are using the newer 3L setup then the rear valve cover needs to go to the intake manifold (that big port on the back just behind the TB in picture 4 would be a good place). the front valve cover must go to the intake tube between the MAF and TB as its a source of fresh air for the crankcase and should not have a vacuum. you then need to hook up the corrugated hose in your last picture to the intake manifold, as well as the brake booster (the 2 smaller ports on the bottom in picture 3 would be good for those). then use the stock 2.5 vacuum tree piece (the long one that goes into the top of the manifold and the smaller hoses come from) in the top port (picture 2). just pull off the rubber piece, cut it to the right length, and reinstall the rubber piece. then hook up the things that use the smaller vacuum hoses, FPR/FPS, EVAP purge valve, HVAC, EGR solenoid (if you didnt delete EGR).

Forgot to add that I am running the 04 3L valve covers. The port in pic 4 is for the IAC, so that needs to go to the intake between the TB and MAF. That leaves the rear valve cover hooking up to the large port in pic 1. As mentioned the front valve cover needs to go between the TB and MAF as well. That leaves the brake booster hooking up to pic 2, and pic 5 and the vacuum tree hooking up to pic 3. I had everything hooked up completely wrong on the stock 3L uim, and it ran just fine. I guess I got some work ahead of me. Thanks everyone for helping, this was really irritating me.

Just thought I'd update this thread for everyone...

I've done some digging of my own in preparation for my own ST220 UIM install. I downloaded some helpfully programs, Mircocat (ver2010) and Ford TIS (ver2004). Ford ITS is bascially the exact same thing as the Ford Service CD many of you have, but it is for Ford Europe. Microcat is basically a dealer parts catalog which shows exploded views of different systems and allows you to determine Ford Europe part numbers for any part on the car. In doing this I have identified 3 of the 4 ports on the ST220 and what they connect too. See snap shots below.

First this picture helped a lot as it's an actual Mondeo ST220. This I found over at STdriveRS.co.uk
installedst220.jpg


Here are my snapshots with comments

ports3described.jpg

ports1described.jpg


Also snap shots from Ford TIS/Mircocat...
brakeboosterline.png

pcvline.png

pcvrouting.png

vacuumlines.png


Also and added bonus... UIM installation details (I'll add all of this into a separate thread called ST220 UIM installation when I do mine)
boltsequenceremoval.png

torquesequencest220uim.png

Yea the vacuum line routing shown for the ST220 doesn't really help much...

mondeovacuumrouting.png


thanks for all the pics and quotes guys / gals ..
 
3L swap update... clutch installed pressure plate just needs to be torque correctly then the tranny goes on.. we for that.. I'm gonna tighten everything twice then drop her in... yay !!!!!
 
Double check ur harness for cracks.

x2 pulling the engine on my car TRASHED the harness. i had huge headaches and had many sensors short out and go bad because of it. cut all of the loom off and inspect the wires very carefully. repair any bad sections
 
x500 on the harness issues. This is why I'm building a complete new harness for my build. I've repaired my harness way to many times in the past and frankly I'm done with it. Do it right the first time and fix EVERYTHING when it's out.

Also as far as those lines go, from the classified add that I'm assuming you are aware of since you posted in it... those bottom two lines are now accounted for. The one goes to the EVAP solenoid valve and the other does in fact go to the fuel pressure regulator as can be seen below...

 
Now on the MPV UIM all the ports are a lil different .. the vac line to the fuel pressure regulator from mazda goes from the FPR to the back of my uim .. anyway i'll be posting pics tomorrow i'll post pics as i go .. as for the 2 lines coming from below the uim they were "T'd" together and i have the plan to hook the T connector to the accordion tube coming off of the fire wall .. when i got the MPV it already had all the vac lines connected, just not the unidentified lines below.. anyway pics tomorrow :)
 
Finally a few questions and some Vacuum line pics ..

Pics followed by questions
MPVIntake005-1.jpg


Hows everything above look ?


MPVIntake004.jpg


Where should i plug this line up at ? i think it went to my SVT PVC valve ? if not idk that's how i labeled it ..


MPVIntake003.jpg


Again Hows everything above look ?


MPVIntake002.jpg


Again another look at the lines behind / below the throttle body and how from the factory they had a "T" inline


MPVIntake001.jpg


Wider view of the vacuum and UIM from a full MPV


82110a76.png

not my pic found in another thread but looks exactly the same

Final question to everyone who used a return style adapter to from NPG - I used my stock Fuel Pressure Regulator and put it on the adapter like the picture above... but what do i do to the fuel pressure regulator that's on the MPV fuel rail ? keep it on a vacuum line pull the vacuum line off remove it leave it? whats up ?
 
Last edited:
Final question to everyone who used a return style adapter to from NPG - I used my stock Fuel Pressure Regulator and put it on the adapter like the picture above... but what do i do to the fuel pressure regulator that's on the MPV fuel rail ? keep it on a vacuum line pull the vacuum line off remove it leave it? whats up ?

everything looks pretty good.it doesnt matter which ones you use for what just as long as all the vacume ports in the uim are connected or blocked off and all the solinoids are connected as well. and to answer your question... i kept my taurus fpr in and did not connect it via vacume or electronically. just used it as a block off

also...in picture #2, that line also goes into a vacume port on the uim
 
Where should i plug this line up at ? i think it went to my SVT PVC valve ? if not idk that's how i labeled it ..

I believe you are correct with this line going to the PCV valve from the contour. I think this is the EVAP line. The gray end on that hose clicks into an elbow that I think is part of the pcv valve. What I ended up doing to avoid cutting this vac line was I dismantled the pcv valve for the contour and kept the elbow part that connects to the gray connector, basically instead of a pcv valve this became a T. I capped the part that used to go to the pcv valve and routed the open end with some hose to the UIM. Since I used the 3L pcv system it was easy to modify this part to work. My description might not be the best but when I get home I could snap a pick that would probably help it make sense.

Right after I wrote this I was looking at the other MPV thread on here. If the MPV pcv is like the newer Taurus/Escape pcv(which it appears to be) then my idea would work, but if it's more like the 2.5L it might be a little different.
 
Last edited:
I think u should use the Taurus fuel rail.
IIRC the factory fuel rail and LIM on the MPV is a Ford Mondeo 3.0 Fuel rail according to this MPV Swap thread below. Whats the advantages of a Taurus fuel rail and why recommend it over what i already have :confused:

I spy Ford Mondeo 3.0L fuel rail not escape and the Mondeo 3.0L LIM...

st220limfuelrail.jpg


everything looks pretty good.it doesn't matter which ones you use for what just as long as all the vacuum ports in the uim are connected or blocked off and all the solenoids are connected as well. and to answer your question... i kept my Taurus FPR in and did not connect it via vacuum or electronically. just used it as a block off

also...in picture #2, that line also goes into a vacuum port on the uim

about the factory MPV FPR, I'll disconnect it then just put a cap on it so it keeps dust and crap outta it.. and as for pic two .. thanks I'll connect it to the last open port i have on the MPV Fuel rail thanks again for the help ..
 
you need some sort of fuel pressure regulator/sensor. since this car is a return style car, how are you going to hook up the fuel lines to the returnless style MPV fuel rail?
 
I believe you are correct with this line going to the PCV valve from the contour. I think this is the EVAP line. The gray end on that hose clicks into an elbow that I think is part of the pcv valve. What I ended up doing to avoid cutting this vac line was I dismantled the pcv valve for the contour and kept the elbow part that connects to the gray connector, basically instead of a pcv valve this became a T. I capped the part that used to go to the pcv valve and routed the open end with some hose to the UIM. Since I used the 3L pcv system it was easy to modify this part to work. My description might not be the best but when I get home I could snap a pick that would probably help it make sense.

Right after I wrote this I was looking at the other MPV thread on here. If the MPV PVC is like the newer Taurus/Escape PVC (which it appears to be) then my idea would work, but if it's more like the 2.5L it might be a little different.

Funny you posted lol... i was just reading your input about the throttle body on Sam's (svttour) 00SVT MPV swap.. anyway thats a great idea i didn't wanna cut the end off the line, but if it's vacuum it needs, I'll take the PVC valve apart as you did and clip it onto the 90* that's in the PVC valve then connect it to the UIM in an open port..
 
you need some sort of fuel pressure regulator/sensor. since this car is a return style car, how are you going to hook up the fuel lines to the returnless style MPV fuel rail?

this is the set up that I used here.

82110a76.png


I used the 3L return set up / to return less that retains a factory setting.. the fuel lines connect into the NPG fuel block then the stock SVT FPR gets bolted to it. then you add the fuel feed line from the NPG fuel block (provided by NPG) to the return less 3L fuel rail on the motor...
 
That's how I felt too, I wanted to minimize cutting the stock vac lines just in case. It was an easy way to go and it's been working well since the car has been running. I had a variety pack of vacuum caps and one of them worked perfectly for this. The TB setup sounds just like the one I used too.
 
That's how I felt too, I wanted to minimize cutting the stock vac lines just in case. It was an easy way to go and it's been working well since the car has been running. I had a variety pack of vacuum caps and one of them worked perfectly for this. The TB setup sounds just like the one I used too.

yeah thanks again .. as for the Taurus TB set up ... the MPV UIM / Taurus throttle body slopes way low and would make my cruse control cable go right through my cam pulley for the water pump ... any idea how to get go around that ? most likely i'll have to modify the TB Bracket to have my cruise go above my throttle if possible ..
 
Back
Top