• Welcome to the Contour Enthusiasts Group, the best resource for the Ford Contour and Mercury Mystique.

    You can register to join the community.

timing belt?

cutiger68

New CEG'er
Joined
Jul 14, 2008
Messages
6
Anyone got a good write up on changing the timing belt on a 1996 2.0? Never tackled a job like this before so any help will be greatly appreciated. The belt hasn't broke, I'm just replacing the old one so I was curious if I still need to worry about pulling the valve cover, setting cams to TDC, etc. Can I not just slip the old belt off, change the idlers/tensioner, and put the new one on with worrying about the cams and crankshaft rotating?
Thanks
 
Wrong section first off.

As for a write up changing the belt isn't terrible and can be done in 4-6 hours. I suggest using the TDC kit that various companies sell. Also make sure you replace the tensioner and rollers when you do the belt or things will go bad down the road and you will have to redo the job.

You have to pull the pass wheel to get access to the crank bolt. Also you have to pull the passenger motor mount and support the engine from underneath. Other than that just pull the parts that seem to be in the way until you get down to the belt. Pull the spark plugs so cranking the motor by hand is easier. Rotate the motor under the cams indicate TDC and insert the locking shim and pin. Pull off the old belt and tensioner and then reverse order put everything back together.
 
Before you go replacing it, why not see if it really even needs it? Pull the upper timing belt cover, and look at it, it should be free of cracks and fray. maybe crank the engine a couple times without starting to check several points of the belt. But if you really want/need to replace -

It is one of those tasks that seems daunting but once you do it once, it is like "is that all there is to it?"
These instructions assume the belt has not jumped and everything is still in good timing. With this method, the valve cover need not be removed.
Time consuming yes but here is what to do -
Disconnect battery.
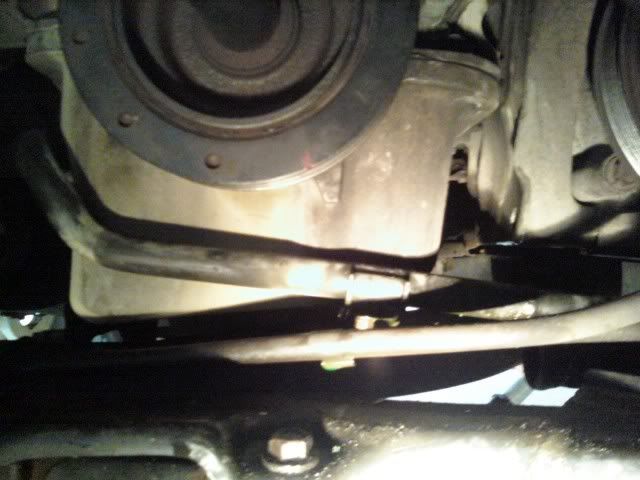
Move that hose that is in the way of the upper belt cover.
Loosen passenger wheel lugnuts but do not remove.
Jack up the car enough to get wheel off, and remove wheel.
Remove the plastic splash guard to access the belts and such.
Remove the coolant reservoir for easier access. YOu might be albe to just set it aside without removing the coolant hoses but it must be out of the way.
have something like a jack to support the engine, don't jack it up but just have something for it to rest on, make sure and have a block of wood between the engine and jack or whatever support.
Remove the 6 bolts holding the passenger side engine mount, remove it, and the lower part of the mount. (this is why the engine needs supported.)
Make sure you have a diagram handy for the belt route. Should be on passenger strut tower. Verify the accuracy...
From the wheel well area (don't try to do it from above like I did, it is a pita), loosen the belt tensioner and remove the serpentine.
Remove the middle timing belt cover.

Once you get to the belt itself, create your own timing marks on the camshafts by placing a level across both cam sprockets and making 4 marks. Don't bother mark the belt itself as it is getting replaced. Say at the center of the sprockets,make your marks 180 degrees apart so in re-install, you know the cams are at the right points.
Somehow you are suppose to remove the crankshaft pulley to get the lower belt cover off and you will see the crank sprocket for the timing belt.
Once you DO get to the crank sprocket, mark it's relation to something stable, maybe make 3 marks inline for best accuracy, 2 on the crank sprocket, one on the stable area.

NOW it is time to remove the belt.
Loosen the center bolt on the tensioner, and turn it using an allen key (forget the size of it, maybe 6 mm?) and the belt will slide right off.

The tricky part is putting the belt on so that the timing marks you made line up correctly. The best way is to try to duplicate the previous tension between the cam sprockets and the right cam to crank.

Installation is the reverse. For free play, the belt should be able to wobble about 1/2 inch up and down between the cam sprockets.
If you do this, now would be a good time to replace the serpentine, since it is already off.

I think that is everything, I am writing this from memory of when I did it, if anyone cares to correct.
This actually isn't a horrible job to do.

Now with removing the valve cover, if you have to figure out the timing from scratch (meaning you don't have your own timing marks made) then on the driver side of the cams, there are these two slots that you stick a ruler or something about 2/10 an inch into that align the cams, but I forget how to set the crankshaft in relation to that.
 
I wanna hit on a couple points. As long as the car hasn't jumped time, it's best to set TDC before taking the belt off.

0718091232.jpg


This is an image of the crank serpentine pulley pointing at a tab on the oil pan, meaning the engine is at TDC. After you take off the timing cover, put the serpentine pulley BACK on the crank (it's keyed, only goes on one way), and turn the engine by hand to TDC (spark plugs out, valve cover off). When you get to TDC, put a bar of some sort in the ends of the cams to line them up and hold them in place. When putting the belt back on, start at the crank and work counter-clockwise.

A couple other things I'd like to touch on:

High pressure power steering line - this is the goldish-colored metal line that runs across the top timing cover. It doesn't need to be moved. The timing cover can be squeezed between it and the sprockets.

Coolant tank - unbolt it (2 bolts), and tip it up forwards toward the headlights and tie it off with something. This way you don't need to drain the coolant.

Water pump pulley - Loosen the 4 bolts for the pulley BEFORE taking off the serpentine belt. It makes it MUCH easier! :)

If you are prepared to do this, and your car hasn't jumped timing, this won't take more than an hour. Yes, an hour.
 
The photo Zorrex shows, yes there is a TDC mark on the crank pulley, but if it is like mine, it is this tiny notch that is hard to find, the photo shows where someone marked it to be more evident. The haynes manual drawn photo makes it look like it would be huge, but no, it is this tiny little notch. When you find it, mark it better for future reference. It is, as seen in the photo, to the left of those three holes on the pulley.
 
check out autozone online as they have the step by step instructions. otherwise get a factory service manual.
 
Many balancers have TWO notches in the edge, if so use the second one as turning clockwise. First mark is a BTDC timing mark and second is TDC. And they are indeed quite small.
 
Many balancers have TWO notches in the edge, if so use the second one as turning clockwise. First mark is a BTDC timing mark and second is TDC. And they are indeed quite small.

if you are using the cam alignment tool and the crank pin then you don't even have to worry about the timing marks. that is if the belt didn't snap first.
 
It's a good backup check though. Sometimes one can get lost, then put pin in at wrong time. I did my first 2 engines without any pin or special tools at all years ago. Then made my own camtool and pin for maybe $5-7.
 
Back
Top