SUCCESS AT LAST!!!
This is what I did: today I just started over at step one of the alt not charging on the Ford CD. I found after removing the pass side wheel and the engine access covers I could reach in and remove the connectors from the alt. My goal was not to remove the alt if at all possible.
View attachment 1827
Next I figured since I might need to access both leads on the battery I made some jumpers and connected them to the battery posts
View attachment 1825
then dropped the other end down below the engine so I could reach them with my meter.
View attachment 1828
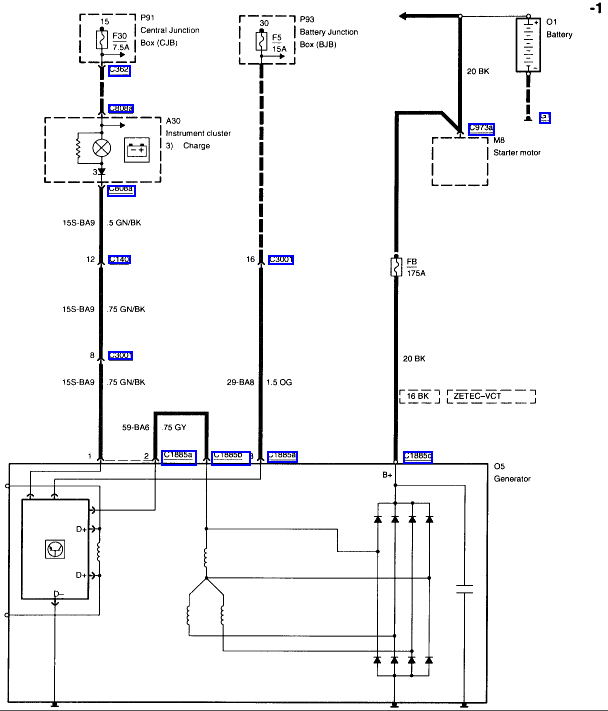
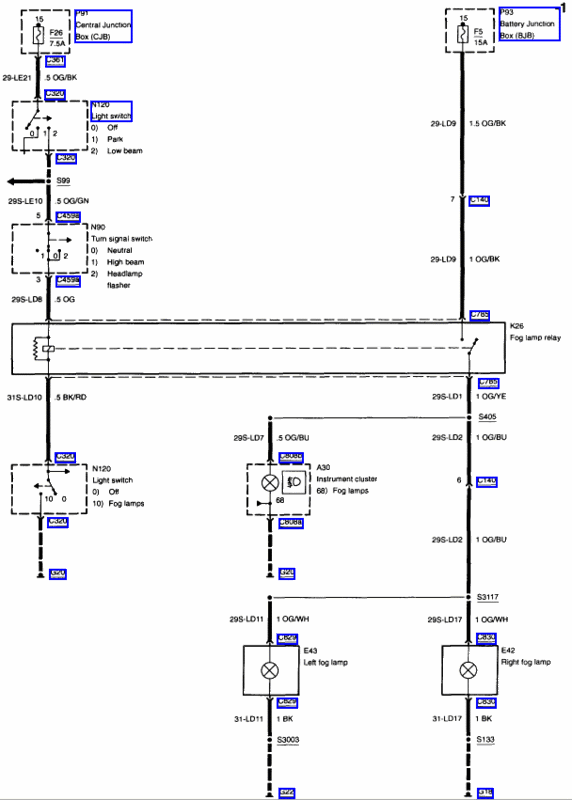
At about the third step I found I couldn't get to the test point on the back of the alt so I changed the plan and started checking out the wires to the connectors. First test was the easy one on the jumper, it was good. Then I went after that wire to the F5 - foglights. I inserted a small spade pin into the connector and attached the other end to one of the wires I had hanging down there. That made a jumper I could test with on the top side after first removing the end from the battery. Since I didn't have and F5 I tried the F3 which is my foglights. Not the same wire, and I started thinking about opening up connector C3001. It is the big one by the Dr side strut tower that is bolted together. I decided to first test the the remaining wires at the fuse locations, and hit pay dirt with F2.
View attachment 1826
All in all, I think changing out the alt is not necessarily as big an issue as it is lead to be. After getting started by raising the car, removing the front wheels, opening the access in the passenger side, the first thing to do is apply PB Blaster to the upper and lower bolts. The easiest way to access that top bolt IMO is from the drivers side with a long extension that includes a swivel closer the the DR side that allows it to drop down a bit and access out the wheel well. You definitely need a breaker bar I used a 1/2" drive so the bar is about 2' long. I did try going in through the top and yes you can get access there but you have to remove more stuff to get to it. The bottom bolt is accessed from the bottom between the Y pipe and the transmission. You do have to pop the tie rod end out so you can remove the alt out of that area. The little L bracket is also accessed from below. There are several comments about how hard it is to reinstall the new one, and about it binding up. Well the reason for that is there are some bushings that are hardened and in a C shape. on the ends when you look up there it looks similar to a lock washer. Ray talks about them in his how to, but I don't think he had them figured out. Key here is they slide. I squirted a little PB Blaster on them and was able to free them up so install was easy. When you tighten the bolts that forces them in and tight against the alt tabs.
ADULT BEVERAGE TIME

with out that red glow...... LOL
Regards,
AF