• Welcome to the Contour Enthusiasts Group, the best resource for the Ford Contour and Mercury Mystique.

    You can register to join the community.

Where to cut, what to cut and pics (altenator and crank)

69Boss302

Has mile high skills
Joined
Dec 26, 2001
Messages
2,630
Location
St.George, SC
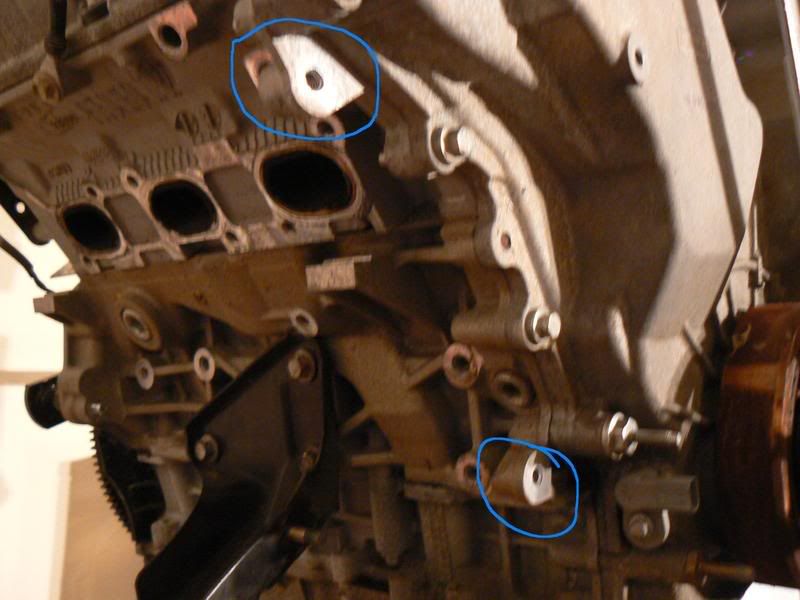
Since there is the continuos ongoing confusion regarding the altenator tabs and crank pulley and lack of pictures, I'm posting pictures and looking to solve my confusion as well.

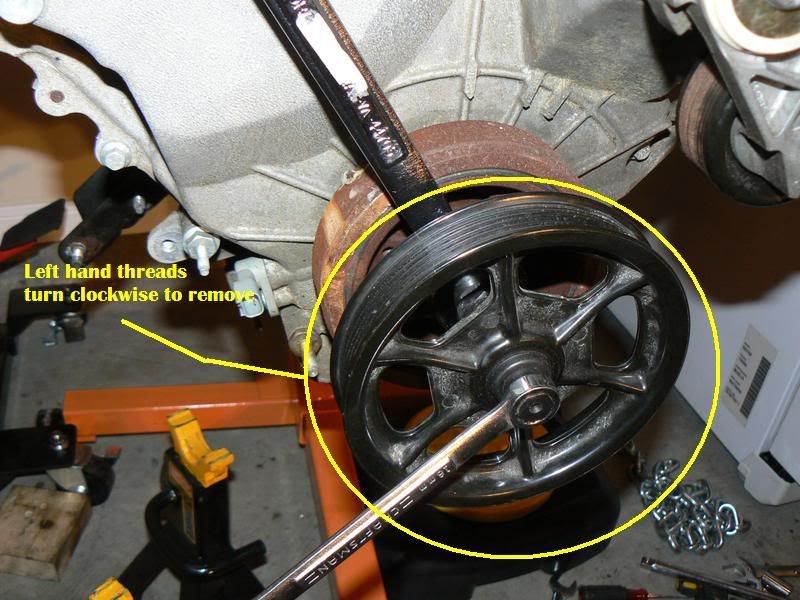
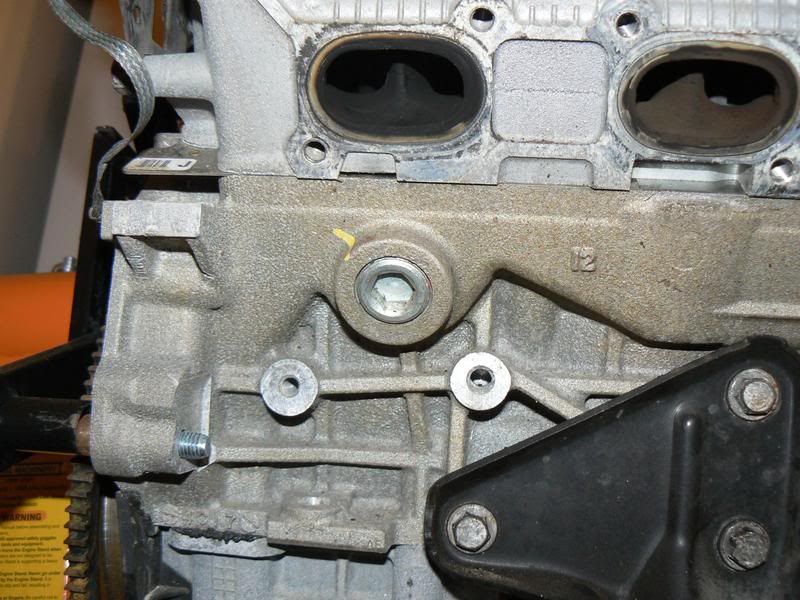
Crank Pulley - 04 Taurus

This what I'm trying to do. Removing it by hand and as so many before me know, it is almost impossible.

P1020598.jpg


So after trying this the results are beginning to round the hat looking piece that comes off the balancer.

Where does one cut the crank pulley? Please take my picture, draw on it where to cut and repost.

P1020601.jpg


And now for the altenator tabs. This an 04 Taurus motor. I've placed the old bracket up against the new motor because "it will be obvious what needs to be cut." Well, it isn't to me. Mostly because when I put up the old bracket, the bottom mounting hole/dowel doesn't sit flush with the block. So what get's cut?

P1020600.jpg


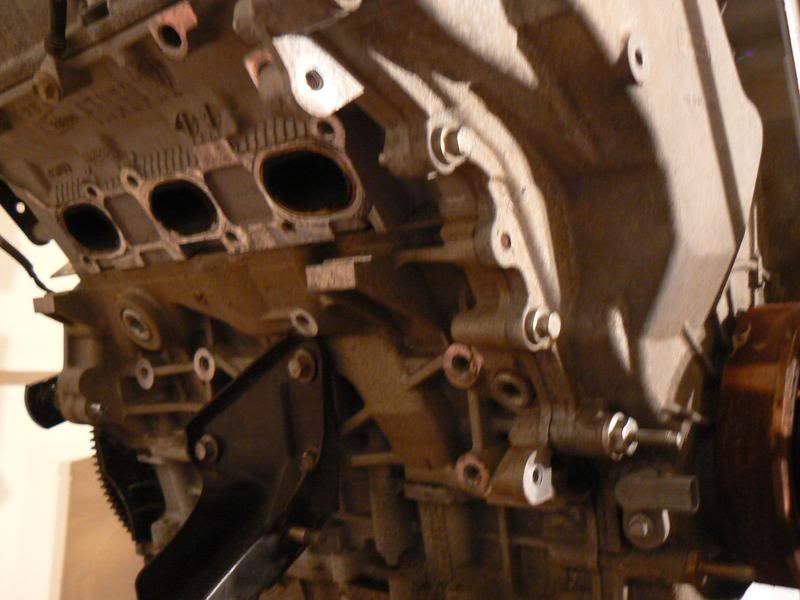
And then lastly for what I believe is the knock sensor. On this motor it is blocked off. Does it still go there in this position or am I one of the lucky ones that has to extend the wiring harness?
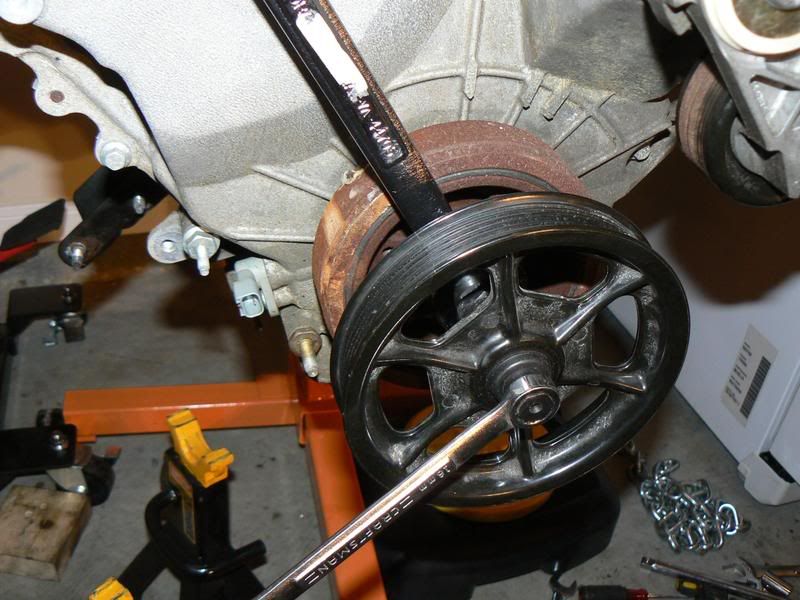
P1020603.jpg
 
The upper tab on mine look different (two bolts holes on yours vs. one on mine)

cut.jpg


Now that I think about it, they don't serve a purpose on a contour anyway.
 
Now that I think about it, they don't serve a purpose on a contour anyway.
Exactly. I only had to cut one on my block. I think it was the lower location. So just prop your alternator bracket up against the block and trim how much you need off to get it to seat all the way.
 
I'm waiting for the Dewalt saw to charge up and she's getting hacked up. I can't find the cutoff wheels because I haven't looked for them yet. Besides, I'm hungry and cooking dinner is cool while waiting on a battery to do its thing.


Does anyone have advice on the knock sensor dilema I posted about earlier?
 
Your's would have two holes if you took off the front cover. In my picture I tried to show where to cut, everything inside the squiggly circle. Cut them off before you take off the front cover. That way you do not get anything in the engine. I cut them after I put the engine back together.

Do you know where the knock sensor was originally on that motor? I would try taking the stud out and seeing if the contour sensor fits.
 
Last edited:
100_1166.jpg


This pic is upside down but as you can see the wires are cut to my knock sensor on this block but the sensor is still there. if your block is an 04 you will probably have to drill & tap the hole for the sensor b/c the newer engine has a smaller hole. I didn't circle it but its the only one w/ anything in it, it looks like yours was just removed at some time.
 
Make sure you are turning the crank pulley the right way. I think that the part you have the wrench on in the back should turn with the front so you can't hold it there, that might be why you are having trouble.
 
I think on one engine I cut the pulley off. Took a while to gain access to the crank bolt. On the rest the goal is to make it look like the 2.5. :D
 
Make sure you are turning the crank pulley the right way. I think that the part you have the wrench on in the back should turn with the front so you can't hold it there, that might be why you are having trouble.

This might help

P1020598.jpg
 
Make sure you are turning the crank pulley the right way. I think that the part you have the wrench on in the back should turn with the front so you can't hold it there, that might be why you are having trouble.
Correct, it's all one piece and is left-hand threaded (loosen in clockwise direction) My recommendation:
1) Spray penetrating oil where the black part threads into the damper.
2) Remove oil pan and windage tray
3) Chock a crank counterweight with 2x4 to oppose clockwise torque.
4) Put 1/2" drive socket and breaker bar (or impact gun) on front of the accessory drive pulley.
5) Break it loose with sharp application of torque. Do not use any extensions as they flex. Use a cheater pipe if needed. You will not break the crank. You may need help holding the engine though!.

I have had great success with the above method on several Honda engine timing belt changes to loosen the damper bolt. (And everyone moans about how hard those things are to loosen)
 
For removal of the crank pully...
I tied cutting the pully all the way down to the hex so I could just throw a socket on there and give it a whirl (get a little more torque that way) and I still couldn't get it off. I wound up cutting that whole piece with the hex into a 6 piece pie. This makes grooves to allow the metal to move and loosen up on the threads, it came off easy as anything else. Then when you get that piece out, there is another bolt that lies within the damper, and that one is regular threads (righty-tighty, lefty-loosy).
 
Don't forget on the other end of the crank there is a bushing that needs to be cut off so that the transmission shaft won't bind against it.
 
Thanks guys. I had a chance to do some cutting on it before I was sidetracked by someone elses car. Still not off yet though.

Do have another question, does this plug look OEM?

P1020613.jpg
 
thats not a plug, its a heat tab put on by whoever you bought the engine from, if the engine is ran to a certain temp (hot) the adhesive that holds the tab on will let go and the tab will come off, then they will know if the engine was overheated. should you go back to them with a problem
 
and on a seperate note...

Can someone, anyone, please post an actual picture of where the bolt for the damper begins? I don't want to cut the head of the bolt off and have more problems. I've been hacking on the cone part just in front of the damper and have not made any progress it seems. The only thing that is gone now is the actual pulley itself thanks the saw.
 
Back
Top