Aussie Ford
Hard-core CEG'er
Auto down for front passenger side door (revised 8/07) 11/11/06
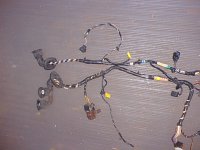
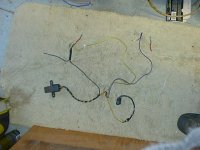
For 95- 00 Tours, & Stiques..... I just completed an Auto Down harness for the passenger door window. This process is fairly easy to do. You will need an extra drivers side harness from any year with the black connector and four pin brown auto down relay. These are available at your local junk yard. Prices vary, the ones I got were $7 ea.
Things to consider when choosing a donor harness:
Why not get one that has additional features that you may not have. For example door handle switch for interior lights (black connector rear bottom of door), lighted key cylinder (white connector next to black connector rear bottom of door), heated mirrors (mirror connector w/ 5 wires). Adding these items to the harness you are working on anyway, for future projects, simplifies things, and makes them plug n play. If you don't do them that is no problem either they are just unused.
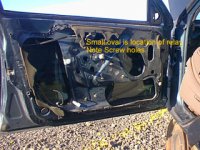
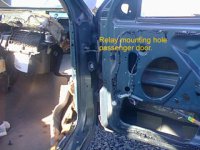
There is already a mounting hole in the door for this relay since in Europe it is the driver’s side.
Useful information:
Connector pin-outs:
Master Switch (95-97, others similar):
Connector "A" White: #1 white/purple - pass front up. #2 yellow/purple - pass front down. #3 white - pass rear up. #4 yellow - pass rear down. #5 not used. #6 white - driver up (to window motor connector up). #7 yellow/green - driver down (to auto relay connector pin #3). #8 white/blue - driver rear up. #9 yellow/blue - driver rear down. #10 orange/blue - light.
Connector "B" black: #1 purple/blue - power to rear windows (from cut off switch). #2 purple/blue - power from fuse panel (40 amp). #3 black – ground. #4 not used.
Motor Connector: yellow - to relay connector pin #5 (driver down), white - to master switch connector "A" pin #6 (driver up).
Auto Down Relay Connector: #1 black - ground, #2 Purple/orange - power (splices into purple/blue to master switch connector "B" pin #2), #3 yellow green - from master switch pin #7 (driver down), #4 not used, #5 yellow - to motor connector (down), #6 not used, #7 not used.
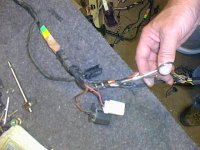
Connectors: To remove a wire, first remove the red retainer by using the small screw driver and pushing in slightly on the clips at the sides. You can see the red retainers, push in and up. The retainer will start to lift a bit then pry it the rest of the way out. Once that is done, the clip is held in place by a plastic clip inside the connector. Raise it up with the dental pick and use the screwdriver to help twist it out of position and down.
Materials needed:
Donor drivers side harness, any year with brown four-wire relay & black connector.
Passenger side harness same as your year Tour (optional, you can use yours).
Sharp pointed scissors, or small knife.
Wire cutters.
Small screwdriver.
Dental pick.
Soldering gun.
Shrink tubing.
Crimp splices 12-16ga (blue), & 18-22ga (red).
Roll of electrical tape.
The Process:
Removing relay:
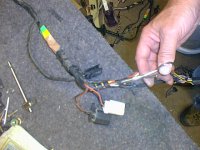
1)Remove the wrapping as needed from the donor harness. *Hint* note position relay tees off main part of harness.
2) Trace out the four wires coming from the AD relay connector.
continued
Last edited:

