• Welcome to the Contour Enthusiasts Group, the best resource for the Ford Contour and Mercury Mystique.

    You can register to join the community.

Home-made custom svt gauges

Savior

CEG'er
Joined
Dec 6, 2002
Messages
306
Location
Honolulu, Hawaii
So I got bored with my cheap, crappy old S&H AutoTrends gauges in favor of some new ones. Here are the S&H gauges. People always complained about how sloppy the glow looked, and I never liked it much either; I always wanted the numbers to glow, not a vague blurry shape around the numbers; you could barely read the words on the HVAC panel. They weren't terrible, I just didn't like them all that much but didn't have anything better...

GaugesBlue-Montage.jpg


SOOO...

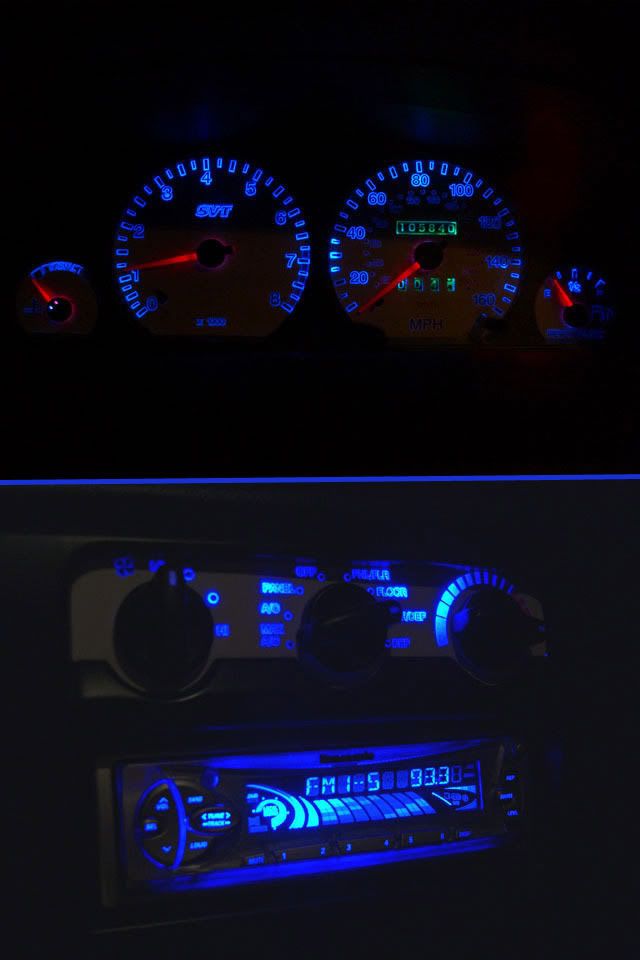
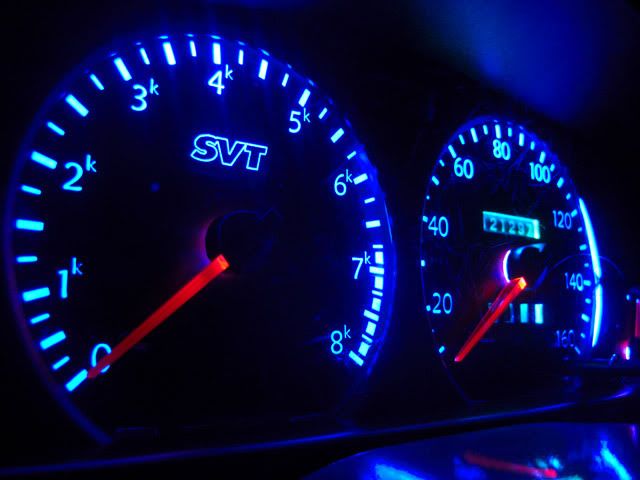
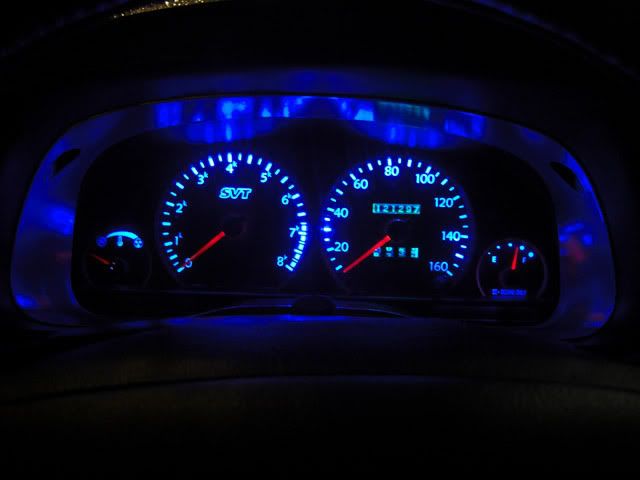
I pulled them off, scanned them, inverted them, cleaned them all up in Photoshopand edited them (adding my own custom icons and fonts), then took the files to work and printed them on the high-quality laser printer at 600dpi. Then I took them to FedEx Office (formerly Kinko's) and made high-quality copies of them onto plastic transparency sheets. I then cut them all out and lined them up, three layers deep for each gauge-face (so the backlighting would not show through the black parts); two transparency-layers with clear numbers (so as not to hinder the backlighting), and one layer of paper to make the numbers white and opaque but very brightly-lit. Here's my result...


*NOTE* - The crazy squiggly lighting is due to light-refraction through all the scratches in the clear plastic viewing-window in front of the the gauges, and the weird super-glow aura effect that some of the numbers have around them is just the camera adding halos to those numbers for some reason. The actual numbers, as can be seen in some of the shots (the tach on the first pic for example), are clean and precise.


Cluster3.jpg


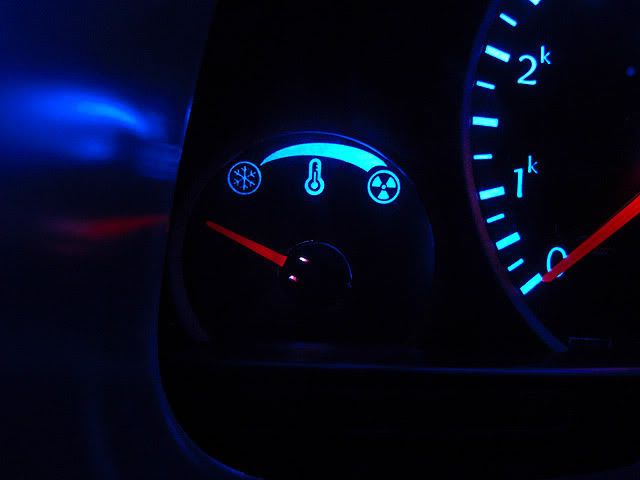
Dig my Frost/Nuclear temp gauge? I guess going to college as an art major wasn't a COMPLETE waste after all...
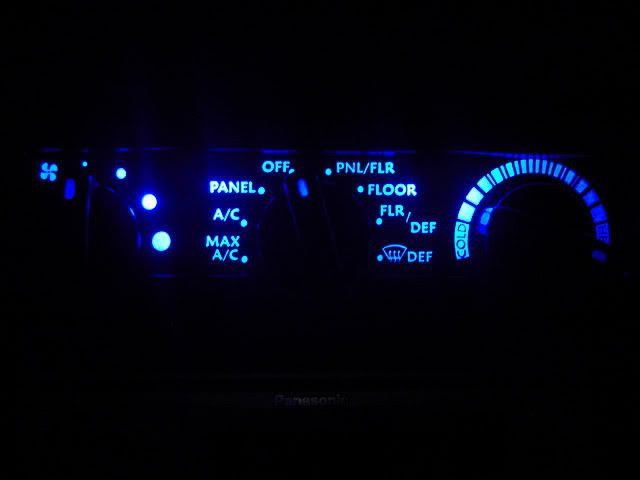
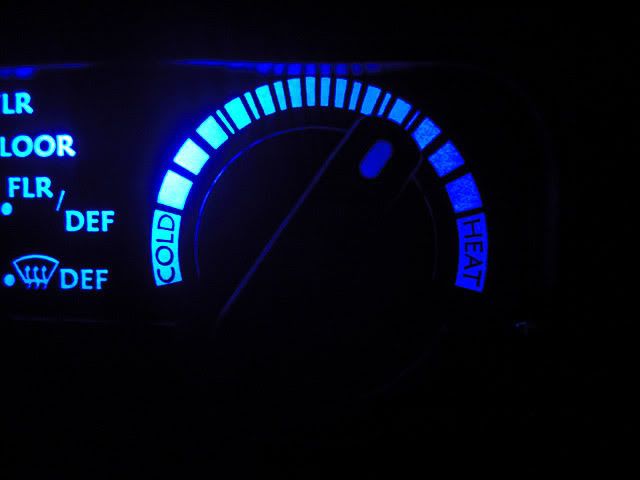
Temp1.jpg


Fuel1.jpg


Cluster1.jpg


HVAC:
HVAC1.jpg


HVAC-Zoom.jpg


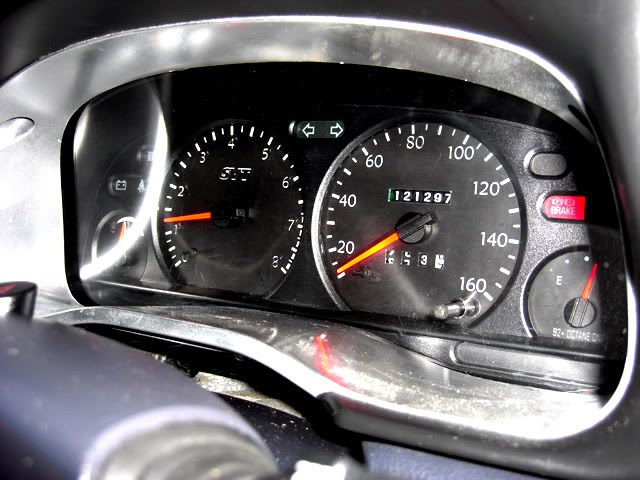
And in the light, they look like normal non-SVT gauges. I have ordered some chrome trim-rings to contrast the black-out effect during the day and match the silver highlighting I've done around the dash. I'll post pics as soon as the arrive.


Cluster-Flash.jpg


I was thinking of being the new premiere seller of custom gauges since noone else does it anymore, but being active duty Navy and soon to deploy, I really don't have time for that sort of thing. So, if anyone wants the original high-resolution scans and/or the HUGE but very cleaned-up Photoshop images (layers and all), let me know I'll email them to you with instructions or something.

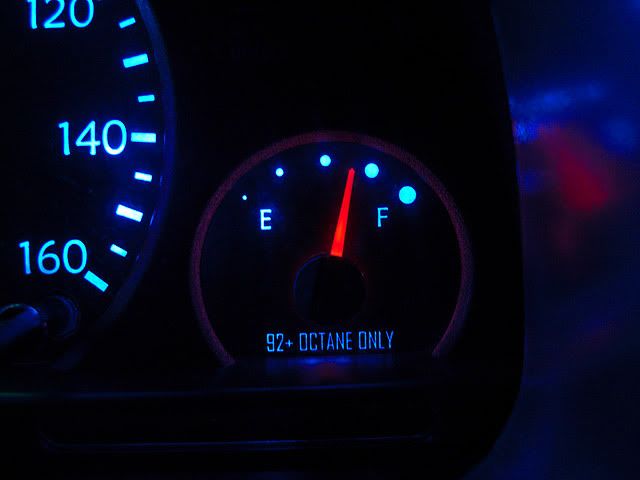
Also, these gauge-faces are NOT colored; just white numbers. Which means, instead of blue LED's like I have, you could get amazing results with red, orange, purple, green, etc. as well with no modifications.

Whaddya think? Not too bad for a guy with a copy machine and some spare time, eh?
 
Last edited:
This is amazing! I was thinking about changing my gauge color, and sanding off the green like usual, but this changed my views 100%. How did you get the faces black? Did you have them printed black from kinkos?

If at all possible, could I have some directions for these? Id gladly pay you...this is really cool!

VERY nice job!
 
Well I'm glad you guys like the look. It's sorta ghetto, but what else can we do? No one else makes SVT Contour gauges anymore! :( Gotta rely on the ingenuity of the community I guess.

They're black because they are not the original gauges. Those are sitting on my counter in an envelope. I scanned the originals, then opened them in Photoshop, and inverted the color. This made the black numbers white, and the white background black. Then I printed them on a good laser printer (HP P4015n model). Then I made two copies of each gauge-face at Kinko's (now called FedEx Office since FedEx apparently bought out Kinko's; this was news to me), but instead of copying onto regular paper, I bought 8 standard letter-sized clear plastic transparency sheets (you can buy them for like 40 cents apiece at FedEx Office; they sell them at the counter). I used the Brightness option on the copier to darken the image one single notch (just to thicken up the black areas so the intense LED's would not shine through it), and this left the numbers/icons completely clear.

I then cut them all out, using sharp scissors to carefully cut out around the outer edges, and used razor blades to cut out the center-holes for the needle-shafts and little holes for the pegs that the needles rest on. I layered the gauges three layers thick each, with the paper copies all the way in the back and the two layers of transparency prints on top. I used double-sided clear scotch tape to hold them in place (had to put many little slices of tape around/between the numbers/icons (between each layer I mean) to keep the layers from warping apart and to keep them tightly together). Layering them can be tricky, because you have to look REALLY close and get the small numbers, lines, and icons PERFECTLY aligned before you press them together, or they'll look all double-exposure due to the misaligned layers.

Then I simply swapped them out with the crappy S&H gauges, attaching them to the cluster unit with double-sided scotch tape. Oh, one piece of advice: PAY ATTENTION to where your needles on your gauges are BEFORE you pull them off or you'll have to guess how much gas you have, where the zero-line is for the temp gauge is, etc. when you go to put them back on after swapping out the gauges.

This whole process took me several days, but most of that time went to the scanning, Photoshop touch-ups, designing icons, experimenting with various printing options and methods, and planning out how to do actually do this since no one's really done/documented it before. Most of that work has been done now. I won't charge anyone for these. If you'd like, I can email you the original and modified files in JPEG and PSD formats for your own editing and printing. Or if you REALLY want, if you can't get to a high-end laser printer at your work or anything (don't use an ink-jet printer; they come out looking like crap even on the best setting), I could probably print them at my work's laser-printer and mail the to you. You'll have to make your transparency copies at FedEx Office (or wherever you can find a high-quality copier and letter-sized clear plastic transparency sheets), cut them out and tape them together yourself though. You could do it in less than one day, including the run to FedEx Office.

I have to say I'm really happy with the result. The photos above aren't doctored; they really look striking at night. And if they ever start to separate or warp or come apart because of moisture or something, I can just print new ones from the image files!

I'm at work right now; for those of you that asked, I'll try and email you the files tonight.
 
I had tri-layered gauges once.
Purple face, chrome transparent text, and yellow backing. The heat in the dash made them warp like a motha!
 
I've already sent the raw scans and cleaned-up, final Photoshop files to three guys. If anyone else wants to mod out their gauges, PM me your email and I'll send them your way. Looking forward to seeing peoples' unique takes on these! I only ask that one one takes my designs/files and then tries to sell them for money as their own, that would be f**ked up. And also that you take good photos and post them for everyone to drool over.
 
I worked on these a little today only to realize that the SVT speedometer is different than the non-SVT :troutslap:

Oh well, time to get creative! Thanks again Savior!
 
I worked on these a little today only to realize that the SVT speedometer is different than the non-SVT :troutslap:

Oh well, time to get creative! Thanks again Savior!

FFF lol i wish i had just checked back .. i was looking at the gagues like... does mine go up to 160... i dont think it does... go check... FFFFFF 130... i gotta rework it too or something
 
It would probably be best to just open up your cluster and peel off your gauge and scan it... Reworking it in Photoshop would be very tricky and probably come out very inaccurate. Also, just so you know, the font I used is called Maiandra GD and it is free to download as a TrueType font. Download it here: http://www.fonts101.com/fonts/view/Brandname/10961/Maiandra_GD.aspx
You might already have it though, it is fairly popular.
 
yeah photo shop realized it as a font and it worked fine.

I may try and attempt the color thing.. but with led's having such a small spectrum i dont know how it will work...

also when you peal it off i was trying to find out does the green color thing come with... cause the way my gauges are now you can barely see the blue backlight i have except around the edgesgaguessm..jpg
 
Holy crap, that Miata gauge-face tutorial is WAY more complex than my method! The main thing I see in it that would really improve this method it the 3M 7 Glue Spray stuff; it would hold the layers together in so much more of a uniform way, so they wouldn't warp or separate. I would recommend trying that with your gauges, and if mine start to warp I'm going to pull the and use the spray as well.

Oh and when you say that LED's have a small "spectrum", are you referring to their narrow-beam pattern? If so, I ran into the same problem. You just buy the 5-tip LED's from autolumination.com; they're only like $2 more apiece and they greatly increase brightness and reduce the "hot spots" you get with single-beam LED's.
 
idk about spray adhesive though.. i have a can of that stuff. and it gets ••••ty in the summer and winter... i had it holding fabric onto my sub box but it all fell off and is pretty ••••ty... but idk it's worth a shot

anything about the green layer or whatever? i've never actually had my gauge cluster dismantled
 
no i was more referring to the fact that they dont want to go through colored filters (as for the concentration and pattern of light you can either go with a surface mount led or what i did is just dremmeled the U tip of the led so it didnt concentrate the light instead it dispersed it)... as in the blue light wont go through the green oem filter... and how do i remove the filter... and how will the blue led light go through the red backround (white light goes through filters because it's a mix of all spectrum) kind of thing
 
Yeah, no blue light will come through the OEM gauges, that's really our main reason for making new ones I think, besides restyling them. And if you want multi-colored gauges, you'll want to install a sheet of blue transparency in your gauge faces and use white LEDs behind the cluster so the colors will light up right. Blue LEDs will just turn everything blue like mine.
 
The main thing I see in it that would really improve this method it the 3M 7 Glue Spray stuff; it would hold the layers together in so much more of a uniform way, so they wouldn't warp or separate. I would recommend trying that with your gauges, and if mine start to warp I'm going to pull the and use the spray as well.


We tried the spray glue too - didn't work. I had 3 sets of gauges with each one having a different adhesive, still warped all of them :-/
 
We tried the spray glue too - didn't work. I had 3 sets of gauges with each one having a different adhesive, still warped all of them :-/

What about a thin piece or cardboard...glued in between some of the layers to add some rigidity. Just cut out pieces to fit on as to not obstruct the light
 
Back
Top