carraudio's box tutorial, his custom fiberglass work is top notch as well.
Originally posted by carraudio:
First you must start with the right tools.
Tools
1. Table saw or precut MDF
2. Router and bits (if you plan on doing a lot of work pay the extra for the good bits)
-FLUSH TRIM - TWO FLUTE

-ROUNDING OVER BIT

-1/4" STRAIGHT CUT BIT

3. Circle Jig (or) jig saw http://www.partsexpress.com/

4. Measure-Matic (if you plan on doing a lot of fiber glass work)
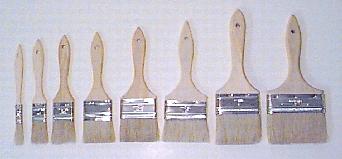
5. 2" Chip brushes
6. Rubber gloves (resin burns when it gets on your skin)
7. Mix & Measure Buckets

8. Miter box saw
9. Hot Glue gun
Materials needed
1. MDF 1/2",5/8", or 3/4 (depending on what subs you are using)
2. 2x2 for you sub woofer supports
3. Polar Fleece (Wal-mart)
4. fiberglass resin (Autozone)
5. Fiber Glass matt (you can get cheap stuff at Wal-mart or the good stuff (1 1/2oz Mat Tape) at http://www.uscomposites.com/mat.html )
6. Acetone
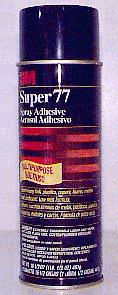
7. 3M #77 Spray Adhesive
Step1
Cut your MDF to size. For this box I cut it 37"x24" (bottom) 37"x13" (back) I cut the back cut of the base at a 13 degrees angle and I cut the bottom of the side at the same angle

*note there are no sharp corners. this will give you a better looking box and fiber glass has more strength on curves then it does flat.
Step2
Router the inside edge of the MDF with the rounding over bit.
Step3
Glue and nail the MDF together. I used my air nailer but you can use a hammer and nails.
Step4
Cut out your rings for your subs. This will take a few trys to get it right. when cutting the rings for your subs you will not want to cut out the centers so leave a little wood in the cuts.

Step5
Cut the 2x2 to the right length. I did mine at 10.5" to the top and they are cut at a 22,5 angle. I mouthed them 9 1/2" in from the sides and 11 1/2 from the front.
Step6
Glue and screw you 2x2 to your base and then your rings to the 2x2 like the picture.


Step7
Test fit in your trunk. If you did it like mine then there will be no problems with it fitting.

Step8
With the 3M #77 Spray Adhesive spray the outside edge of the base so you can start to wrap your box. Fleece is only stretchy one way so I would put it so the stretchy part goes from side to side no font to back
Then keep pulling it tight until you get all the wrinkles out of it, you may need to spray more 3M as needed.


Step9
Mixing the resin will take some practice but it is 1-100 parts 100ml of resin take 1ml of MEKP
Step10
with the chip brush start to add the resin. If you mixed it too strong it will harden really fast. Once it stops giving off heat it is dry. Make sure you get a lot of resin any where the fleece is touching the MDF this will help hold it to together.
(THIS BOX LOOKS DIFFERENT BECAUSE IT IS FOR A TAURUS)

Step11
Now it is time to cut out the sub holes. I have a body saw I use. Then with the flush trim bit to cut the extra fleece and wood around the rings. If you used a jig saw to cut out your rings you will have a harder time making the cuts smooth.


Step12
Now that you have the holes cut out you can put the resin on the inside of the box. After this sets for a few minute cut strips of fiberglass to put inside the box. While the resin is still sticky you can put the fiberglass onto the box. This will hold the fiber glass in place.

Step13
Mix your resin and put it on the fiber glass. be careful you are working with it upside down and you will get it all over your hands and it could start to fall. Try and keep the air bubbles out of it.
Step14
If you are using more powerful subs you might need to do 12 & 13 again.
Step15
Mix resin and saw dust together until it looks like mud. Put a thick coat of it inside the box wherever the fleece and MDF meet.
Step16
While you are waiting you can sand the outside of the box with a 120 grit paper.
Step17
Cut holes in the rear of the box for your terminal cups, or you could go ghetto and drill holes and chalk the wires into the box.
Step18
If you are going to carpet the box this is where you would do it. Spray #77 3M on the box and carpet, let it dry for a few seconds and then put it on the box. This will take some work for the top of the box but it can be done without a wrinkle in it. Put in your terminal cups, put in your subs and you are done.
Step19
If you want to paint it have fun. Mix a 50/50 bondo/resin mix and add the right amount of MEKP hardener for the mix, the hardener for the bondo will work too but I have never done it that way.
Step20
Sand it once it has hardened, and fill any pin holes with Glazing putty. This will take some work but don���?�t stop until they are all gone.
Step21
Prime and paint the box, put in the terminal cups and subs.
[image] [/image]

