|
|
Joined: Jul 2001
Posts: 7,100
Addicted CEG\'er
|
OP

Addicted CEG\'er
Joined: Jul 2001
Posts: 7,100 |
expanded on from:
original
Manual Transaxle Drain and Fill How-To
For the purpose of this how-to the following references will be used:
FORWARD:
facing the headlights of the car. Not actually AT the headlights (front) of the car, but FACING IT..
REAR: opposite of forward
Driver's side: facing the driver's side. Does not mean it is ON the driver's side. Example: the inside edge of your passenger rim is facing the driver's side.
passenger side: opposit of driver's side.
Parts:
- Jack
- Jack stand, or suitable support methods (no, a jack doesn't count...)
- 3Qt (or more) Drain Pan

- 8mm Allen Wrench

or a T50 Torx bit


(will depend on your particular car)
- A method of getting the replacement fluid INTO the transaxle. There is a small plastic pump that you can buy made for this purpose..
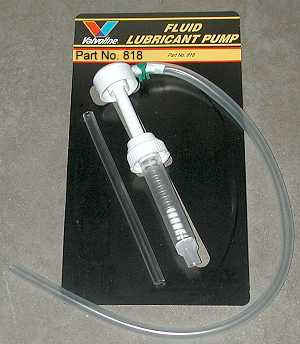
Autozone, or any parts store should carry them...
Approx $5.29
Materials:
- 3Qts of fluid (The classic tranny cocktail calls for synthetic ATF. Mobil 1 and Redline ATF work well. Yes, that's ATF, as in Automatic Transmission Fluid. Recently, many have tried Redline MTL, which is a synthetic gear lube that matches the specs for this transaxle. Redline will point out that MTL is not recommended for this application, but those that have tried it have said it works better than the other fluids available, including Ford's synthetic "honey" colored fluid. Ford's fluid (part #XT-M5-QS) runs nearly $20/qt, so MTL is quite attractive. Another option is ATF+3, a Chrysler spec'ed ATF that has the friction modifier already in it. It is much cheaper than the synthetics, but will require more frequent changes. In theory, any 75W90 gear oil will work as long as it is not rated GL-5, which contains additives that will damage the internals. GL-4 is the spec to satisfy for fluids.)
- If you choose regular ATF, then you need a half a bottle of "Ford Friction Modifier" Part number:C8AZ-19B546-A

So: You've got a little grind in your tranny; Perhaps a little stiffness in your shifter? Maybe its been a while since you've changed the MTX (Manual Transaxle) fluid, huh? It isn't that hard, and improves your shifter feel almost instantly. Let's get down to it, huh?
We'll be working from the underside of the car, so if you are "sensitive" or just plain whiny you'll want to wear something to protect your delicate wittle arms from the mean ol' ground.
I suggest cardboard.
Drain Procedure:
- Raise and support the vehicle. DO NOT WORK UNDERNEATH THE VEHICLE WITHOUT SOME MEANS OF SUPPORT (other than the jack itself). Jacks are not meant to SUPPORT the weight, only to lift it temporarily.. Failure to heed this warning could result in SEVERE INJURY OR DEATH.
- Locate the MTX FILL plug. We want to find the fill plug first, even though it is full (for now). Using either the 8mm allen wrench, or the T50 torx bit, we need to loosen the plug just to make sure it WILL loosen. It would really suck to drain your tranny, then find out you can't put more in!
The fill plug is located on the forward edge of the tranny as noted in this picture.

You can make out the waterpump pulley on the upper left of the picture, for reference. It is underneath the front bumper, just to the rear of the lower splash shield.
- re-tighten the fill plug (just so no dirt gets in there, though you shouldn't have taken it OUT.. just break it loose.
- Locate the drain plug. It is located on the passenger side of the lowest part of the tranny. You can get a better overall understanding of it (and the entire process) by looking at this picture (source unknown)

- Place your drain pan underneath the drain plug, and loosen the drain plug, draining whatever you can from the transaxle. do not replace the drain plug, yet
- completely remove the FILL plug, now.
- Using the pump, begin adding your fresh fluids to the MTX. This is a "fill-till-spill" process, so add fluid until you have reached the drain plug's opening, and begin to lose fluid. (this is why we left the drain plug off!)
- replace both plugs (drain and fill)
- lower the vehicle
- dispose of old fluid according to locally enforced laws.
Enjoy your new shifter feel.
Remember, this is not a CURE for grinding gears, or failing synchros. It can certainly AID in prolonging your MTX's life, though, if you drive with CAUTION, and use the common sense rule: if it makes it grind, don't do it.. (high rev shifting, fast shifting, etc...)
APPROX 30 minutes of time.
Credit goes to PlatoSVT for his pictures of his tranny drain/fill. Thanks, man..
'99 CSVT - Silver #222/276
In a constant state of blow-off euphoria.
Originally posted by Kremitthefrog:
I like to wear dresses and use binoculars to watch grandmas across the street.
|
|
|
|
|
Joined: Mar 2004
Posts: 4,141
Hard-core CEG\'er
|
|
Hard-core CEG\'er
Joined: Mar 2004
Posts: 4,141 |
one question, perhaps i'm just not grasping this. the fil-till-spill is making me wonder, if we remove the drain plug, and drain the fluid, shouldn't the new fluid begin flowing out imediatly? i guess i'm not getting how\why we're removing all the old fluid, then pumping in all the new fluid we need with the drain plug out. if fluid will stay in the trans with the plug out(aparently all that we need according to the directions) then all the old fluid is still in the tran is it not? Quote:
This is a "fill-till-spill" process, so add fluid until you have reached the drain plug's opening, and begin to lose fluid. (this is why we left the drain plug off!)
99 SE V6\5spd - 156 HP\157 TQ 15.166-90.84
Totaled 02/12/06
99 SVT # 1571 - 175 HP\153 TQ 14.999-91.88
Born 3/24/99 Reborn 3/18/06
Pietenpol Racing Technologies project vehicle
90 Festiva L 5spd, Blue(not for long), 103k
|
|
|
|
|
Joined: Apr 2003
Posts: 1,322
Hard-core CEG\'er
|
|
Hard-core CEG\'er
Joined: Apr 2003
Posts: 1,322 |
Replace the drain plug, add fresh fluid.
1999 Toreador Red SVT, DOB 4/22/99, 2005 Of 2760.
"Many posted questions are answered by farm boys"
|
|
|
|
|
Joined: Mar 2004
Posts: 4,141
Hard-core CEG\'er
|
|
Hard-core CEG\'er
Joined: Mar 2004
Posts: 4,141 |
thats not what the how-to says...hence my question.
99 SE V6\5spd - 156 HP\157 TQ 15.166-90.84
Totaled 02/12/06
99 SVT # 1571 - 175 HP\153 TQ 14.999-91.88
Born 3/24/99 Reborn 3/18/06
Pietenpol Racing Technologies project vehicle
90 Festiva L 5spd, Blue(not for long), 103k
|
|
|
|
|
Joined: Jan 2005
Posts: 453
CEG\'er
|
|
CEG\'er
Joined: Jan 2005
Posts: 453 |
Originally posted by pole120:
thats not what the how-to says...hence my question.
Yeah i wondered the same thing too. Maybe it because it's late and I'm tired and can't think straight though.
-Peter
|
|
|
|
|
Joined: Mar 2004
Posts: 4,141
Hard-core CEG\'er
|
|
Hard-core CEG\'er
Joined: Mar 2004
Posts: 4,141 |
ray.....can we get a clarification on this??
josh
99 SE V6\5spd - 156 HP\157 TQ 15.166-90.84
Totaled 02/12/06
99 SVT # 1571 - 175 HP\153 TQ 14.999-91.88
Born 3/24/99 Reborn 3/18/06
Pietenpol Racing Technologies project vehicle
90 Festiva L 5spd, Blue(not for long), 103k
|
|
|
|
|
Joined: Sep 2002
Posts: 3,944
Hard-core CEG'er
|
|
Hard-core CEG'er
Joined: Sep 2002
Posts: 3,944 |
Originally posted by pole120:
ray.....can we get a clarification on this??
josh
I'll take a stab at this...
There is a drain plug and a fill plug. You remove the drain plug, to drain the fluid, and then replace it. You then remove the fill plug and fill the tranny until the fluid just starts to spill out of the plug hole. Then replace the fill plug. 
Phillip Jackson
`98 Mystique LS
262K+ and counting...
ATX rebuilt @ 151K
"This storm has broken me, my only friend!" RIP Dime
|
|
|
|
|
Joined: Mar 2004
Posts: 4,141
Hard-core CEG\'er
|
|
Hard-core CEG\'er
Joined: Mar 2004
Posts: 4,141 |
that explaination makes sence, but once again, that not what the how-to states, there is no mention of replacing the drain plug and then adding more fluid.
i'm not trying to nit pick here, just want to make sure this is clear to all who read it.
99 SE V6\5spd - 156 HP\157 TQ 15.166-90.84
Totaled 02/12/06
99 SVT # 1571 - 175 HP\153 TQ 14.999-91.88
Born 3/24/99 Reborn 3/18/06
Pietenpol Racing Technologies project vehicle
90 Festiva L 5spd, Blue(not for long), 103k
|
|
|
|
|
Joined: Jul 2001
Posts: 7,100
Addicted CEG\'er
|
|
OP
Addicted CEG\'er
Joined: Jul 2001
Posts: 7,100 |
The drain plug is on the bottom.. the fill is on the side.
LOOSEN fill (make sure it WILL loosen)
remove drain, as stated.. drain it.
replace drain plug.
remove fill plug and fill until fluid begins to spill out of the fill plug. (technically the procedure calls for 0.5mm below the fill bore)
The inconsistencies in this how-to are due to gross negligence on my part, and a (seemingly blatant) inability to cope without sleep.
Apologies to all.
Ray
'99 CSVT - Silver #222/276
In a constant state of blow-off euphoria.
Originally posted by Kremitthefrog:
I like to wear dresses and use binoculars to watch grandmas across the street.
|
|
|
|
|
Joined: Mar 2003
Posts: 712
Veteran CEG\'er
|
|
Veteran CEG\'er
Joined: Mar 2003
Posts: 712 |
LOL.. I read that and thought the same thing, and for a minute i thought.. "wow there must be some wierd trick to this". Then i decided, no. someone just forgot a step. Good how to tho, just missed one small detail.
1998.5 Diamond White Pearl SVT (#4725)
custom exhaust/intake k&N/mod'ed y-pipe
slotted rotors/greenstuff pads/SS lines
cougar trans/FSVT shift tower/Torsen
16lb. flywheel
18" Velox VX-8's with some rubba bands
|
|
|
|
|
Joined: Mar 2004
Posts: 4,141
Hard-core CEG\'er
|
|
Hard-core CEG\'er
Joined: Mar 2004
Posts: 4,141 |
Originally posted by Ray:
The drain plug is on the bottom.. the fill is on the side.
LOOSEN fill (make sure it WILL loosen)
remove drain, as stated.. drain it.
replace drain plug.
remove fill plug and fill until fluid begins to spill out of the fill plug. (technically the procedure calls for 0.5mm below the fill bore)
The inconsistencies in this how-to are due to gross negligence on my part, and a (seemingly blatant) inability to cope without sleep.
Apologies to all.
Ray
thanks for clearing it up, no apology necessary, its a great how-to 
99 SE V6\5spd - 156 HP\157 TQ 15.166-90.84
Totaled 02/12/06
99 SVT # 1571 - 175 HP\153 TQ 14.999-91.88
Born 3/24/99 Reborn 3/18/06
Pietenpol Racing Technologies project vehicle
90 Festiva L 5spd, Blue(not for long), 103k
|
|
|
|
|
Joined: May 2005
Posts: 46
New CEG\'er
|
|
New CEG\'er
Joined: May 2005
Posts: 46 |
I have a quick question... why did you point out the clutch bleeder in the pictures? is there something that I supposed to do with that?
1999 SVT Contour
Magnaflow Dual Exhaust
KKM High Flow Intake
|
|
|
|
|
Joined: Nov 2004
Posts: 1,516
Hard-core CEG\'er
|
|
Hard-core CEG\'er
Joined: Nov 2004
Posts: 1,516 |
Thats just an FYI for realative location of the plug. You don't need to do anything with the clutch bleeder, but if you allready know where it was and you couldn't find the tranny plug, that picture would help you find it
Cameron
98 Black CSVT #2958
|
|
|
|
|
Joined: Jul 2001
Posts: 7,100
Addicted CEG\'er
|
|
OP
Addicted CEG\'er
Joined: Jul 2001
Posts: 7,100 |
exactly.. that picture was a relative picture, and its been floating around here for a LONG time. I happened to use it, as it helps in describing the location.
As with ALL my how-tos.. I state: Follow the DIRECTIONS to a "t" and you will have no problems, regardless of whether or not a picture "makes sense".. I commonly tear apart my car to illustrate a howto without an actual need to do the procedire, so I may visually skip a step that I tell people to do.
"do as I say, not as I do" type of thing.. LOL
Ray
'99 CSVT - Silver #222/276
In a constant state of blow-off euphoria.
Originally posted by Kremitthefrog:
I like to wear dresses and use binoculars to watch grandmas across the street.
|
|
|
|
|
Joined: May 2005
Posts: 46
New CEG\'er
|
|
New CEG\'er
Joined: May 2005
Posts: 46 |
Ok, thanks for the clarification.
1999 SVT Contour
Magnaflow Dual Exhaust
KKM High Flow Intake
|
|
|
|
|
Joined: Aug 2003
Posts: 4,140
Hard-core CEG\'er
|
|
Hard-core CEG\'er
Joined: Aug 2003
Posts: 4,140 |
Originally posted by Ray:
"do as I say, not as I do"
Unless you say to leave the drain plug off, right? You should probably fix the FAQ and delete all these posts to clarify the issue. I did it for you, since you're overworked here as it is:
Drain Procedure:
- Raise and support the vehicle. DO NOT WORK UNDERNEATH THE VEHICLE WITHOUT SOME MEANS OF SUPPORT (other than the jack itself). Jacks are not meant to SUPPORT the weight, only to lift it temporarily.. Failure to heed this warning could result in SEVERE INJURY OR DEATH.
- Locate the MTX FILL plug. We want to find the fill plug first, even though it is full (for now). Using either the 8mm allen wrench, or the T50 torx bit, we need to loosen the plug just to make sure it WILL loosen. It would really suck to drain your tranny, then find out you can't put more in!
The fill plug is located on the forward edge of the tranny as noted in this picture.
You can make out the waterpump pulley on the upper left of the picture, for reference. It is underneath the front bumper, just to the rear of the lower splash shield.
- re-tighten the fill plug (just so no dirt gets in there, though you shouldn't have taken it OUT.. just break it loose.
- Locate the drain plug. It is located on the passenger side of the lowest part of the tranny. You can get a better overall understanding of it (and the entire process) by looking at this picture (source unknown)
- Place your drain pan underneath the drain plug, and loosen the drain plug, draining whatever you can from the transaxle. Be sure you replace the drain plug!
- completely remove the FILL plug, now.
- Using the pump, begin adding your fresh fluids to the MTX. This is a "fill-till-spill" process, so add fluid until you have reached the fill plug's opening, and begin to lose fluid.
- replace fill plug
- lower the vehicle
- dispose of old fluid according to locally enforced laws.
|
|
|
|
|
Joined: Jul 2001
Posts: 7,100
Addicted CEG\'er
|
|
OP
Addicted CEG\'er
Joined: Jul 2001
Posts: 7,100 |
That's what the post below it stating the correction was for.. how many people who DON'T know how to change the fluid (hence reading the how-to) aren't going to read the other posts below (perhaps containing other tips, etc)??
I appreciate the effort, but the reason we avoid that sort of thing would be for posterity. Simply deleting responses that don't "work", line up well, or sound right, isn't an option.
Should I simply delete your post, as well, because it doesn't "look good" beneath the how-to we wrote in the first place?
If a mistake is made, then it is far better to leave it, and also include the FIX, rather than only provide the correct way. This way, if someone makes the SAME mistake, they can find the FIX for it, and not just a bunch of posts on how to do it properly the first time.
(granted, this particular issue is a text issue and not a PART issue, but the principle is the same)
and...
I'm in no way overworked, but thanks for assuming I cannot handle any workload I volunteered for.
 
Ray
Last edited by Ray; 06/30/05 08:58 PM.
'99 CSVT - Silver #222/276
In a constant state of blow-off euphoria.
Originally posted by Kremitthefrog:
I like to wear dresses and use binoculars to watch grandmas across the street.
|
|
|
|
|
Joined: Nov 2004
Posts: 84
CEG\'er
|
|
CEG\'er
Joined: Nov 2004
Posts: 84 |
If you have only the front up on jackstands, should you lower it before adding the liquid? Otherwise you change the point of the fill plug in reference to the center of the tranny, and you increase the amount of liquid in there. But does it matter? Is it better to have more fluid?
|
|
|
|
|
Joined: Sep 2000
Posts: 4,693
Hard-core CEG'er
|
|
Hard-core CEG'er
Joined: Sep 2000
Posts: 4,693 |
I fill with the front up on ramps, but I leave the plug out and lower the car and allow it to spill if it will and then reinstall the plug.
Jim Johnson
98 SVT
03 Escape Limited
|
|
|
|
|
Joined: Nov 2003
Posts: 6,700
Addicted CEG\'er
|
|
Addicted CEG\'er
Joined: Nov 2003
Posts: 6,700 |
If you lower the car, how do you squeeze back under there to put the plug back in? I've done this how to before (and it is FANTASTIC Ray!!), but I don't see how it is possible to do this. Putting the front on ramps, drain it, jack the rear up and set the rear on jackstands so that the car is reletivly level, then fill it. That is how I have always done it. ..Just a note for Ray, every How TO that you have done, I have printed up, laminated, and stuck in a 3 ring binder. I appreciate all of them, makes life so much easier and keeps me organized. When I want to do a UIM/LIM rebuild, change the fuel filter, change the trans fluid, etc.. I just whip out my book, turn to that section, and bam. 
2006 Pontiac G6 3900SFI GTP Coupe
CAI, Stainless Cat Back, Vector Tune, Strut Brace, Eibach Pro Kit, Custom Made Projector Headlights, 4300K, 20% Tint
Former Owner- 2000 "Stryped" CSVT
CEG Dragon Run- Oct 13-15
|
|
|
|
|
Joined: Jul 2005
Posts: 351
CEG\'er
|
|
CEG\'er
Joined: Jul 2005
Posts: 351 |
Is it that big of a deal? I put my front on ramps, but its on a slightly downward sloping hill, so the car is close to level anyway. I don't think I would worry about it though.
Black 2000 SVT Contour w/ Prairie Tan
MSDS Headers | Magnaflow | Mirko Splitter | Fidanza Short Throw Shifter | Kenwood KVT-815 LCD/DVD
|
|
|
|
|
Joined: Nov 2003
Posts: 6,700
Addicted CEG\'er
|
|
Addicted CEG\'er
Joined: Nov 2003
Posts: 6,700 |
Ohhhh I see. My driveway is very level, so when the front is on ramps, the car is very unlevel. I see where that would work out for ya.
2006 Pontiac G6 3900SFI GTP Coupe
CAI, Stainless Cat Back, Vector Tune, Strut Brace, Eibach Pro Kit, Custom Made Projector Headlights, 4300K, 20% Tint
Former Owner- 2000 "Stryped" CSVT
CEG Dragon Run- Oct 13-15
|
|
|
|
|
Joined: May 2003
Posts: 5,600
Addicted CEG\'er
|
|
Addicted CEG\'er
Joined: May 2003
Posts: 5,600 |
Originally posted by Big Jim:
I fill with the front up on ramps, but I leave the plug out and lower the car and allow it to spill if it will and then reinstall the plug.
I used this method as well. Filled her up, and left out the plug. When I put the car back down on all 4s it spilled some fluid out. There is enough room to reach through the wheel well area to re-install the plug.
#4559 of 6535 born on Feb 17, 1998
Black 1998.5 CSVT
FOR SALE [cleaning house]: SVT rear swaybar. Reasonable offer and its yours!
|
|
|
|
|
Joined: Nov 2005
Posts: 82
CEG\'er
|
|
CEG\'er
Joined: Nov 2005
Posts: 82 |
I'm wanting to fill my trans with Valvoline semi-synthetic ATF. Anyone have a reason not too?
It's had ATF in it, propably from the start.
Thanks.
95 Contour, 2.0L, stick, 178K mi.
|
|
|
|
|
Joined: Apr 2003
Posts: 1,322
Hard-core CEG\'er
|
|
Hard-core CEG\'er
Joined: Apr 2003
Posts: 1,322 |
I suggest you do some reading in this forum, it has been discussed once or twice.
1999 Toreador Red SVT, DOB 4/22/99, 2005 Of 2760.
"Many posted questions are answered by farm boys"
|
|
|
|
|
Joined: Nov 2005
Posts: 82
CEG\'er
|
|
CEG\'er
Joined: Nov 2005
Posts: 82 |
Originally posted by Marky:
I suggest you do some reading in this forum, it has been discussed once or twice.
Thanks.
What better thread on this forum for it to appear.
No one mentions this brand or semi-syn, although it is a nationally known brand.
95 Contour, 2.0L, stick, 178K mi.
|
|
|
|
|