yes you can leave the TB on the intake manifold im pretty sure, just disconnect everything. i cant tel form the pic, did you remove the fuel rail yet? i think you have to do that (again, i have never done a HG on a four cyilder car so i really am of very little use at this particular time).
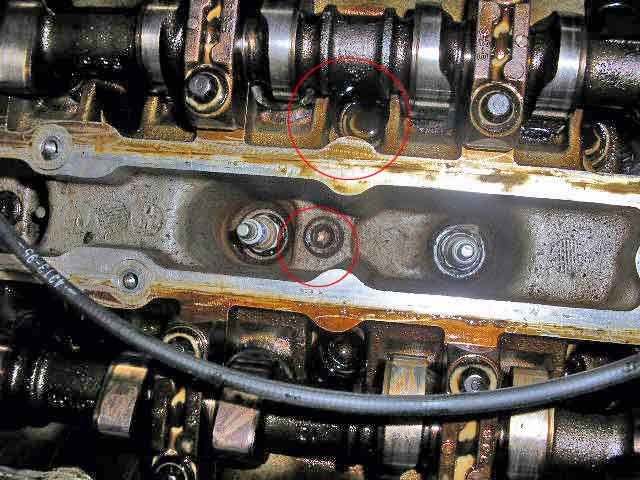
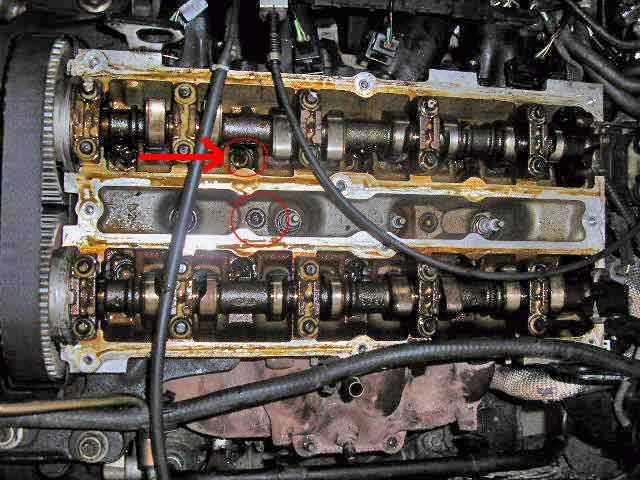
as for those bolts under the cams...you have to remove them and you have to remove the cams to get to them. its the only way. but...oh dear god, what have you done to those cams??? they are so dirty!!
here see if this helps:

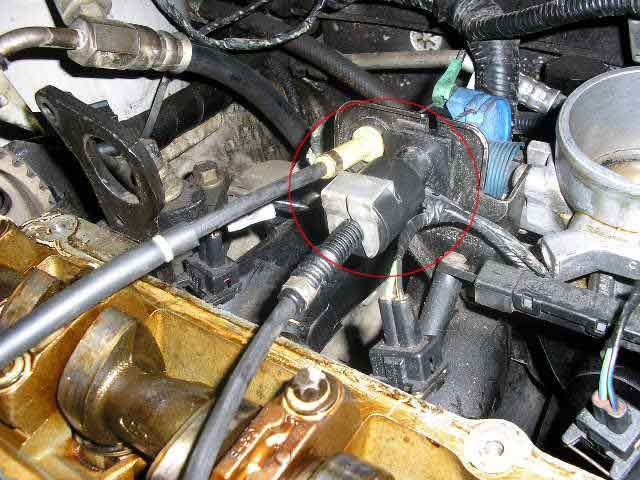
Fig. 1: Upper engine mount and accessory mounting brackets-2.0L engine

Fig. 2: Cylinder head bolt removal sequence-2.0L engine.
^ I certainly hope that you removed those bolts in that sequence or you may have problems putting them back in^

Fig. 3: Once the camshafts are removed, the cylinder head bolts are accessible.

Fig. 4: Loosen the head bolts in sequence, using the appropriate tools. The head bolts on the 2.0L engine require a T55 Torx bit to un-bolt.

Fig. 5: Lift the cylinder head off the engine block.
and theres the head gasket, or whast left of it.


Fig. 6: Remove the head bolts with a magnet once the head is placed on a suitable worksurface
you want pics of the rebuilding of the head (which you can probably dop while your in there, new t-stat and timingbelt tensioner!!!!!!) you want to do at least a partial rebuild (new TStat and TB tensioner) this is all providing that these things havent been replaced recently.... 
Fig. 7: The thermostat housing is held by three retaining bolts.

Fig. 9: Remove the timing belt tensioner pulley from the head
i cant stress enough that you replace the tensioner and the timing belt while your in there. do the Water pump to. its a while your in there thing. and the WP may have gotten fudged while trying to pump oil through the cooling system anyway.  Now is also a PREFECT time to remove that god awful Timing Belt cover. i would put the bottom one back on, but the middle one (shown here), and the top one can go away.
Fig. 10: The front cover is held by four retaining bolts, remove the bolts and...

... remove the cover from the cylinder head, the head will now lay flat.

using a suitable tool, remove the remains of the head gasket from both the block and head surfaces.

 wipe the head and the block down with some cleaner (i woudl probably use TB cleaner, since it wont/shouldnt harm the metal, but consult a true professonal (i.e. terry haines) before doing so)
  this will provide a good sealing surface for the new gasket.
Fig. 16: Place the new head gasket onto the engine block, aligning the holes in the gasket with ...

Fig. 17: ... the dowels in the block.


Fig. 19: The cylinder head bolts must be tighten in sequence, to the proper torque using a torque wrench
IMPORTANT!!!! The cylinder head bolts are a torque-to-yield design and cannot be reused. If the cylinder head bolts are reused, engine damage may occur.
here is the complete procedure...in steps:
1. Disconnect the negative battery cable.
2. Drain the engine coolant from the radiator and the cylinder block drain plugs.
3. Remove the intake manifold.
4. Remove the exhaust manifold.
5. Remove the camshafts and valve tappets.
6. Support the engine with a wood block between the crankshaft pulley and the front sub-frame.
7. Remove the engine support device (the big black funny looking bar that wraps around the rightside of the motor, its a brace/mount for the motor) for the timing belt cover removal.
8. Remove the right-hand engine lifting eye retaining bolt and the lifting eye.
9. Remove the support bracket from the power steering pump mounting bracket and cylinder head.
10. Remove the timing belt covers.
11. Remove the camshaft timing belt tensioner pulley.
12. Remove the thermostat housing from the rear of the cylinder head.
13. Remove the ignition coil and bracket from the cylinder head.
15. Remove the spark plugs if not already removed.
16. Remove the cylinder head retaining bolts in the reverse of the installation sequence.
17. Remove the cylinder head and gasket from the engine.
RE INSTALL INSTRUCTIONS:
1. Clean the cylinder head and cylinder block gasket surfaces and check for flatness. Refer to the Engine Reconditioning Section for procedures.
2. Install a new cylinder head gasket onto the cylinder block. Be sure the head gasket is properly positioned on the dowels.
WARNING Use care when positioning the cylinder head to prevent damage to the head gasket or dowels. 3. Place a light coating of engine oil onto the threads of the new cylinder head bolts and install.
4. Tighten the cylinder head bolts in sequence and in the following steps:
5. Tighten all bolts to 15-22 ft. lbs. (20-30 Nm)
6. Tighten all bolts to 30-37 ft. lbs. (40-50 Nm)
7. Rotate all bolts 90-120 degrees.
8. Reinstall the ignition coil bracket and the ignition coil.
9. Reinstall the water thermostat housing.
10. Reinstall the timing belt covers.
11. Reinstall the camshaft timing belt tensioner pulley and retaining bolt onto the front of the cylinder head.
12. Reinstall the support bracket to the power steering pump mounting bracket and the cylinder head.
13. Tighten the support bracket to 29-41 ft. lbs. (39-55 Nm).
14. Reinstall the right engine lifting eye to the cylinder head and the alternator mounting bracket. Tighten the retaining bolts to 30-41 ft. lbs. (41-55, Nm).
15. If removed, install the left-hand engine lifting eye to the cylinder head and tighten to 10-13 ft. lbs. (14-18 Nm).
16. Install the engine support device to the engine lifting eyes and support the engine.
17. Remove the wood block from between the sub-frame and the crankshaft pulley.
18. Reinstall the valve tappets and camshaft into their original locations.
19. Reinstall the exhaust manifold.
20. Reinstall the intake manifold.
21. Reinstall the spark plugs.
22. Drain the engine oil and remove the engine oil filter.
WARNING
Operating the engine without the proper amount and type of engine oil will result in severe engine damage.
DUHHH!
23. Reinstall the drain plug and tighten to 15-21 ft. lbs. (21-28 Nm).
24. Reinstall a new engine oil filter and fill the crankcase with the proper amount and grade of oil.
25. Fill the engine cooling system.
26. Reconnect the negative battery cable.
27. Run the engine and check for oil and coolant leaks. Check for proper engine operation.
there, i hope this helps, it took me like an hour to make!!! lol. i dont mind though, helping a fellow CEG'er makes it all worthwhile...

MAKE THIS A STICKY PLZ!!!


oh and dont forget what i said about cleaning the tops of your cylinders and the valves in the head...they need to be cleaned...gasoline is probably the safest thing to use, since they get gas on them anyway lol.
BTW, link is here:
Headgasket How to!! 


 I know this was a long post but just remember I'm a newb without a manual at the current moment and any help is good help. So please don't skip the post because of its length, I could really use the info.
 "
"


