Header How-To - 07/04/06 10:26 PM
Header How-to By Tourige version 1.0
I take no accountability for any actions you do when performing a header swap on your car. This How-to is meant to be informative and used as a guide, if you can�t follow instructions then it�s your own dumbass fault for getting hurt.
Refer to the Header FAQ before reading anything.
http://www.contour.org/ubbthreads/showflat.php?Cat=&Board=perf&Number=1192533&page=&view=&sb=5&o=&fpart=1&vc=1
Estimated Time:
Beginner: 10+ Hours
Experienced: 5-6
Parts:
Headers of your choice (Weapon R (include extra parts needed for Weapon R headers, see FAQ) or MSDS)
MIL Eliminators
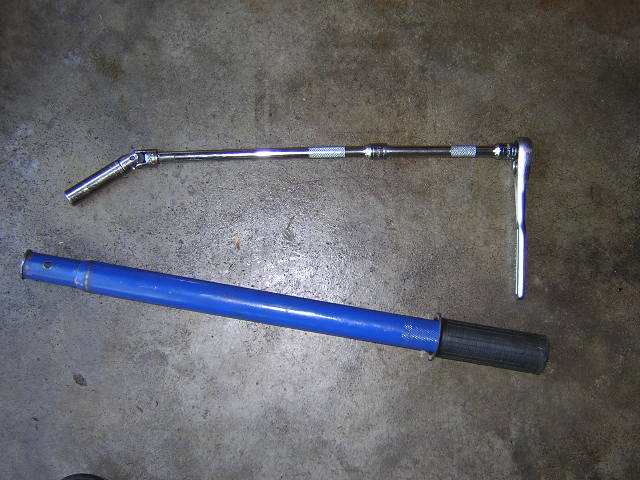
1 or 2 Socket Sets, you need at least 2 feet of extensions and you may need 2 Flex Joints.
2 Jack Stands (Recommend using 4 as you may be doing other exhaust work)
1 Jack
Wrench Set.
27mm Wrench for the EGR
5/8� Compression fitting (only for Weapon R)
Flash Lights
Anti-Sieze
Lots of PB plaster or liquid wrench anti-rust
New Gaskets (Optional)
I won�t go through the differences between a 3 and 2 bolt y-pipe and the whole flex pipe bit that has been covered in the FAQ.
Step 1:
The Day before the install jack the car up and support it on jackstands, look up at the manifold bolts and studs, spray them REALLY well with PB Plaster or Liquid wrench anti-rust, then spray down the EGR tube(where it connects to the manifold) and the 02 Sensors. Then Spray down all the bolts on the exhaust.
If your doing just headers and leaving the y-pipe the way it is you can just spray down the y-pipe to header bolts and the catback to main cat bolts.
Drop the car down, DO NOT DRIVE THE CAR MORE THAN 20 FEET, doing so will dry up the PB plaster and all that effort will go down the drain.
Get a good nights sleep and prepare yourself for some fun.
Step 2:
Jack the car up, support it firmly on jackstands, get out your tools etc. Disconnect the battery.
Start by removing the exhaust components from the car, you can leave the catback in place because we don�t go anywhere near it, remove the Main cat, the Flex pipe and the Y-pipe (note that 2-bolts flange Y-pipes don�t have a Flex pipe)
Remove the Lower 02 Sensor on the Y-pipe
Let�s start off with the Front header because it�s easier.
Step 3:
Remove the Splash shield and lay it aside. Drain the oil like you normally would while doing an oil change, this leaves you with WAY more room to work with. Remove the oil filter and set it aside. Begin by unscrewing the bolts that hold the radiator line that runs just in front of the manifold. Move the line forward a few inch�s to give you more room tow work with.
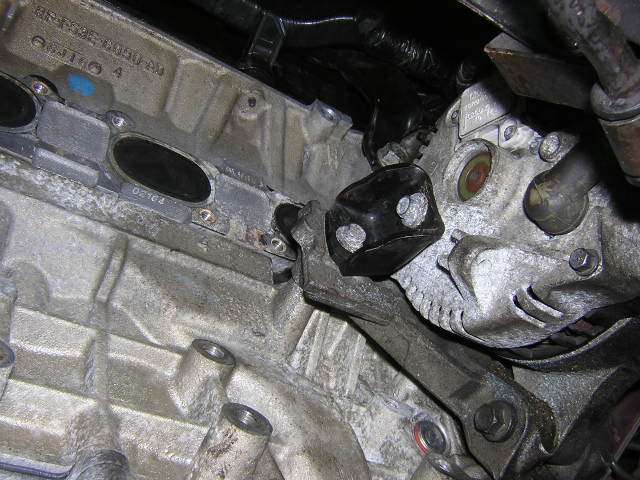
Start by removing the bottom manifold bolts with a 15mm deep well socket, you�ll we need a flex joint and some extensions to get at them, I found it was easiest to guide the socket up with one hand on the socket and the other on the base of the wrench.
Remove them in whatever order you wish, it doesn�t really matter, simply adjust the angle to get at the bolts.
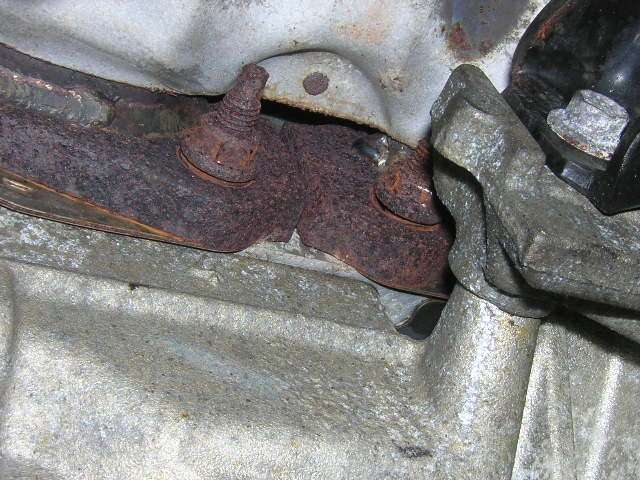
Now start removing the manifold studs, same principle as the bolts but you�re using a 5mm socket on the tip of the stud to get them out. Pull the bottom 3 out and move to the top.
Step 4:
Now I found it easier to get the top bolts off by going from the bottom of the car and having a helper on top guide the socket onto the bolt. Unscrew the bolts and set them aside.
You should now be able to remove the header from the studs, now remove the 02 Sensors either by unplugging the multiplug and removing the 02 sensor away from the car, or just by unscrewing the 02 under the car. Be careful with the 02 sensors as they are delicate.
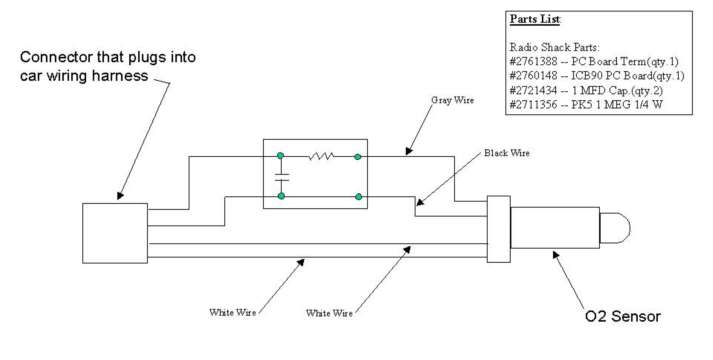
Wire in the MIL Eliminators to the downstream 02 Sensors, I found this WAY easier if you remove them from the car by unplugging the multiplug.
Step 5:
Take your new Headers and install them the same way you removed the stockers. I found I had to dremel some of the backing of the radiator fan away to properly screw in the upstream 02 sensor. Remember to put anti-sieze on the threads of the 02 sensors and the studs/bolts just in case you ever have to come back and work on the car again.
Tighten the bolts enough that they are snug.
Now the fun part...
Step 6:
Seriously take 30-60 minutes to cool off and gather some energy because this is a real PITA
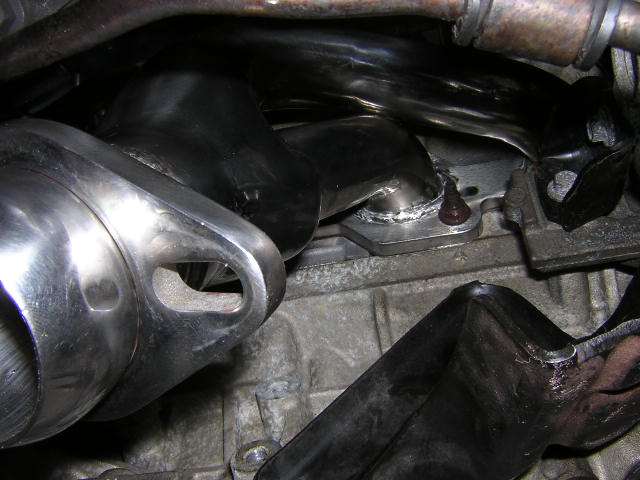
Start by removing the rear manifold in the same way you removed the front one, Go for the bottom bolts to begin with because they are right there and they are EASY. You can either go over the sub frame to get them or you can do what I did and just go for the direct shot.
For the Top Bolts your going to need at least 2 feet of extensions and at least 1 flex joint, I used a LONG (about 1 foot) extension off the ratchet, then a flex joint, and then the rest of my extensions and the socket. I lied down with my feet out the passenger side direction and used my right hand to push the ratchet over the sub frame and then my left hand to guide it on the bolts.
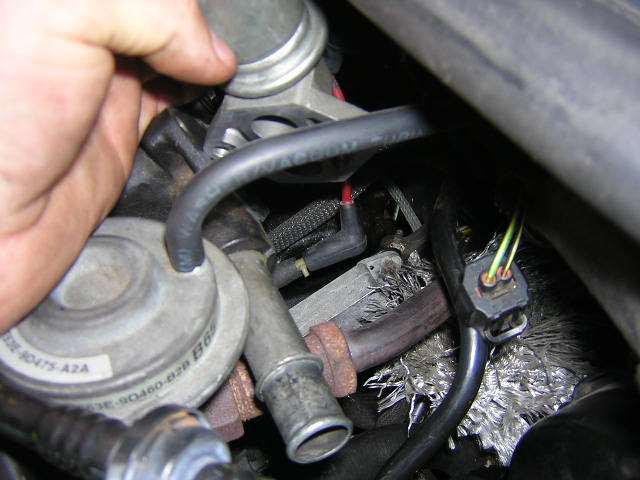
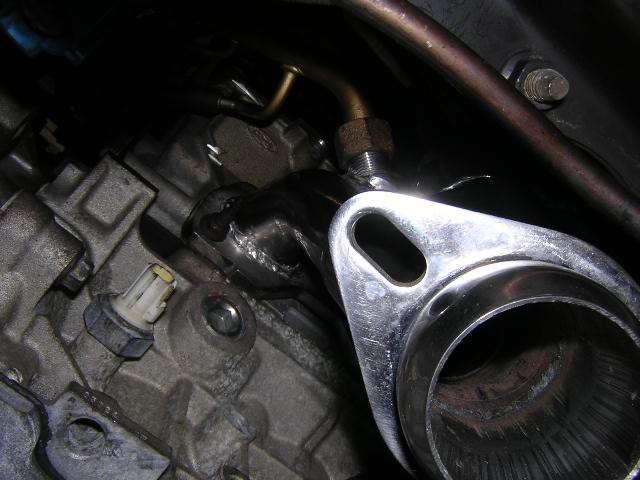
After removing the bolts you need to remove the EGR and 02 Sensor. Reach up with a 27mm wrench to get at the EGR, Note that this is a HUGE pain to remove and might take some time.
After unscrewing the EGR you can move to the top of the car, unscrew the EGR bolts that hold the EGV to the Upper intake manifold and remove the whole unit from the car (you need to also remove 2 small green hoses from underneath the car, warning that these are frail; and will break easily)
Now work on removing the 02 Sensor using some wrench�s (I don�t recall off the top of my head which size, but the size is pretty common)
Now remove the manifold studs the exact same way you removed the bolts, instead using a 5mm socket to get them off.
Once they are removed you can slither the old crappy header out and throw it on the floor in success.
Congrats, the hard part is over.
Step 7:
Take your EGR tube and place it on a table.
Using the below pic as a guide simply cut the EGR in half with a dremel and install the 5/8� compression fitting.
EGR Pic:

Step 8:
Install the rear header in the same way you removed the stocker. Install the upper 02 sensor once the header is on the car otherwise it will not clear the sub frame when you try and install it.
Use anti-sieze liberally on all bolts, studs, the EGR tube fittings and the 02 Sensors
Install the EGR the same way you removed it, bolting it up to the UIM first, then remove the green tubes, and finally screwing it into the header. I found it easier to tighten the compression fitting once everything was in place that way the EGR had some give to it and it could sit properly.
Step 9:
Install the new Y-pipe and the downstream 02 Sensor+MIL eliminator with it.
Install your flex pipe.
Install your main cat.
Drop the car, connect the battery, let it sit for 5 mins and start her up.
Step 10:
Take her for a spin to enjoy your new found power and sound, get home crack open a beer and relax.
I take no accountability for any actions you do when performing a header swap on your car. This How-to is meant to be informative and used as a guide, if you can�t follow instructions then it�s your own dumbass fault for getting hurt.
Refer to the Header FAQ before reading anything.
http://www.contour.org/ubbthreads/showflat.php?Cat=&Board=perf&Number=1192533&page=&view=&sb=5&o=&fpart=1&vc=1
Estimated Time:
Beginner: 10+ Hours
Experienced: 5-6
Parts:
Headers of your choice (Weapon R (include extra parts needed for Weapon R headers, see FAQ) or MSDS)
MIL Eliminators
1 or 2 Socket Sets, you need at least 2 feet of extensions and you may need 2 Flex Joints.
2 Jack Stands (Recommend using 4 as you may be doing other exhaust work)
1 Jack
Wrench Set.
27mm Wrench for the EGR
5/8� Compression fitting (only for Weapon R)
Flash Lights
Anti-Sieze
Lots of PB plaster or liquid wrench anti-rust
New Gaskets (Optional)
I won�t go through the differences between a 3 and 2 bolt y-pipe and the whole flex pipe bit that has been covered in the FAQ.
Step 1:
The Day before the install jack the car up and support it on jackstands, look up at the manifold bolts and studs, spray them REALLY well with PB Plaster or Liquid wrench anti-rust, then spray down the EGR tube(where it connects to the manifold) and the 02 Sensors. Then Spray down all the bolts on the exhaust.
If your doing just headers and leaving the y-pipe the way it is you can just spray down the y-pipe to header bolts and the catback to main cat bolts.
Drop the car down, DO NOT DRIVE THE CAR MORE THAN 20 FEET, doing so will dry up the PB plaster and all that effort will go down the drain.
Get a good nights sleep and prepare yourself for some fun.
Step 2:
Jack the car up, support it firmly on jackstands, get out your tools etc. Disconnect the battery.
Start by removing the exhaust components from the car, you can leave the catback in place because we don�t go anywhere near it, remove the Main cat, the Flex pipe and the Y-pipe (note that 2-bolts flange Y-pipes don�t have a Flex pipe)
Remove the Lower 02 Sensor on the Y-pipe
Let�s start off with the Front header because it�s easier.
Step 3:
Remove the Splash shield and lay it aside. Drain the oil like you normally would while doing an oil change, this leaves you with WAY more room to work with. Remove the oil filter and set it aside. Begin by unscrewing the bolts that hold the radiator line that runs just in front of the manifold. Move the line forward a few inch�s to give you more room tow work with.
Start by removing the bottom manifold bolts with a 15mm deep well socket, you�ll we need a flex joint and some extensions to get at them, I found it was easiest to guide the socket up with one hand on the socket and the other on the base of the wrench.
Remove them in whatever order you wish, it doesn�t really matter, simply adjust the angle to get at the bolts.
Now start removing the manifold studs, same principle as the bolts but you�re using a 5mm socket on the tip of the stud to get them out. Pull the bottom 3 out and move to the top.
Step 4:
Now I found it easier to get the top bolts off by going from the bottom of the car and having a helper on top guide the socket onto the bolt. Unscrew the bolts and set them aside.
You should now be able to remove the header from the studs, now remove the 02 Sensors either by unplugging the multiplug and removing the 02 sensor away from the car, or just by unscrewing the 02 under the car. Be careful with the 02 sensors as they are delicate.
Wire in the MIL Eliminators to the downstream 02 Sensors, I found this WAY easier if you remove them from the car by unplugging the multiplug.
Step 5:
Take your new Headers and install them the same way you removed the stockers. I found I had to dremel some of the backing of the radiator fan away to properly screw in the upstream 02 sensor. Remember to put anti-sieze on the threads of the 02 sensors and the studs/bolts just in case you ever have to come back and work on the car again.
Tighten the bolts enough that they are snug.
Now the fun part...
Step 6:
Seriously take 30-60 minutes to cool off and gather some energy because this is a real PITA
Start by removing the rear manifold in the same way you removed the front one, Go for the bottom bolts to begin with because they are right there and they are EASY. You can either go over the sub frame to get them or you can do what I did and just go for the direct shot.
For the Top Bolts your going to need at least 2 feet of extensions and at least 1 flex joint, I used a LONG (about 1 foot) extension off the ratchet, then a flex joint, and then the rest of my extensions and the socket. I lied down with my feet out the passenger side direction and used my right hand to push the ratchet over the sub frame and then my left hand to guide it on the bolts.
After removing the bolts you need to remove the EGR and 02 Sensor. Reach up with a 27mm wrench to get at the EGR, Note that this is a HUGE pain to remove and might take some time.
After unscrewing the EGR you can move to the top of the car, unscrew the EGR bolts that hold the EGV to the Upper intake manifold and remove the whole unit from the car (you need to also remove 2 small green hoses from underneath the car, warning that these are frail; and will break easily)
Now work on removing the 02 Sensor using some wrench�s (I don�t recall off the top of my head which size, but the size is pretty common)
Now remove the manifold studs the exact same way you removed the bolts, instead using a 5mm socket to get them off.
Once they are removed you can slither the old crappy header out and throw it on the floor in success.
Congrats, the hard part is over.
Step 7:
Take your EGR tube and place it on a table.
Using the below pic as a guide simply cut the EGR in half with a dremel and install the 5/8� compression fitting.
EGR Pic:
Step 8:
Install the rear header in the same way you removed the stocker. Install the upper 02 sensor once the header is on the car otherwise it will not clear the sub frame when you try and install it.
Use anti-sieze liberally on all bolts, studs, the EGR tube fittings and the 02 Sensors
Install the EGR the same way you removed it, bolting it up to the UIM first, then remove the green tubes, and finally screwing it into the header. I found it easier to tighten the compression fitting once everything was in place that way the EGR had some give to it and it could sit properly.
Step 9:
Install the new Y-pipe and the downstream 02 Sensor+MIL eliminator with it.
Install your flex pipe.
Install your main cat.
Drop the car, connect the battery, let it sit for 5 mins and start her up.
Step 10:
Take her for a spin to enjoy your new found power and sound, get home crack open a beer and relax.