• Welcome to the Contour Enthusiasts Group, the best resource for the Ford Contour and Mercury Mystique.

    You can register to join the community.

Rear roll restrictor

Aussie Ford

Hard-core CEG'er
Joined
Sep 3, 2006
Messages
2,033
Location
Portland, Orygun
Rear Roll Restrictor repair & replacement – Aussie Ford 6/08

So I looked around and the only sources for a replacement I could find was Ford $75 + SH or a junk yard. Well Ford is real proud of them IMO and jy ones all seem to be as bad as mine, so having grabbed and extra one from the jy ($5) I proceeded to remake my own poly fill ($40).

1) Clean the part. Then do it again.....
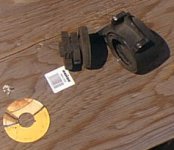
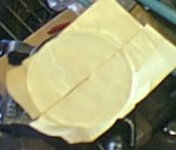
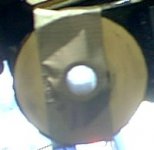
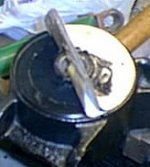
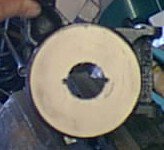
2) Center the hole in the housing. Make a cardboard template to fit the bottom. It should fit around the inside of the housing, and around the center tight. I used a stiff cardboard that was shinny on one side. Fitting tight will help align the sleeve and keep it in the middle. There are two rubber nubs on the sleeve I decided to save them so I could orient the center.
Cover.jpg

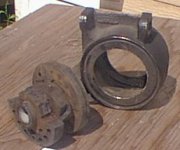
3) Remove the rubber insert. I found that cutting it out with a razor knife worked well. I stretched it with a screwdriver and cut it. Only had to cut about 1/2 of one side out to be able to manipulate the rest out.
center out.jpgcenter out2.jpg

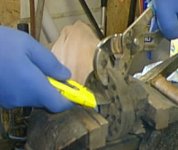
4) I left the rubber on the very ends and cut the rest away with a razor knife and pliers to stretch it.
cutting.jpg

5) Finished by cleaning it up with a wire brush in a drill. Then wiped it down again with some brake cleaner.
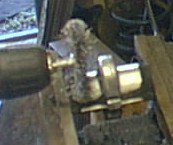
wire brush.jpg
 
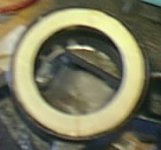
6) Using some 2” wide double sided carpet tape (real sticky stuff) I had laying around I covered the bottom of the housing then trimmed away the extra.
Tape1.jpg Tape2.jpg

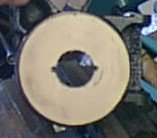
7) Then after coating the area that will not be in contact with the tape with silicone grease, install the bottom cover
Bottom cover.jpg

8) Install the core with the oval inline with the top and bottom of the RR when installed. Tape the bottom to keep it in place and ensure no leaks.
Core1.jpgBottom tape.jpg
 
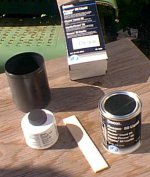
9) Following the instructions supplied mix the urethane.
Urethane kit.jpg

10) Fill’er up a 1 lb kit will do the job with a little extra.
Filler up.jpg

11) After waiting an hour or so past the working time of the urethane check the left over for proper set then remove the bottom cover, and let it cure per directions.
Remove cover.jpg

12) After proper curing, install your new DIY poly rear roll restrictor. Depending on the hardness of the urethane 94A, 80A, or 60A you will notice vibrations inside the vehicle. However, no matter which one you use there will be a positive difference when compared to the stock RR. So go for a spin and when you get back have an adult beverage.
 
Thanks Gents, so here's the rest of the story.....

While the performance was there with the 80A urethane I found it a bit hard for a DD in that I didn't care for the transmitted vibrations. Granted after a couple of days it started to just sound normal to me, but I still didn't care for it at idle. I ordered some 60A urethane from McMaster-Carr, and prepped the take off RR I had. This one was bad, but I reasoned that since I was going to fill it that was not an issue.

Using a citrus base degreaser I soaked it for a day then rinsed it good, and cleaned it again with brake cleaner and Q-tips. After drying for a day in the hot sun I figured it was ready.

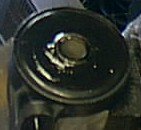
I did not remove any rubber this time, but made a cover for the bottom and taped it into place. Sealed the center up with duct tape as above.

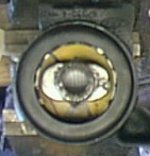
I further reasoned that the rubber in the part took up about half of the area. You can see there are void areas in the part as well as holes in the outer discs.

I carefully divided the urethane kit into two equal parts and mixed up half of my material.

As I poured it in slowly through the holes, I had the part in a vice, and tapped the side with a plastic faced hammer. This helped remove trapped air. Also just filling slowly should provide plenty of escape routs for air. Watching air bubbles come out as it neared the top indicated that the process worked.

I followed the process waiting awhile then removing the cover and it appeared to be filled well.

After three days I installed it tonight and went for a spin. I am pleased with the results so far, but will wait a week or so before actually claiming victory. IF you have a bad RR on a DD this might just be the way to go...:laugh:

So what is the difference between the 60A & 80A urethanes? well the rubber that is in the RR is about the same as the 60A, and the 80A is harder than a tire. I can squeeze a 1/4" x 3" disc in half, I can not do that with an 80A similar disc. Only barely compress it.

Regards,
AF
 
Great write up, reall enjoyed the detail on the differences between 80A and 60A.
 
Wait a minute, you mean the mod I proclaimed over 5 years ago is not mine any more... :shrug:

RollResistors.jpg


Great improvement in MTX feel and gear selection. (modified short throw too!)
HARSH change to NVH at rpm levels below 4000rpm. (i.e. cruisin' throttle response gets much rougher!)

I even did my wife's Z24's front RR in 94A urethane to help acceleration stiffness.

Just doing the front helps wheel hop a lot. Doing both (i.e. rear) really hurts the NVH of the vehicle. The increased NVH out weighs the other gains. I just took that sacrifice. It is not for everyone!!!
 
"Wait a minute, you mean the mod I proclaimed over 5 years ago is not mine any more... :shrug:"

LOL... I'm not putting a claim on your work my friend. However I am looking for a better solutions for a DD that is not as harsh as the 94's. There are different considerations to the term performance.

Regards and thanks for pioneering the work here.

AF
 
Back
Top