69Boss302
Has mile high skills
Wiper Arm removal, Cowl Screen removal and Fresh Air (Cabin) filter replacement.
This is valid for all year Contour and Mystiques.
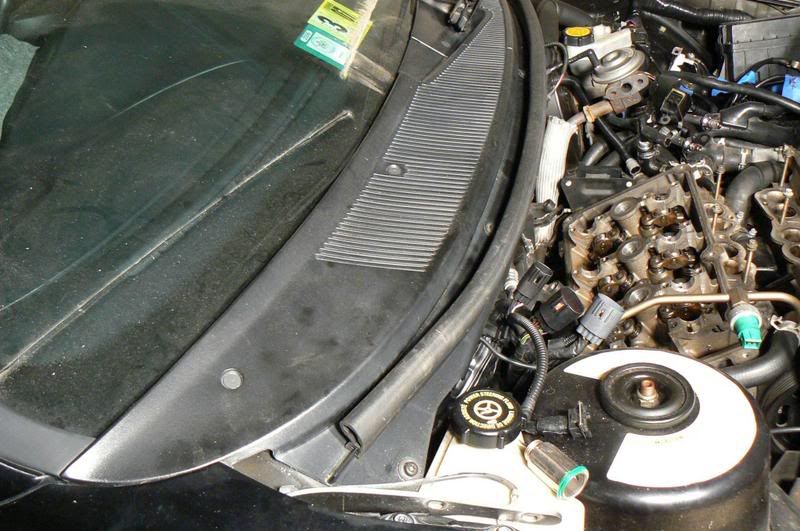
The hood has previously been removed from the vehicle used for this write-up. It is not neccessary to do so to your vehicle.
To remove the Entire Cowl Screen (approx 10 minutes)
Tools needed:
Wiper Arm removal tool
15mm socket and ratchet
Phillips Head screwdriver
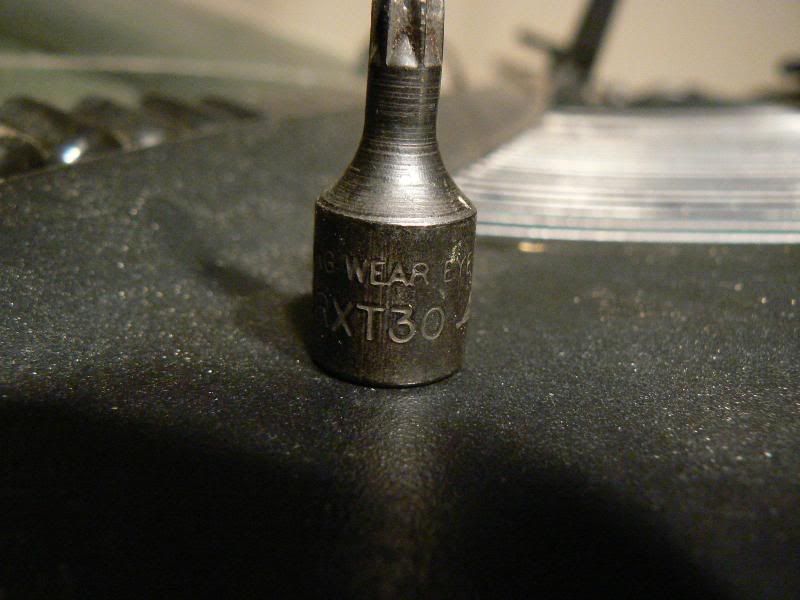
T-30 Torx bit
Small pick or very small flathead screwdriver
The air filter I use is Purolator C14860. It is widely available and can be had for under $20.
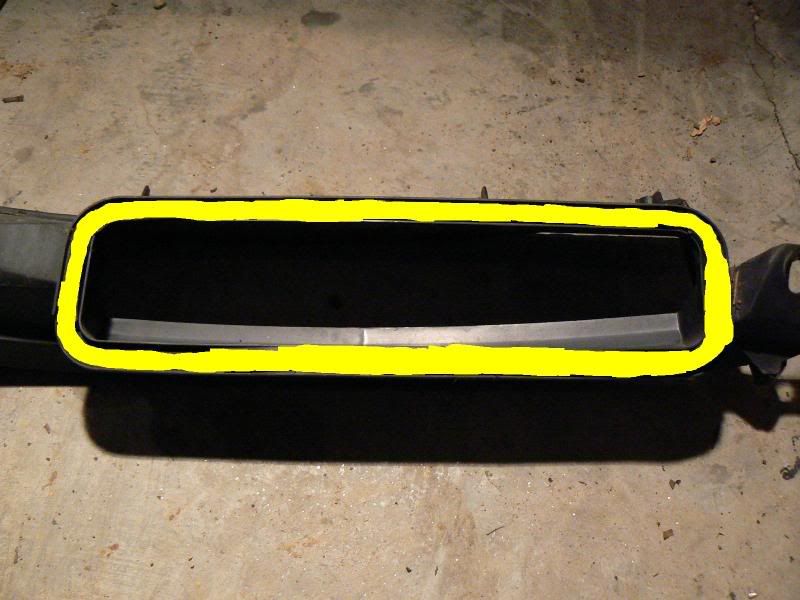
Begin by removing the long weather stripping piece along the lower edge of the cowl screens
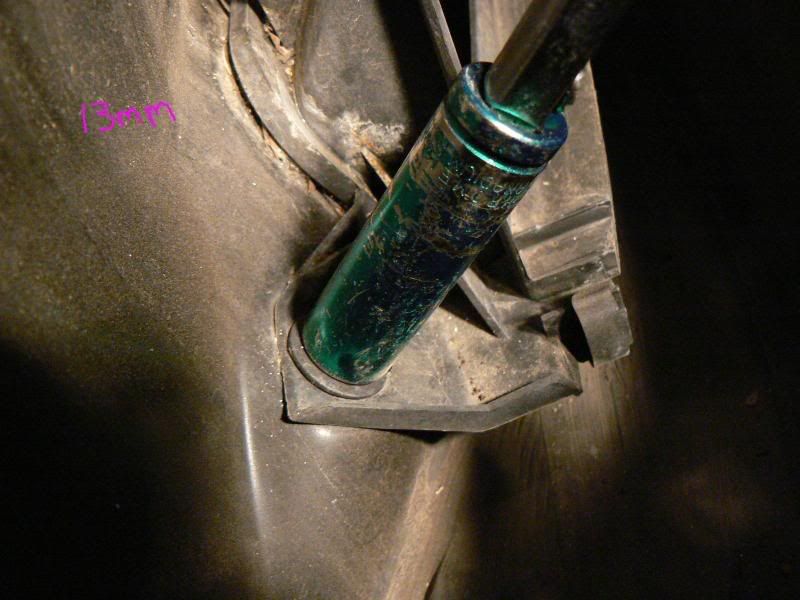
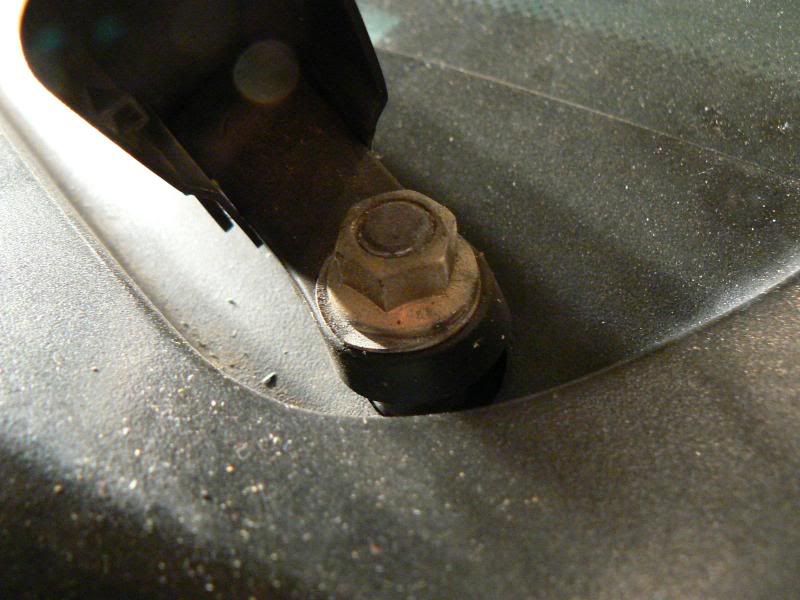
Under the end of the wiper arm is a 15mm nut. To access this, flip up the cover. Now remove the 15mm nut and washer. Set aside.
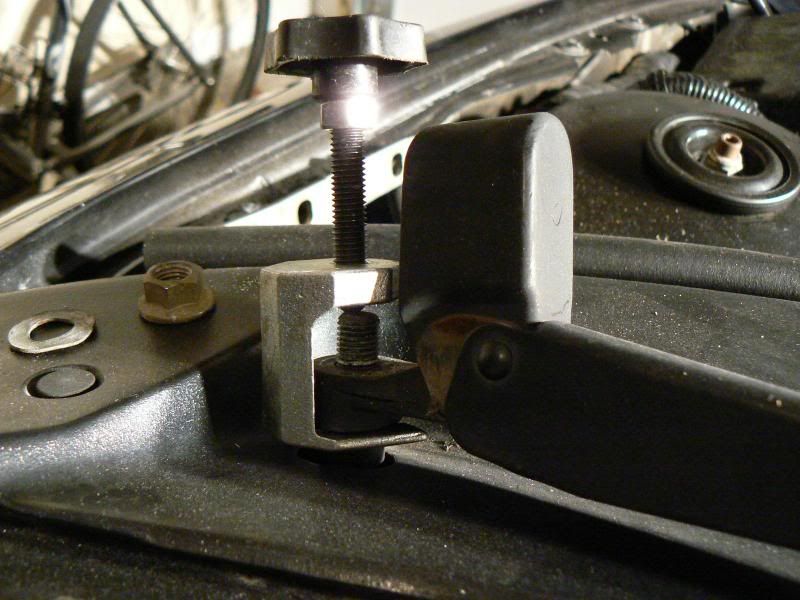
Attach the wiper arm removal tool underneath the arm and on top of the stud. When in the correct position, turn the handle of the tool and the wiper arm will come loose. Repeat for the Passenger side.
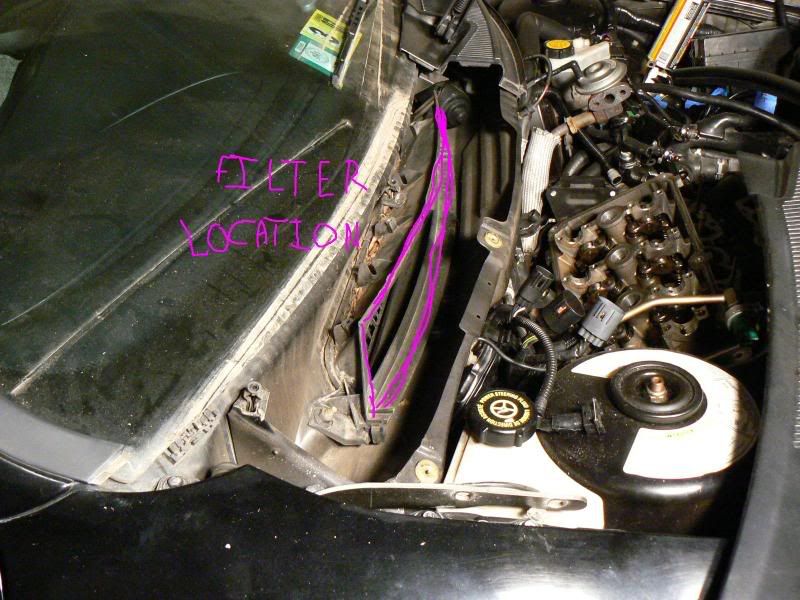
For replacing the Cabin Air Filter, begin here. (Approx 15 minutes total)
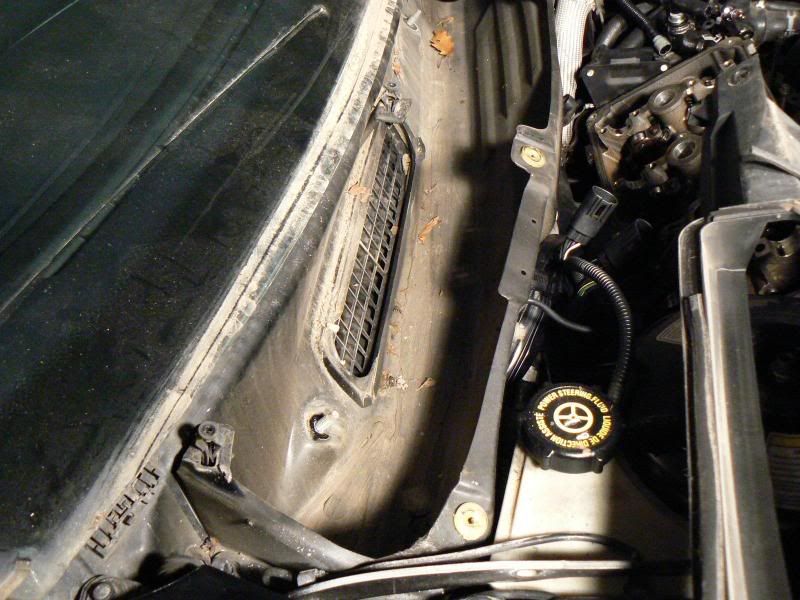
The filter is located on the passenger side.
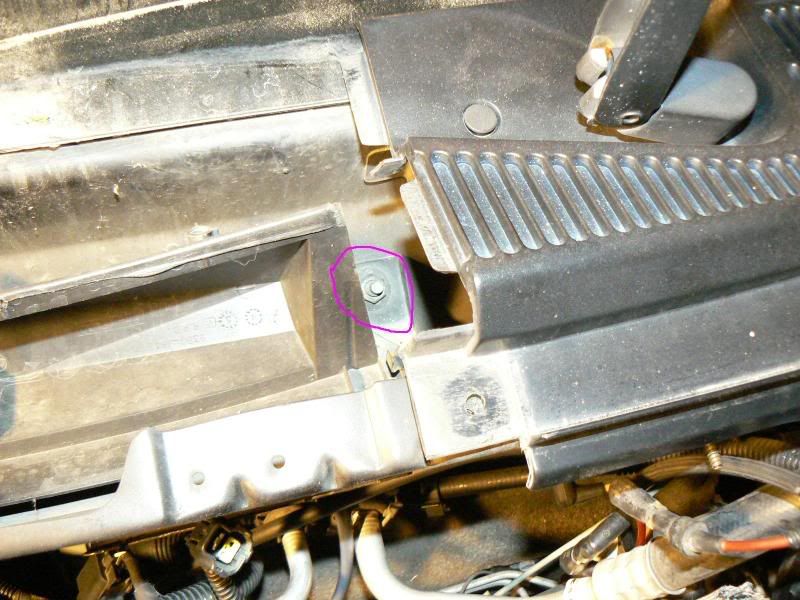
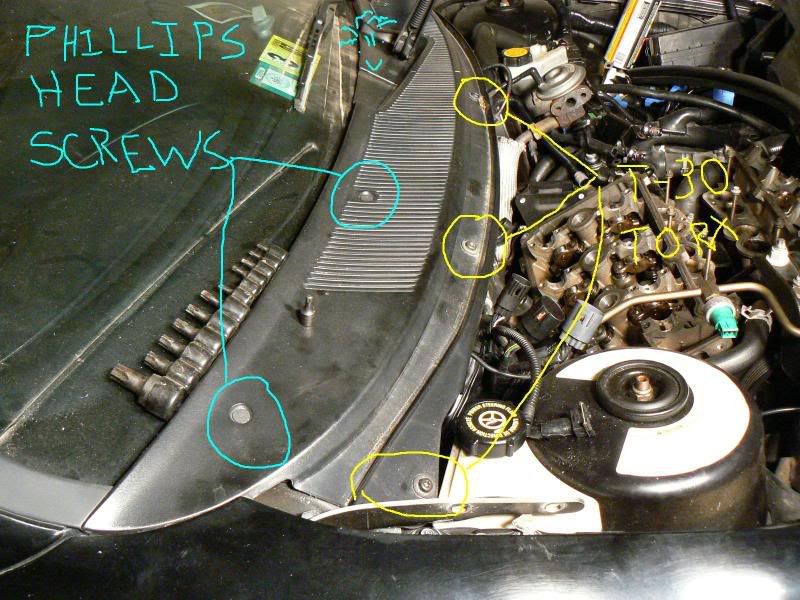
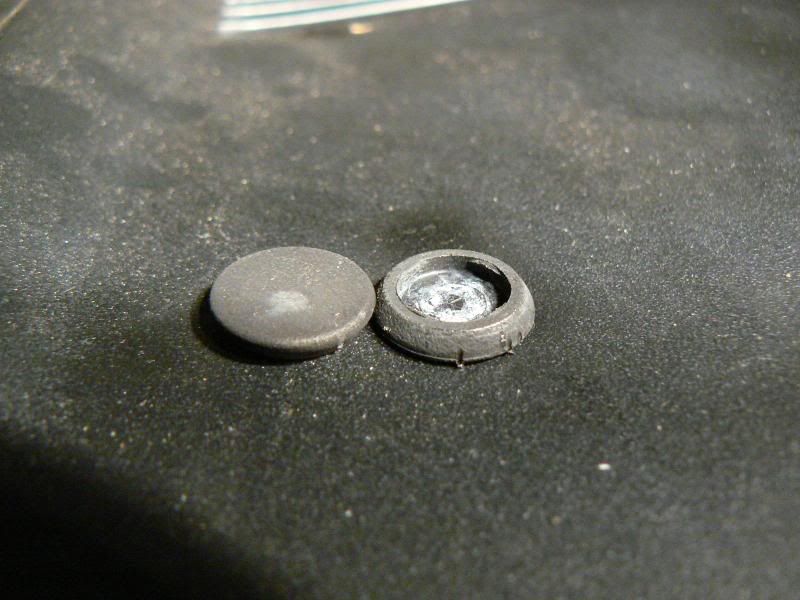
In the indicated areas, remove the Torx bits and phillips head screws. The screws have a beauty cover over them and are best removed using a small pick or small, thin bladed flat head screwdriver.
Set all screws, covers and Torx bolts aside.
Beauty covers
The same process may now be used on the drivers side if you are replacing the entire thing. It is not neccessary for replacing the Cabin Filter.
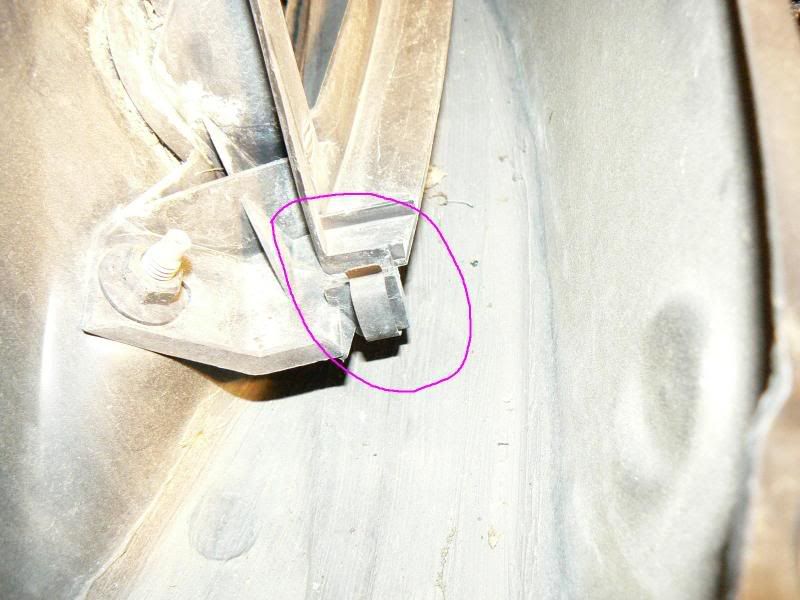
Next is to release the clamps that are holding down the plastic strap the retains the filter.
Shown is the passenger side. There is another clamp on the other side. Once loosened, the filter and plastic strap can now be removed.
To install, reverse the above directions.
This is valid for all year Contour and Mystiques.
The hood has previously been removed from the vehicle used for this write-up. It is not neccessary to do so to your vehicle.
To remove the Entire Cowl Screen (approx 10 minutes)
Tools needed:
Wiper Arm removal tool
15mm socket and ratchet
Phillips Head screwdriver
T-30 Torx bit
Small pick or very small flathead screwdriver
The air filter I use is Purolator C14860. It is widely available and can be had for under $20.
Begin by removing the long weather stripping piece along the lower edge of the cowl screens
Under the end of the wiper arm is a 15mm nut. To access this, flip up the cover. Now remove the 15mm nut and washer. Set aside.
Attach the wiper arm removal tool underneath the arm and on top of the stud. When in the correct position, turn the handle of the tool and the wiper arm will come loose. Repeat for the Passenger side.
For replacing the Cabin Air Filter, begin here. (Approx 15 minutes total)
The filter is located on the passenger side.
In the indicated areas, remove the Torx bits and phillips head screws. The screws have a beauty cover over them and are best removed using a small pick or small, thin bladed flat head screwdriver.
Set all screws, covers and Torx bolts aside.
Beauty covers
The same process may now be used on the drivers side if you are replacing the entire thing. It is not neccessary for replacing the Cabin Filter.
Next is to release the clamps that are holding down the plastic strap the retains the filter.
Shown is the passenger side. There is another clamp on the other side. Once loosened, the filter and plastic strap can now be removed.
To install, reverse the above directions.
Last edited: