69Boss302
Has mile high skills
The following has been written to show the steps required to replace the window and run channel damaged from a break in.
It should be noted that this should work on all year Contours. The glass being used in this illustration is from a 95 Contour and going into a 99 SVT. The door in this example is the drivers. Variations to the guide may be required for other doors but this should get you close.
Time: Approx. 1 hour on average.
Tools needed for this project are:
8mm socket
15mm socket
6in. extension and ratchet
Flat and Phillips head screw driver
T27 torx bit( may not be required)
Small Pick (not required but nice to have)
Step 1
Remove interior trim piece. There is a Phillips head screw underneath the circular cover. For Mirror replacement, proceed to Step 6.
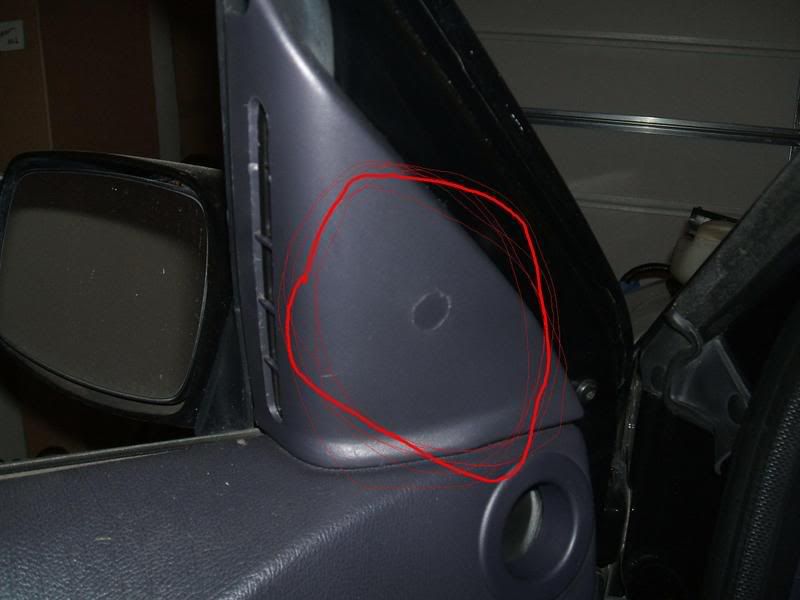
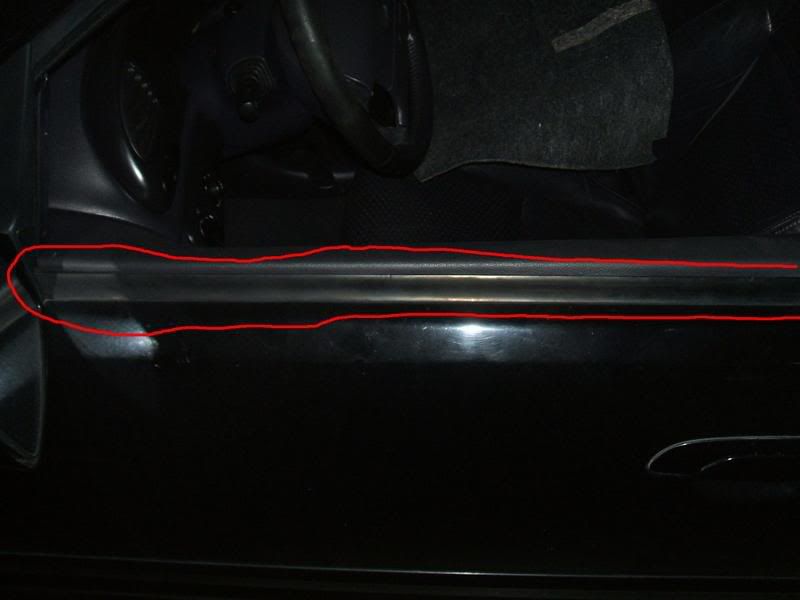
Step 2
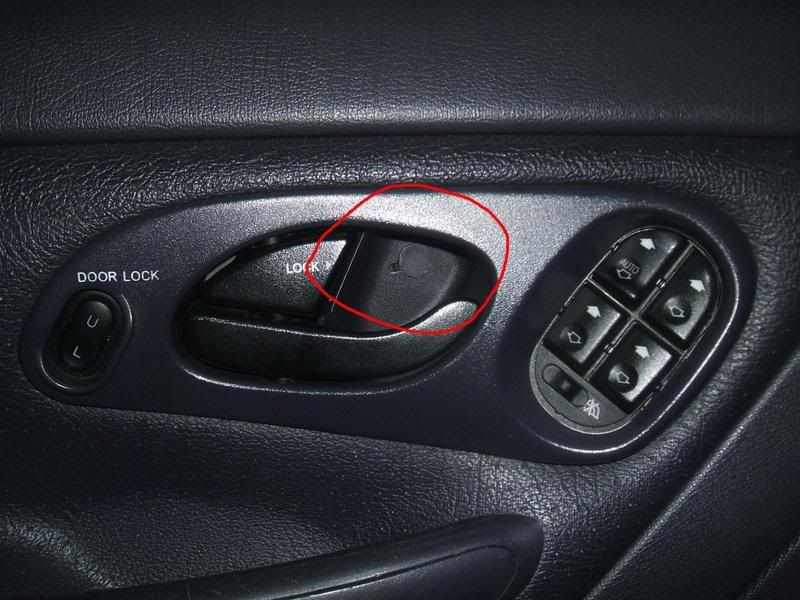
Remove the door handle trim. Using a small pick, remove the cover (Circled) There is another Phillips head screw under the circular cover.
At this point, the panel can be wiggled out from door handle. Now that you have it loose, disconnect the window switch (if needed) and the door lock switch. Set aside panel.
Step 3
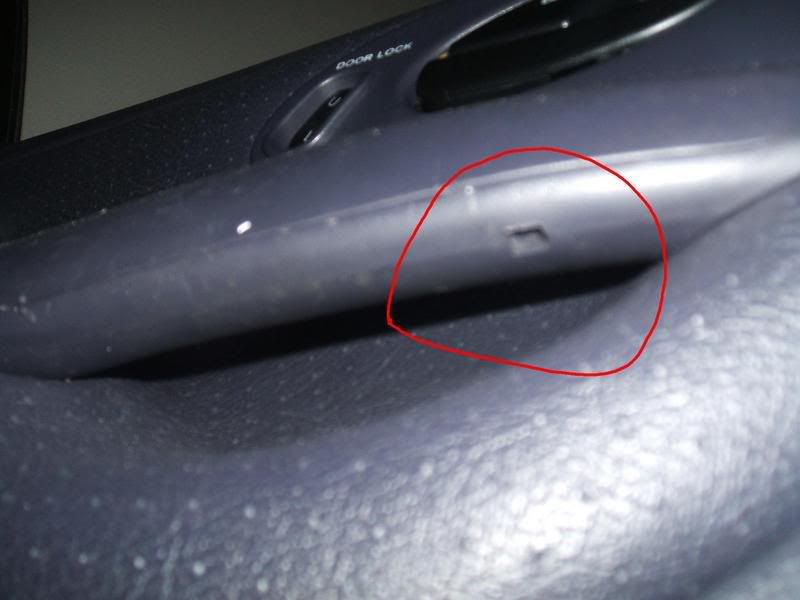
Remove Door Pull. Please notice the small notch underneath the handle. Insert either a small flat head screwdriver or curved pick into the notch and push outwards. This will push the center piece out. You may find it neccessary to use another small flat head screwdriver to hold the piece out to prevent it from snapping back in. Do not pull to hard on the piece or it may bend.
Once out, there is another 2 Philips head screws holding the pull in place. Remove these screws.
Step 4
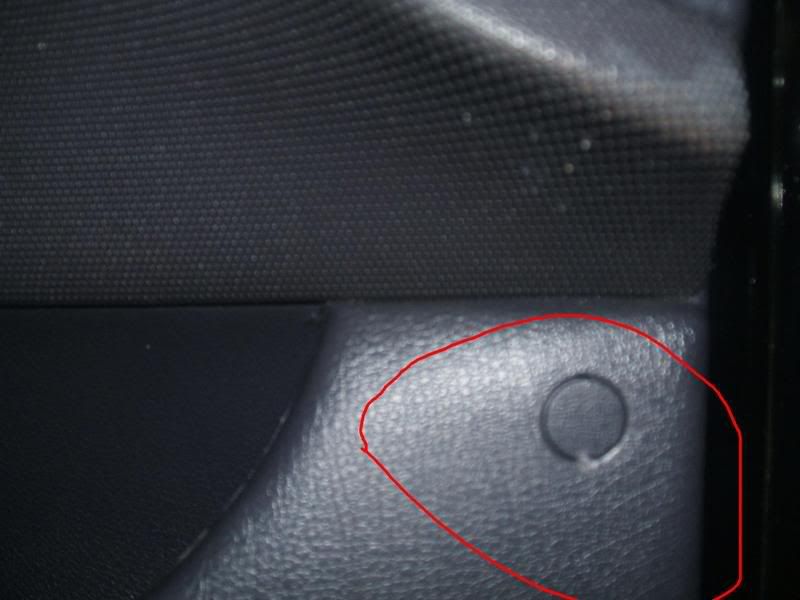
Remove lower forward screw. In front of the map pocket. Remove the cover and the Philips head screw underneath.
Step 5
Remove the outer edge screws. This should be about 5 and run along the outside edge of the panel.
At this point you can easily access the speakers.
Now that the panel has been removed, you have no doubt noticed the foam liner underneath that is attached to the door. This is to keep excess wind from entering the car through the door panel. It is attached via an adhesive bead running along the outermost edges. If you find it neccessary to remove, be sure to remove it in one piece. For this example, I have removed the entire piece.
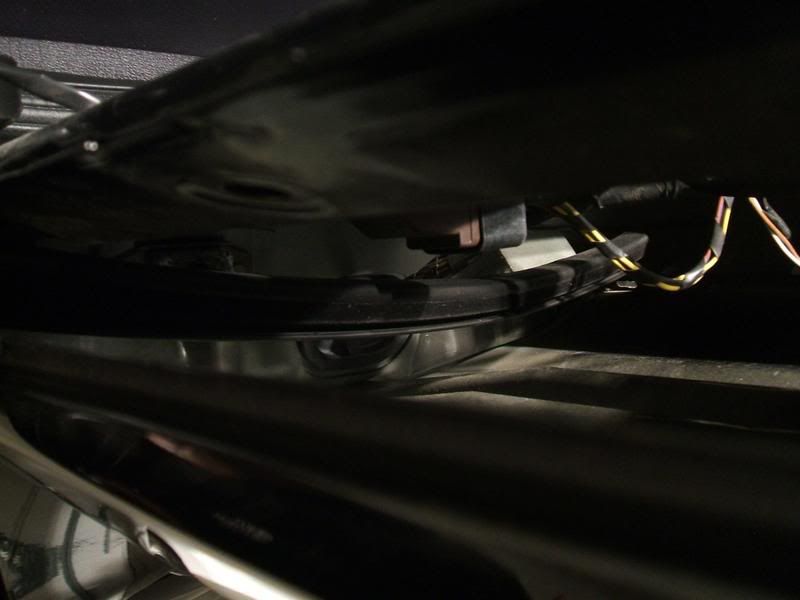
Step 6
Side Mirror removal
**Note** This step is not needed if the window run chanel is not being replaced.
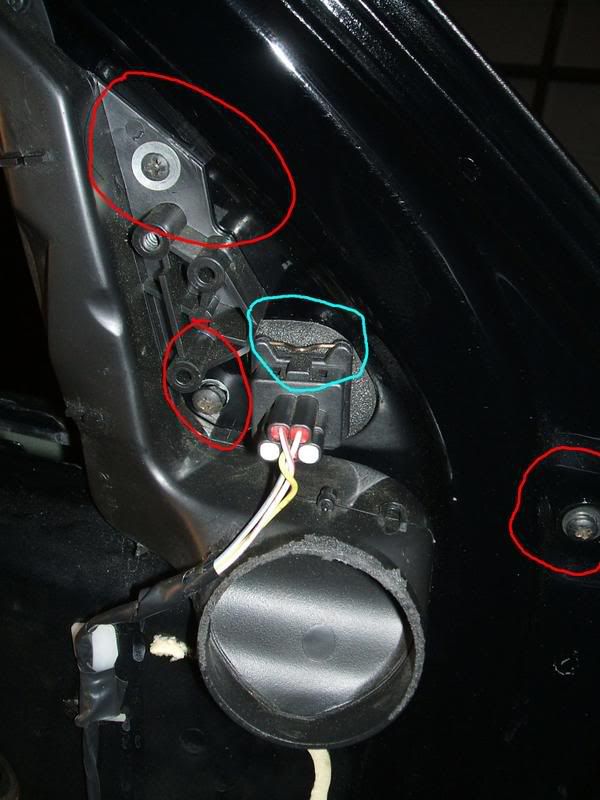
Remove the 3 screws/T-27 Torx/8mm bolts shown. Variations exist between model years and prior work done. Remove the wire clip retaining the wire harness. The entire housing assembly can now be removed.
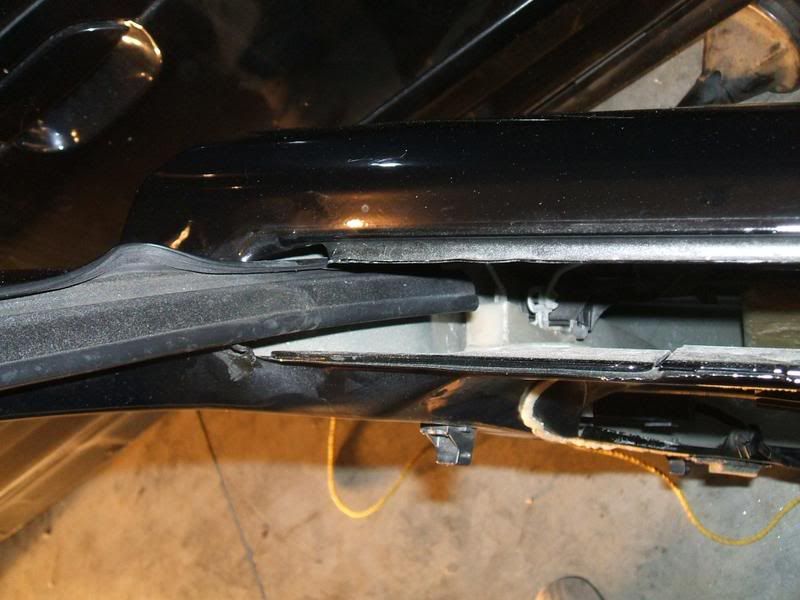
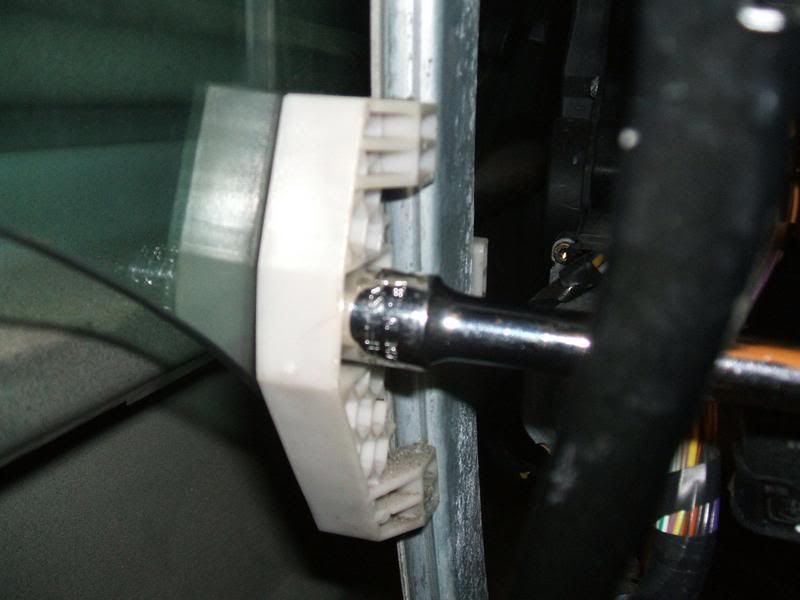
The easiest way to tell what you have without removing any trim at all is to look at this bolt.
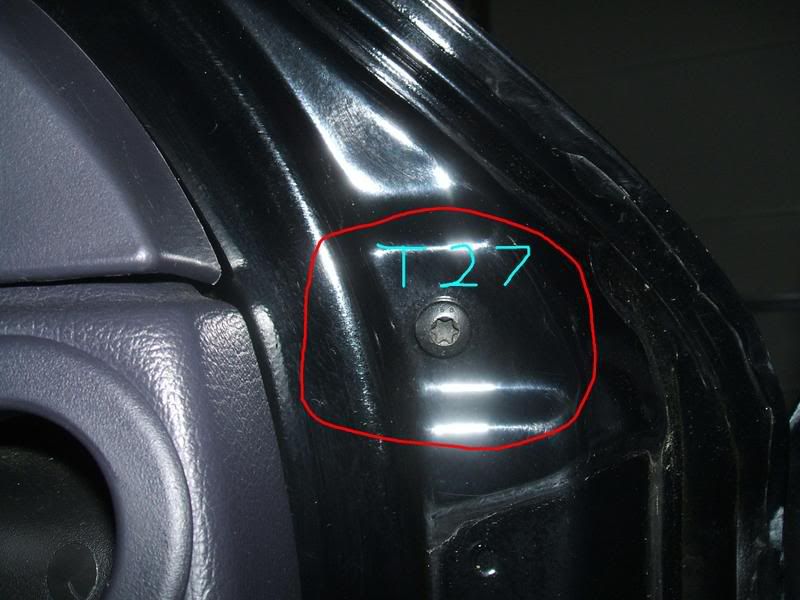
To install the housing assembly, reverse the above instructions.
Step 7
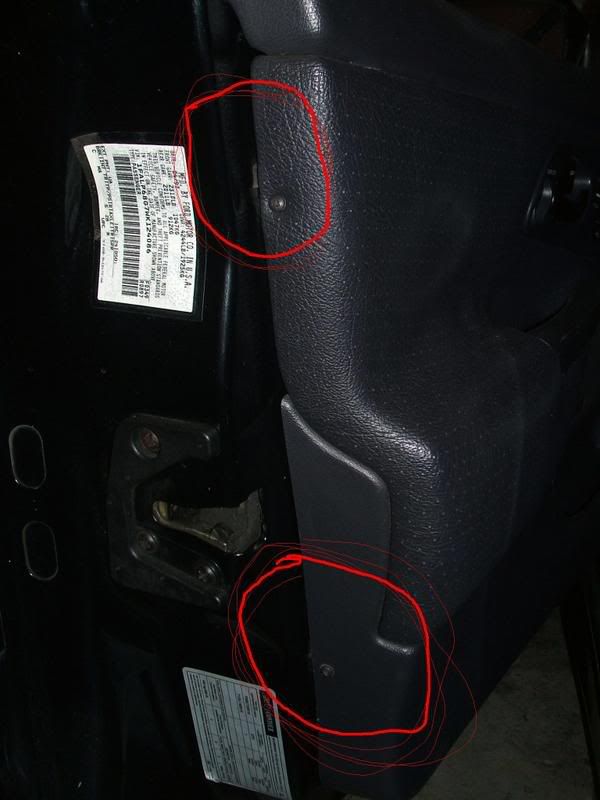
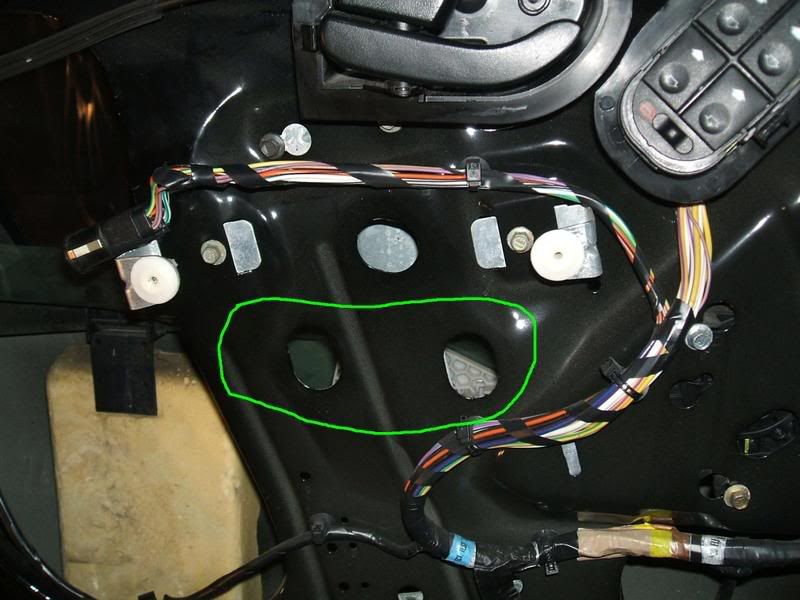
Lower the window until the two bolts holding the window in are inline with the holes circled in the pic.
Step 8
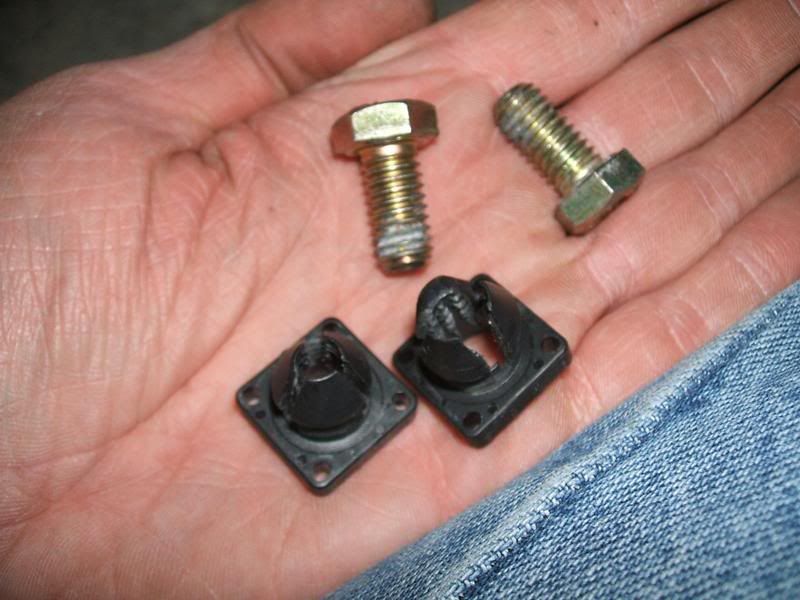
Remove the two 15mm bolts and plastic retainers. The retainers can be pushed from the backside of the glass and will pop out. The window sits in a small slot and won't fall down. However, don't knock the door around and take required precautions to prevent the glass from falling.
It should be noted that this should work on all year Contours. The glass being used in this illustration is from a 95 Contour and going into a 99 SVT. The door in this example is the drivers. Variations to the guide may be required for other doors but this should get you close.
Time: Approx. 1 hour on average.
Tools needed for this project are:
8mm socket
15mm socket
6in. extension and ratchet
Flat and Phillips head screw driver
T27 torx bit( may not be required)
Small Pick (not required but nice to have)
Step 1
Remove interior trim piece. There is a Phillips head screw underneath the circular cover. For Mirror replacement, proceed to Step 6.
Step 2
Remove the door handle trim. Using a small pick, remove the cover (Circled) There is another Phillips head screw under the circular cover.
At this point, the panel can be wiggled out from door handle. Now that you have it loose, disconnect the window switch (if needed) and the door lock switch. Set aside panel.
Step 3
Remove Door Pull. Please notice the small notch underneath the handle. Insert either a small flat head screwdriver or curved pick into the notch and push outwards. This will push the center piece out. You may find it neccessary to use another small flat head screwdriver to hold the piece out to prevent it from snapping back in. Do not pull to hard on the piece or it may bend.
Once out, there is another 2 Philips head screws holding the pull in place. Remove these screws.
Step 4
Remove lower forward screw. In front of the map pocket. Remove the cover and the Philips head screw underneath.
Step 5
Remove the outer edge screws. This should be about 5 and run along the outside edge of the panel.
At this point you can easily access the speakers.
Now that the panel has been removed, you have no doubt noticed the foam liner underneath that is attached to the door. This is to keep excess wind from entering the car through the door panel. It is attached via an adhesive bead running along the outermost edges. If you find it neccessary to remove, be sure to remove it in one piece. For this example, I have removed the entire piece.
Step 6
Side Mirror removal
**Note** This step is not needed if the window run chanel is not being replaced.
Remove the 3 screws/T-27 Torx/8mm bolts shown. Variations exist between model years and prior work done. Remove the wire clip retaining the wire harness. The entire housing assembly can now be removed.
The easiest way to tell what you have without removing any trim at all is to look at this bolt.
To install the housing assembly, reverse the above instructions.
Step 7
Lower the window until the two bolts holding the window in are inline with the holes circled in the pic.
Step 8
Remove the two 15mm bolts and plastic retainers. The retainers can be pushed from the backside of the glass and will pop out. The window sits in a small slot and won't fall down. However, don't knock the door around and take required precautions to prevent the glass from falling.
Last edited: