• Welcome to the Contour Enthusiasts Group, the best resource for the Ford Contour and Mercury Mystique.

    You can register to join the community.

It was a sunnny day

Aussie Ford

Hard-core CEG'er
Joined
Sep 3, 2006
Messages
2,033
Location
Portland, Orygun
It was a sunny day:
So I decided to finish the saga of my water leak in the door and put it all back together. There has been no more leaking since I removed all that crap in there (see other post).

Now as with most of you I couldn’t just put it back together the way it was without completing a few mods ….. right! (I think there is a rule about that someplace)

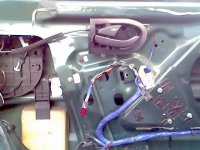
I removed the contour master window control mounting bracket and the door handle brackets, and installed the mystique door handle bracket. It drops down whereas the tour one is straight. The master window switch on the mystique mounts in the door pull / arm rest, and there is no other mounting bracket needed.
tour buttons.jpg
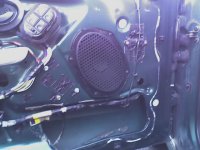
mystique door prep.jpg

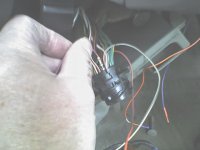
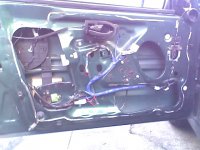
I removed the door wiring harness and installed my revised mystique one with the following options in it:
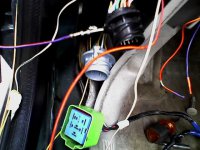
Auto up and down. Auto up relay is the green connector lower rear of the door. The green connector is actually the one used on a 98 I just used it for the heck of it..... LOL
Exterior door handle switch (turns on the courtesy lights inside the car when you lift the handle).Black connector at bottom rear of door.
Exterior lighted lock cylinder. White connector under black connector bottom rear of door.
Heated mirror. 5 wires in connector
Door handle pocket light. Controlled by the dimmer switch. Wires that run to the front side of the door handle pocket with little green bulb.
Under door light. Hangs out of rear lower corner of door.
harness complete.jpg

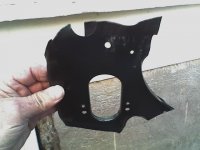
Installing the bracket for the auto up relay:
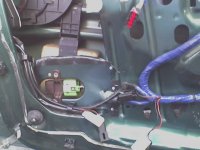
First you have to get / make one. I go the JY and cut out as large of an area around the mounting hole as is reasonable to do with a pair of tin snips. One from each side if you are planning on installing two on your car. Do a little trial fitting to see how it is going to mount and some tinkering to get it to fit right. Once the fit is established I bend the edges about ¼” over to add strength to stiffen it up. Next I beat it over a round punch to form a pocket for the wires to run through then put tape over the edges to protect the sharp edge. Fit it one last time and pop rivet it in place. Everything should be out of the way of the window glass. Test it before closing up the door. The bracket will be in the way of the sound deadener in the door panel cover. I just take a saw and cut that down to accommodate the situation as needed.
auto up mount 1.jpg
auto up mount 3.jpg

Continued:
 
The body connectors:
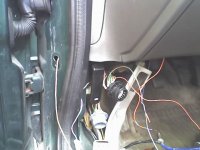
Once the harness was installed I had to add three wires to the body side of the connector so it would all work. #12, #17, & #19 had to be added to the lower connector. Those are not all that hard to reach from inside the car but the first thing that has to be done is to partially remove the interior rocker trim. That means getting those darn plastic spreader screws out of it. If / when one of them just starts spinning in the hole I use a dental pick under the edge of it to help it up as I turn it. Once out leave them out (my thought, that is). You only need to remove the first three to get the flexibility to get it out of the way. Since this is the driver door you then have to get that front part over the hood release too. Once that’s done you have the room you need to work. Now just reach up and working inside and out twist the connector out of the body. First the top then the lower and you also need to remove the door switch wire. Be sure to tie a string on it so you can pull it back into place. Now everything is just hanging out from under the dash and you can start.
body plugs 1.jpg
body plugs 2.jpg

Adding wires to the connector:
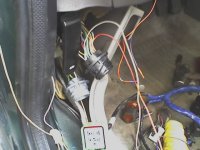
Looking at the back of the connector there are some white prongs take a small screwdriver and push on a couple of them. That should pop the middle outward and release the lock feature of the connector. Then insert the pins you need to. I try to have a foot or so lead on them so there is plenty to make them up under the dash. The first part of that is you must have acquired them from another plug so you will know all about this step when you get to it. Once the additional wires are in place put it all back together.
add a wire 1.jpg
add a wire 2.jpg

Hooking up the goodies:
In this case for the grounding of the under door light #19 was spliced to the door pin switch. That way it only comes on when that door is opened. In the factory setup it comes on with the interior lights.
Pin #12 is for the heated mirror and goes to the rear window defrost switch. How do you know if you have heated mirrors? If you have 5 wires in the connector on the mirror it’s heated. Most 98+ have 3 wires. The other wires are a ground (in the harness goes to pin #2) and the power from the defrost button (pin #12).
Pin #17 is power for the door pocket light and goes to the dimmer switch.

Install the interior panel and .......
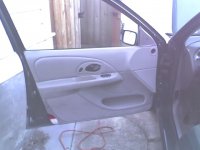
door complete.jpg

Go have a cold one and play with your auto up/down buttons till it gets dark and you can see your new lights and stuff…….
 
Picture #1 ...... dude, all that work and you still have stock OEM factory whizzer-cone speakers?!? :laugh:

I do like that Mystique door panel better than the Contour one. Nice idea for a project.
 
Nice write up and now you have every option ever!
Thanks,
Isn't that the goal?

To get the best car one has to blend both the Tour and the Stique with a touch of SVT...... LOL I'd throw in some Mondeo too, if they'd make the parts fit our cars....... well I have seen those chrome rings around the gages done :laugh:
 
Picture #1 ...... dude, all that work and you still have stock OEM factory whizzer-cone speakers?!? :laugh:

I do like that Mystique door panel better than the Contour one. Nice idea for a project.

LOL, I'm an old guy with a tin ear anyway...... what's the use :shrug:
 
did u reuse the contour window switches or have to find the mystique ones? does the contour ones fit into the mystique door panel nicely? does the auto up and down work on all 4 windows?
 
did u reuse the contour window switches or have to find the mystique ones? does the contour ones fit into the mystique door panel nicely? does the auto up and down work on all 4 windows?
Yes there is no difference in the window or lock switches between Contours, Mystiques, and Cougars.

The auto up/down only works on the door(s) that you add it in to. I am planning on adding auto down to the rear doors but I don't think there is room for mounting two relays. Besides auto up may not be wise on the rear doors where little fingers could be out of sight and be caught.

AF
 
i gotcha. u have to add the relays to each door to auto up/down that respective door. can u auto up/down the front passenger window from the driver side switch or it only works with the window switch on the actual front passenger door?

i ask cuz my alarm's window control module gives me auto up/down for the front from the driver side control. the switch on the passenger door (if someone is sitting in the passenger seat) still needs to be held while opening or closing but from the driver seat i can auto open/close the passenger. do the mystique relays work differently?
 
Nice work.

Can you give us a list of all the things you have done to your car? It is hard to keep track.
 
Yes the auto up/down for the pass door works from the master window switch and the passenger door just as it does for the drivers side now. You do not change the trigger wire from the master window and since it now just runs through a relay as it does for the driver window it works the same. The relay being between the switches and the motor it doesn't care where the power comes from it just works when told to. Auto up is the same. You are just adding the relays to the circuit w/o changing function. If that makes sense. The passenger door has the auto down relay mounting position already there, but you have to add mounting for the additional relay to both doors. You could do this with any similar relay I choose to do it with the ford ones because they are handy and the sockets have the correct wire size ready to go. ALL tour and stique relays, window sw's, and lock sw's are the same. ALL electrical stuff in them is the same as the same years. There are slight wiring changes in different years but they are the same in both cars. Mystique harnesses for example have added features like under door lights, but the Contour harness is the same with those positions in the connectors just empty. Wires can be added or harnesses can be swapped between cars. I actually have basically a 96 mystique harness in my 99 passenger door, and a 97 in my drivers door.

i gotcha. u have to add the relays to each door to auto up/down that respective door. can u auto up/down the front passenger window from the driver side switch or it only works with the window switch on the actual front passenger door?

i ask cuz my alarm's window control module gives me auto up/down for the front from the driver side control. the switch on the passenger door (if someone is sitting in the passenger seat) still needs to be held while opening or closing but from the driver seat i can auto open/close the passenger. do the mystique relays work differently?
 
Nice work.

Can you give us a list of all the things you have done to your car? It is hard to keep track.
LOL.... I've never compiled one but just for you my friend here is what I can think of right now..... There are a few more that I'm working on and listed too.


Mods to my 99 Contour just to make it as good as a 95 with a touch of SVT,……and more.
Body:
· SVT E1 wheels.
· BMW side marker lights – dual level.
· Cyclops brake light. (spoiler was stock)
· Spoiler light hooked to tail lights
· Gold front Ford grill emblem.
· Fog light mod.
· Pre 98 lighted lock cylinder.
· Pre 98 lighted entry door handle switch.
· Pre 98 heated mirrors – body color.
· Todo: (parts on hand)
o Spoiler light hooked to fog light switch.
o Power antenna.
o Pre 97 Latching gas door.
o Pre 98 under hood light.
Engine:
· SVT air intake.
· SVT throttle body – optimized.
· Poly filled rear roll restrictor.
· SVT stab-o-shock.
· Todo: (parts on hand)
o SVT LIM & UIM.
o SVT ECM.
o SVT injectors.
o SVT heads & cams.
o SVT exhaust system - cat back.
Interior:
· 98 Mystique dash w/ wood grain headlight and radio/HVAC bezels, and drivers side glove box.
· SVT instrument pod.
· Painted instrument bezel and steering column covers.
· Cougar leather shift knob.
· Clock.
· Lighted 99 dimmer switch.
· Light moonroof switch.
· Pyle radio single din - AM/FM, cassette tape, CD player.
· Leather seats w/ fold down rear seat.
· Mystique rear dome light.
· Mystique door panels w/ under door lights.
· Under door light mod.
· Door handle pocket lights.
· Pre 98.5 front door handles.
· Auto up/down on front door windows.
· Todo: (parts on hand)
o Auto down on rear doors.
o Pre 98.5 door handles on rear doors.
o Locking glove box.
o Glove box light.
o Pre 97 trunk/gas door release.
Pre 98 visors w/ lighted mirrors.


tell me more about the locking gas door? hard to do?

you should add a hood light, I did that the other day with the one out of my 92 ranger. it has a mercury switch built in, so if you position it correctly, it only comes on when the hood passes half open. it isnt bright enough, so I plan on an led bulb, but other than that, it's nice to be able to see the battery at night when you need a jump-start or something. I'll get some pics later on
 
I forgot...... What year is your Tour? Anyway.... what you need:

Gas door assembly from a 95-96 Tour/ Stique (preferably from a matching color car) This includes the door and gas nozzle surround (only held in by one screw. The latch and release assembly with manual emergency pull (in the trunk) and the mounting bracket.
Actuating lever assembly located by driver seat on floor.
Operating cable and retainer clips. (the cable runs down the drivers side then across under the rear seat and up over the wheelwell drops down to the door relase assembly and over to the trunk latch.

It works both latches the gas door and the trunk. You push it to open the gas door and pull for the trunk.

The worst part of this is getting the bracket for the gas door release off the back side of the wheelwell inside the trunk. By the time you have all this stuff off the donor car you will fully understand what you need to do to reinstall it. As this is actually on my list of things to finish I haven't done the install yet so I don't have all the answers. I plan on using pop rivits to reinstall the bracket and a hole saw to make the hole for the latch to go through the wheelwell. Might be a chance to actually use my offset drill..:laugh:

The under hood light is another of my todo's and I think I'll be adding two of them or more. I have the parts and harnesses just need to wire in. I will even be using the proper switch.

AF
 
proper switch? the one I used was self functional, all I did was cut it from the truck and splice it into a 12v supply I have running past the cruise control module to the interior.
 
Yes and that is a good light, but it is not Tour / Stique that one is controlled by a switch on the radiator support. Originally the switch is located on the pass side, and the light is on the drivers side. Since the hood support is swapped on the 98+ I'm installing the switch on the driver's side, and lights on both sides.

AF
 
ah, yeah, mine is on the driver side too, it took me a good bit of time just picking a nice way to rout the wiring to look stock, it's ok I guess, could be better if you ask me, but I'm really critical when it comes to stuff looking stock under there, dont want the track tech thinking twice about my "SE V6", bwahahahardyharF'nhar! take that stock GT stang. sorry, I'm drunk
 
every day is national man day, so hows the other site been? tell terry I'll be giving him a call this fall. this tranny might not make it longer than that in one piece.
 
Back
Top