
69Boss302
Has mile high skills
This is fairly easy to do and is alot cheaper than letting the dealership do it.
What you need:
Catch pan for the Anti-freeze
8mm socket and ratchet
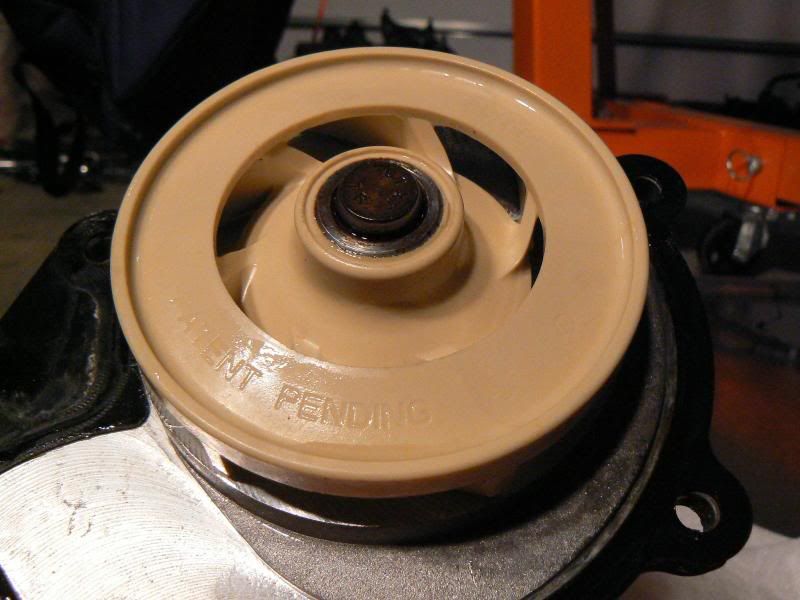
New metal impeller water pump. What you most likely be getting is just the impeller. It is the only moving part in the water pump. Except the water, of course.
New water pump gasket
(not needed but wouldn't hurt) - new water pump belt. I prefer Dayco belts.
Ok, start by removing this

from here
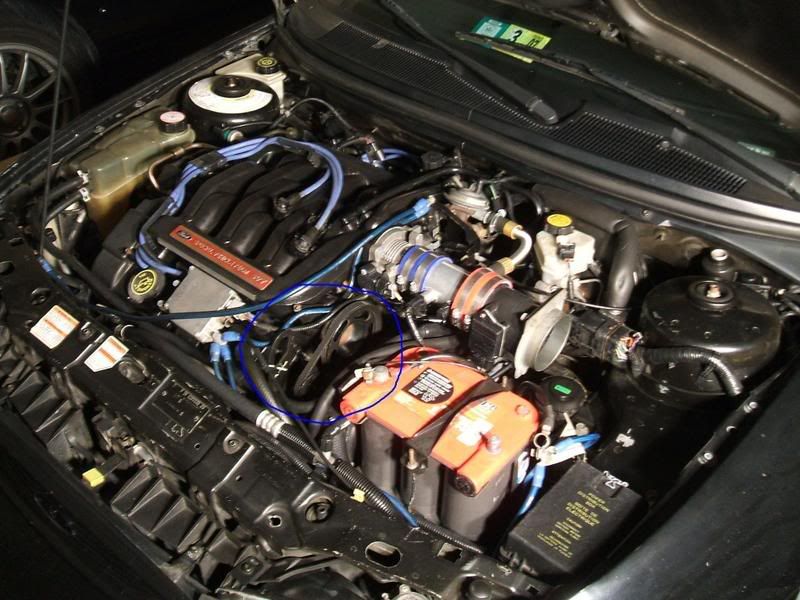
Circled is the water pump and pulley. There is a tensioner pulley that holds the belt tight. It is spring loaded and easily moveable. Move the pulley so that the belt slackens and remove the belt.
Here is a better view of what you are working on.
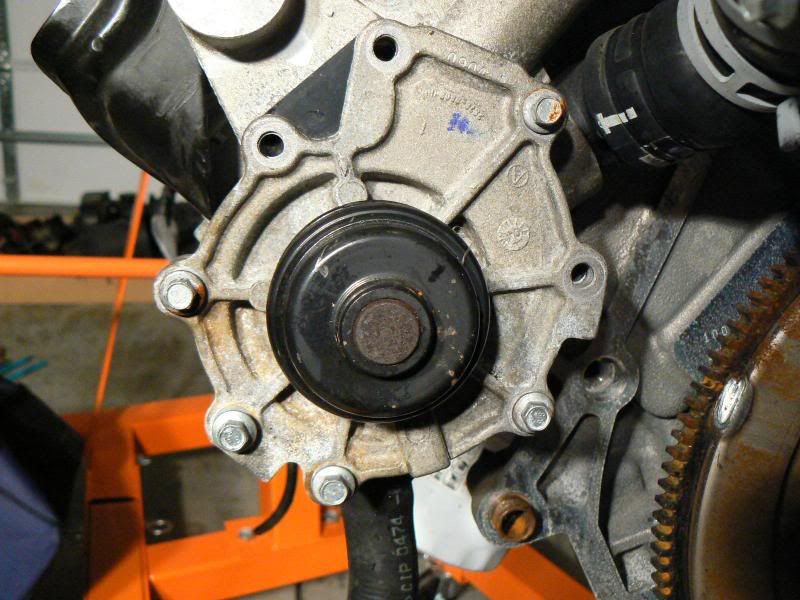
Ok, now remove all of the 8mm bolts. Please note the 3 bolt holes that are empty in the pic. When these are removed, the entire pump housing will be loose from the engine. Do not worry about that but note that this is the location of the 3 longest bolts. As you remove the bolts, the housing will begin to leak. use some paper towels to keep your work area dry.
Now that all of the bolts have been removed, it is most likely that the impeller portion will stick to the engine. Give it some light taps with a plastic handled screwdriver to the side of the pump. It should pop right off in your hand.
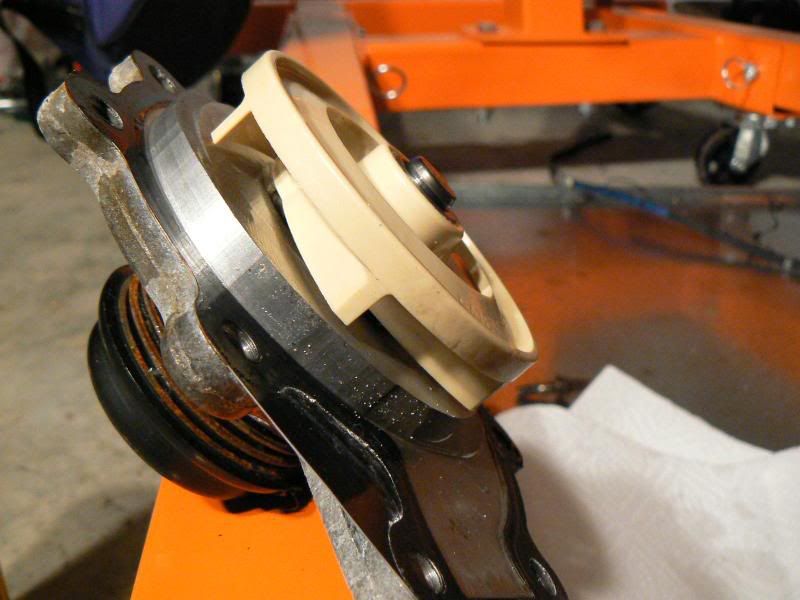
If you are replacing the water pump because the impeller shattered, it is extremely important that all of the impeller pieces are removed from the system. Failure to do so can cause you more headaches in the future. Such as engine failure from insufficient cooling.
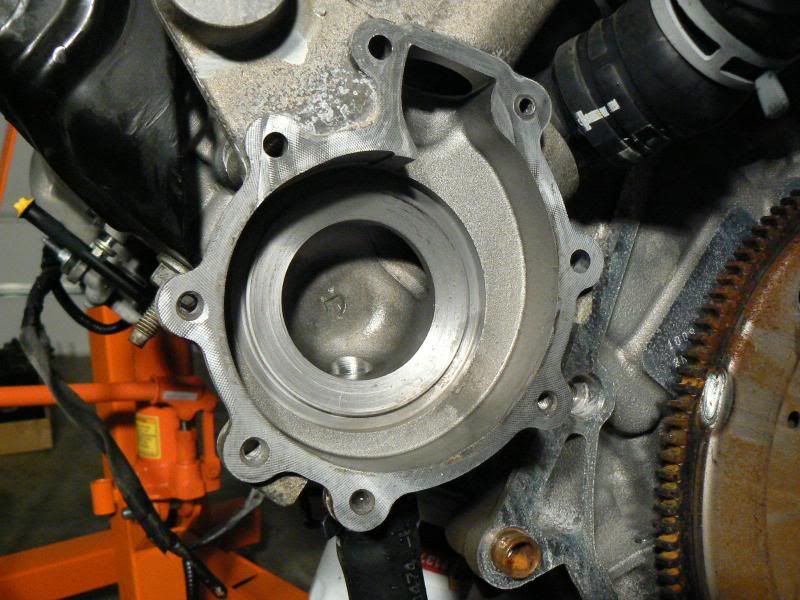
Check the mating surface of the engine block where the water pump goes. It needs to free any old gasket material or other contaminants.
Now that everything has been cleaned, it is time to reassemble.
Align the new gasket properly over the bolt holes on the water pump and put it all back on the engine. I find that it is helpful to have a small dab of RTV silicone to hold the gasket in place while doing this.
Install all of the bolts in the proper positions and tighten accordingly. According to the Service manual, the bolts should be tightened to 18Nm (13 ft lbs).
Install the Water pump belt.
Refill your cooling system to the full level to replace any fuids lost during this process.
Check for any leaks.
And that should be about it. If I have forgotten something, please let me know.
If you have questions, post here.
What you need:
Catch pan for the Anti-freeze
8mm socket and ratchet
New metal impeller water pump. What you most likely be getting is just the impeller. It is the only moving part in the water pump. Except the water, of course.
New water pump gasket
(not needed but wouldn't hurt) - new water pump belt. I prefer Dayco belts.
Ok, start by removing this
from here
Circled is the water pump and pulley. There is a tensioner pulley that holds the belt tight. It is spring loaded and easily moveable. Move the pulley so that the belt slackens and remove the belt.
Here is a better view of what you are working on.
Ok, now remove all of the 8mm bolts. Please note the 3 bolt holes that are empty in the pic. When these are removed, the entire pump housing will be loose from the engine. Do not worry about that but note that this is the location of the 3 longest bolts. As you remove the bolts, the housing will begin to leak. use some paper towels to keep your work area dry.
Now that all of the bolts have been removed, it is most likely that the impeller portion will stick to the engine. Give it some light taps with a plastic handled screwdriver to the side of the pump. It should pop right off in your hand.
If you are replacing the water pump because the impeller shattered, it is extremely important that all of the impeller pieces are removed from the system. Failure to do so can cause you more headaches in the future. Such as engine failure from insufficient cooling.
Check the mating surface of the engine block where the water pump goes. It needs to free any old gasket material or other contaminants.
Now that everything has been cleaned, it is time to reassemble.
Align the new gasket properly over the bolt holes on the water pump and put it all back on the engine. I find that it is helpful to have a small dab of RTV silicone to hold the gasket in place while doing this.
Install all of the bolts in the proper positions and tighten accordingly. According to the Service manual, the bolts should be tightened to 18Nm (13 ft lbs).
Install the Water pump belt.
Refill your cooling system to the full level to replace any fuids lost during this process.
Check for any leaks.
And that should be about it. If I have forgotten something, please let me know.
If you have questions, post here.
Last edited: