• Welcome to the Contour Enthusiasts Group, the best resource for the Ford Contour and Mercury Mystique.

    You can register to join the community.

I was bored.....

RaptorSVT

Veteran CEG'er
Joined
Oct 16, 2006
Messages
534
Location
Tonganoxie, KS. Don't blink! You'll miss it!!
....So I did a little project!:laugh:

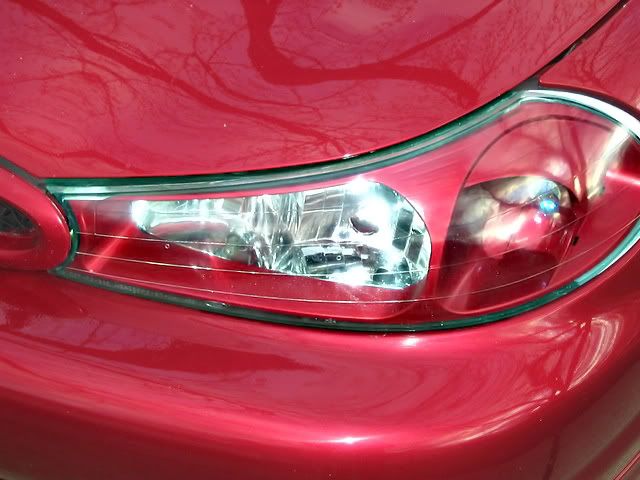
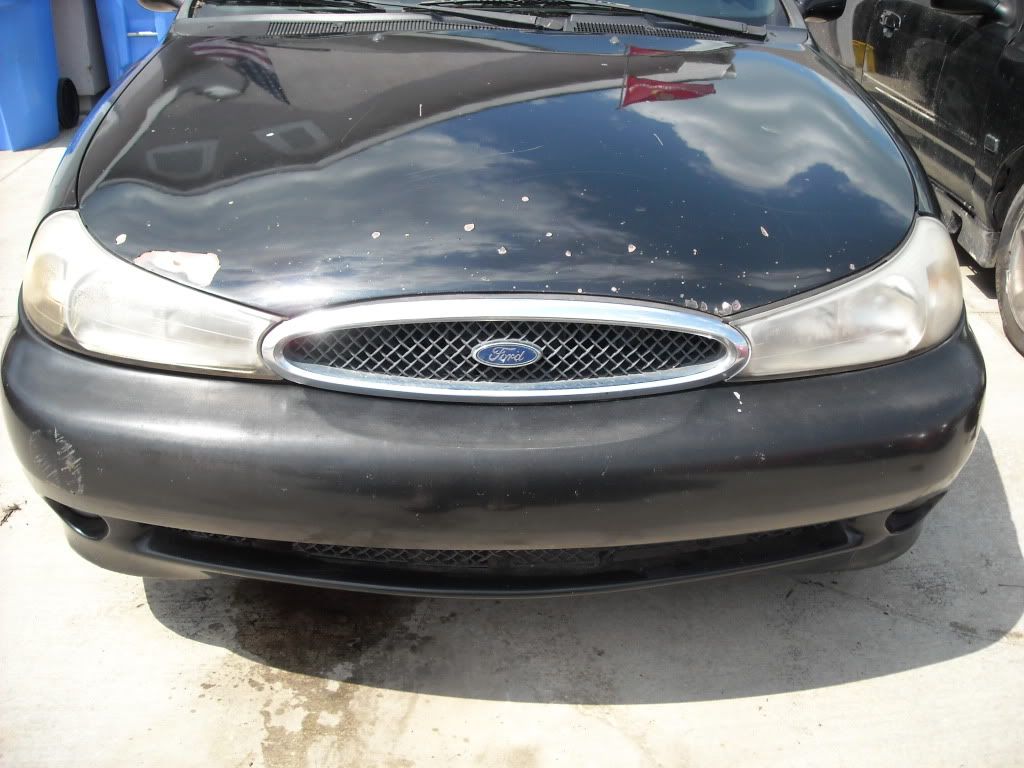
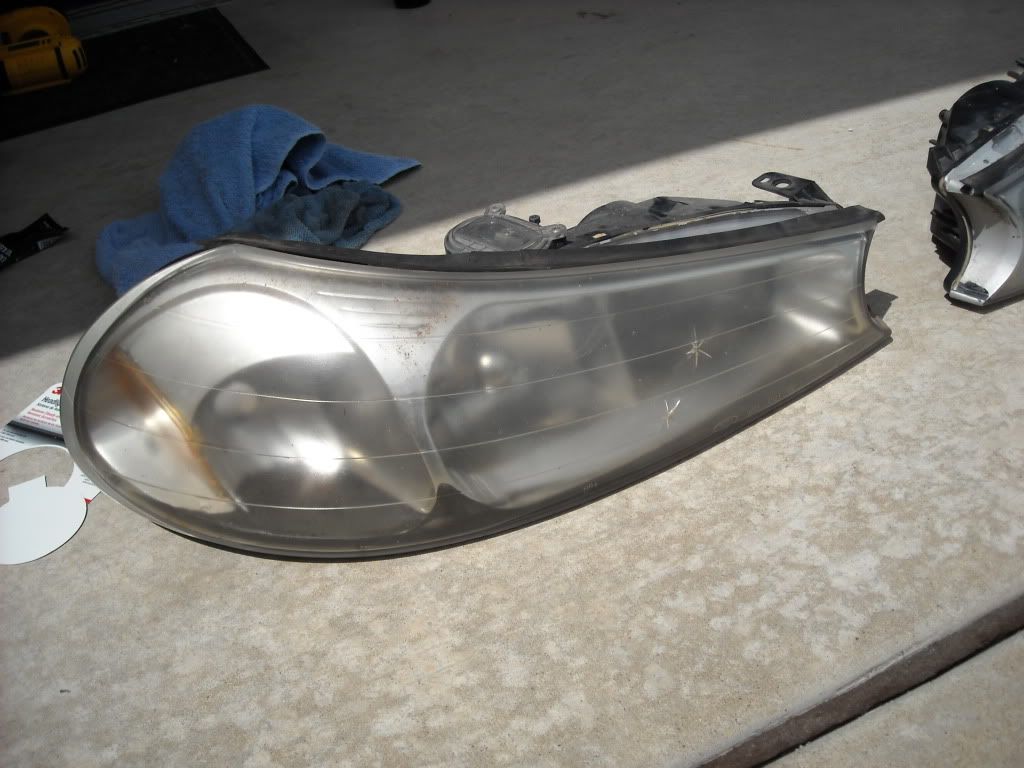
This is what I started with:
DSCN0476.jpg


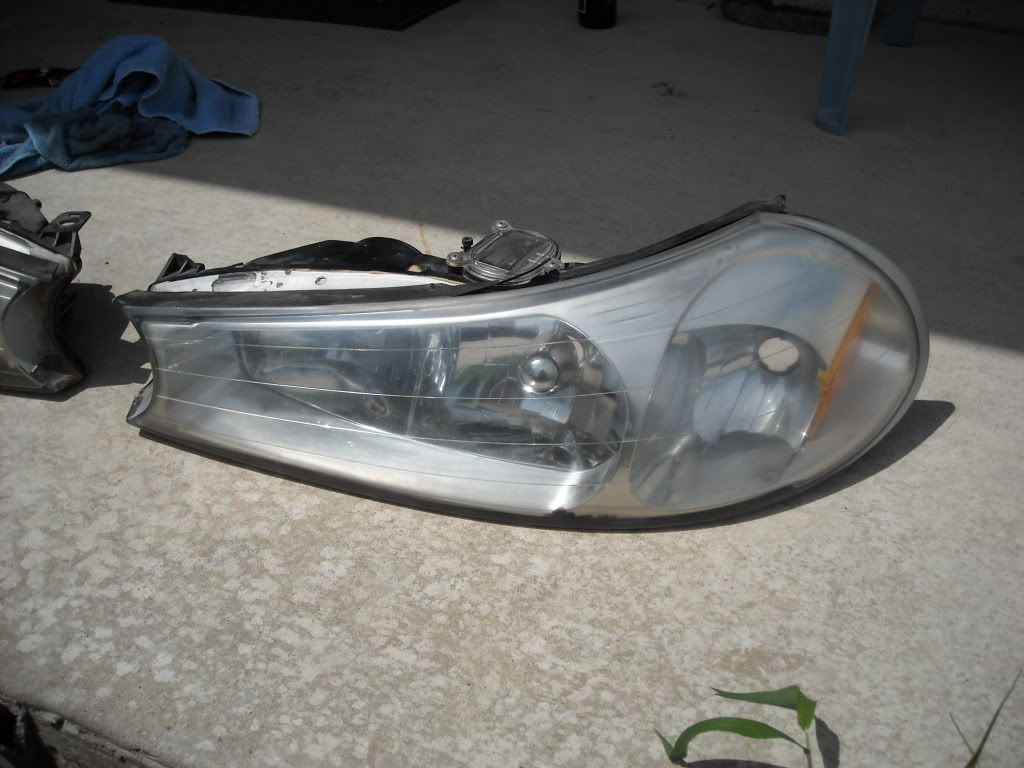
I found a new cleaning technique I like! 3M headlight resto kit.

Driver's side after polish::shocked:
DSCN0785.jpg


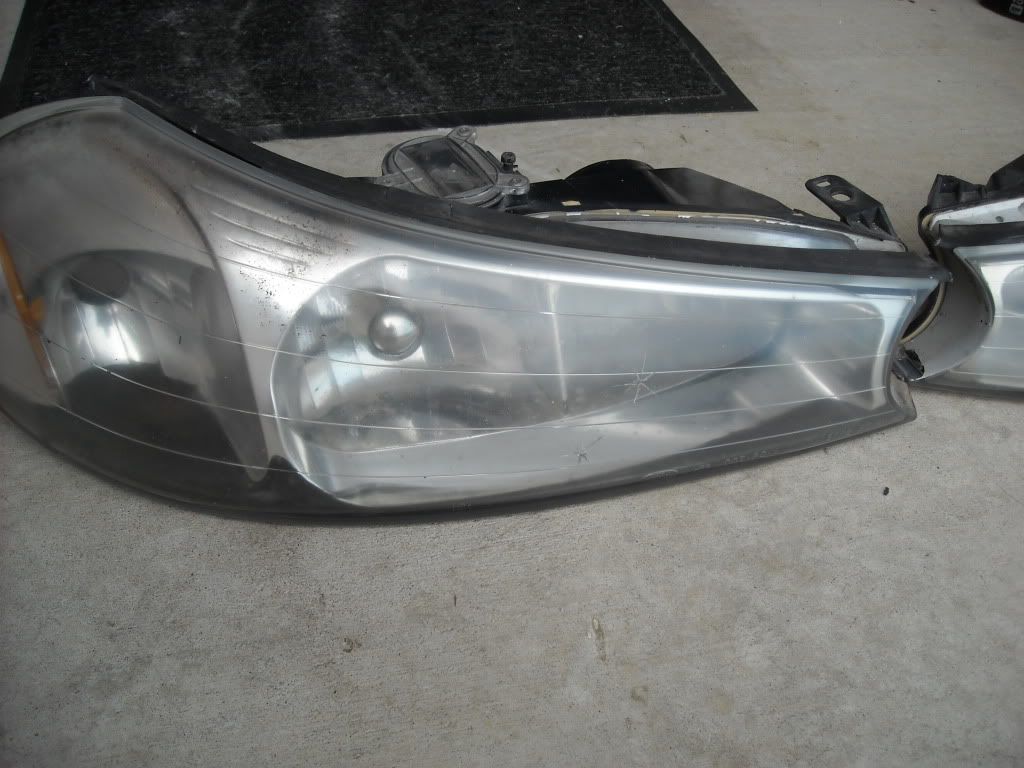
Next to the passenger as comparison:
DSCN0784.jpg


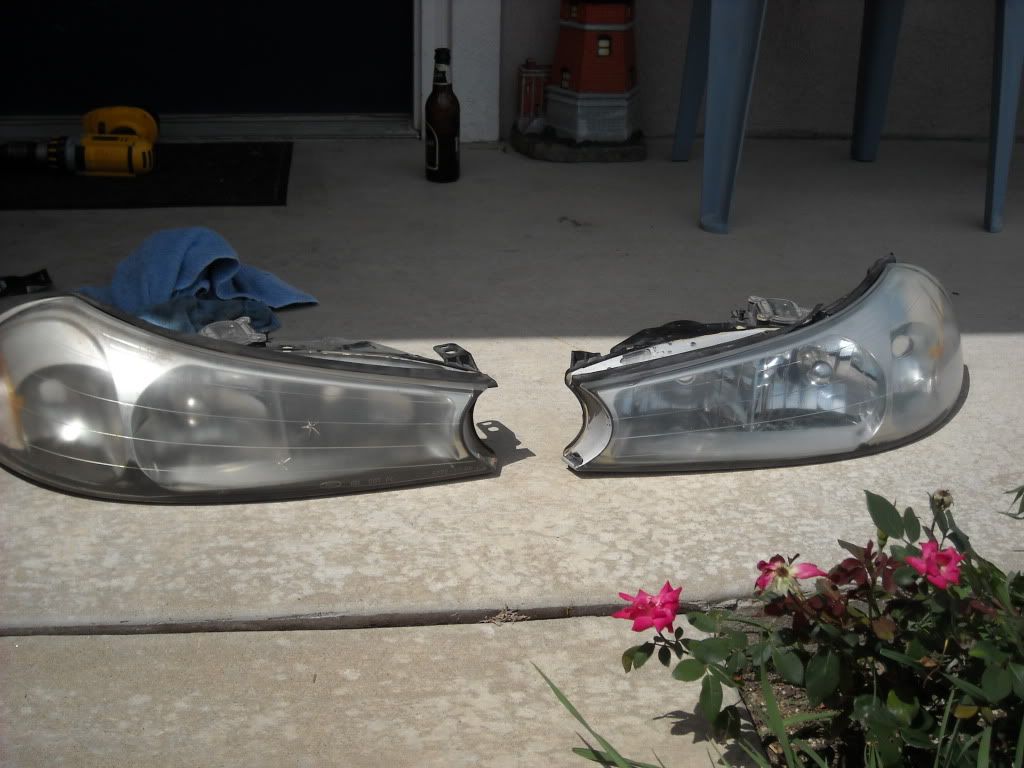
I know.....passenger side is beyond help....:nonono:

But I tried!!!:laugh:

Start:
DSCN0786.jpg


Finished:
DSCN0787.jpg


Both done:
DSCN0788.jpg


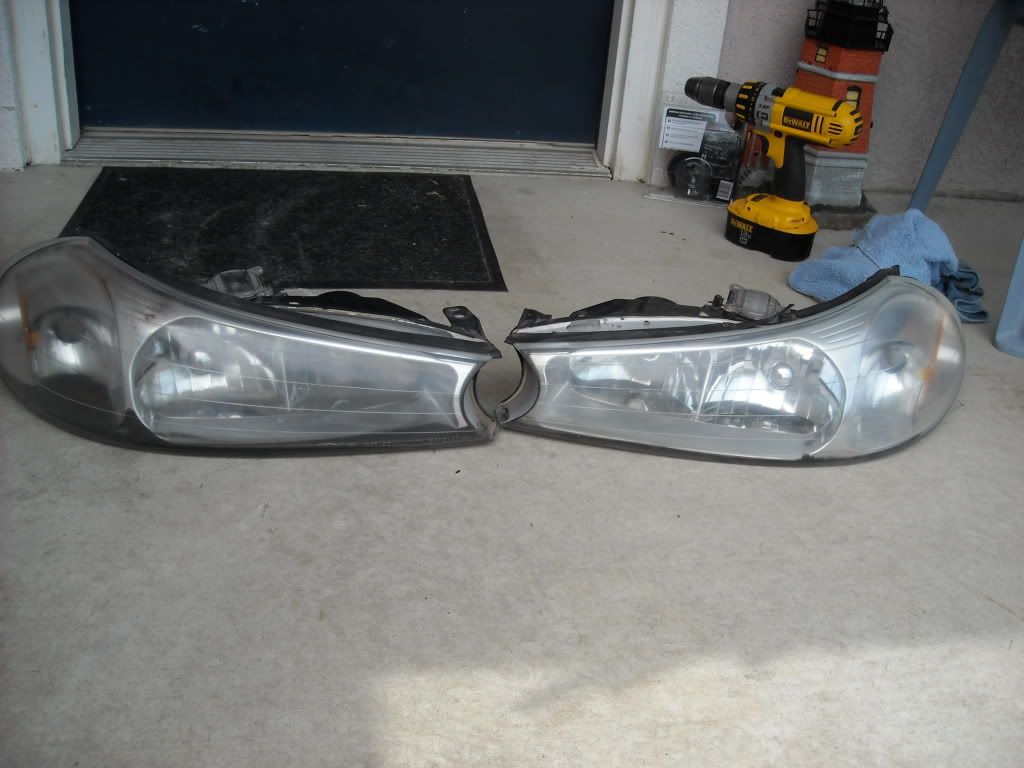
Best $18 I ever spent!
 
Did you use all the pads and take your time? I love that kit but yours still look like there is work to be done on them.
 
Good job, but yes, give the LH a good sanding and polish after the whole thing and you'll see a big big difference.

Dacker and I worked on a couple of almost beyond help headlights and man, we were proud of ourselves on the work done.

Good luck!
 
I bought a kit that had 1000grit , 2500 grit, polish and some kind of hard clear coat for shine... Cleared them up very nicely with just the sand paper but the polish and clear made them look like glass and they have a lifetime warranty.. Got the product from advance auto for $19.99 , came in a silver bag.. Best kit ive ever used/seen used. Ive seen those kits that just have the sanding pads used and i dont think they work very well...
 
All anyone ever needs is 400 or 600, 1000, 1500, 2000 and Meguiar's Plast-x or #17 and #18 plastic cleaner and polish. The key is to put EFFORT into it. Not some halfass pussy sanding job but sanding till your arms feel like they will fall off during each step.
 
I bought a kit that had 1000grit , 2500 grit, polish and some kind of hard clear coat for shine... Cleared them up very nicely with just the sand paper but the polish and clear made them look like glass and they have a lifetime warranty.. Got the product from advance auto for $19.99 , came in a silver bag.. Best kit ive ever used/seen used. Ive seen those kits that just have the sanding pads used and i dont think they work very well...
That is the c/v headlight restore kit and in my opinion it cant be beat! whatever the sealer/finish coat is they include is what makes the difference.
 
Looking good. I almost failed inspection this year due to hazed headlights, definitely need to get that done soon too.
 
With the first picture and the title of this thread, I thought you were going to do some body filling, sanding and painting on the hood and bumper. I didn't even notice the headlights with that paint... :help:
Mark
 
With the first picture and the title of this thread, I thought you were going to do some body filling, sanding and painting on the hood and bumper. I didn't even notice the headlights with that paint... :help:
Mark

The front end shot should be posted in the flat black SVT thread. That bumper should give us an idea of what it'll look like. :laugh:
 
Raptor, I dare you to take some 400 grit sandpaper to the headlights and see how much ISH you can get off still :laugh:
 
im sorry but... there really wasnt much of a change that I can see. There is a way better technique out there that does worlds more than what you did, however, one of those lights really isnt even worth restoring.

Just for reference these headlights were 2x more yellow than yours before hand...
IMG_0715shiney.jpg
 
Back
Top